
Before you start
You need an overlay in OBS. Add an overlay to OBS takes you from New overlay to a Browser Source; the Clip player is one more layer on it. The clips play in Twitch’s own clip player, so the streamer you shout out needs at least one public clip on Twitch.
1. Add a Clip player
- Open Overlays, open the overlay you use in OBS, and choose Add at the top of the left panel.
- Under Chat & info, open Clip player and choose Add. It lands in the middle of the canvas as a dashed card at the player’s size, so you can place and style it before any clip plays.
- Drag it where you want it.
- In Content, write the Heading.
$(name)becomes the streamer’s name, so Go check out $(name)! reads Go check out PixelPal!. Switch Show heading or Show clip title off if you want only the clip. - Set Player width anywhere from 400 to 1920 pixels. The height follows at 16:9, and never under 300.
- Choose Publish.
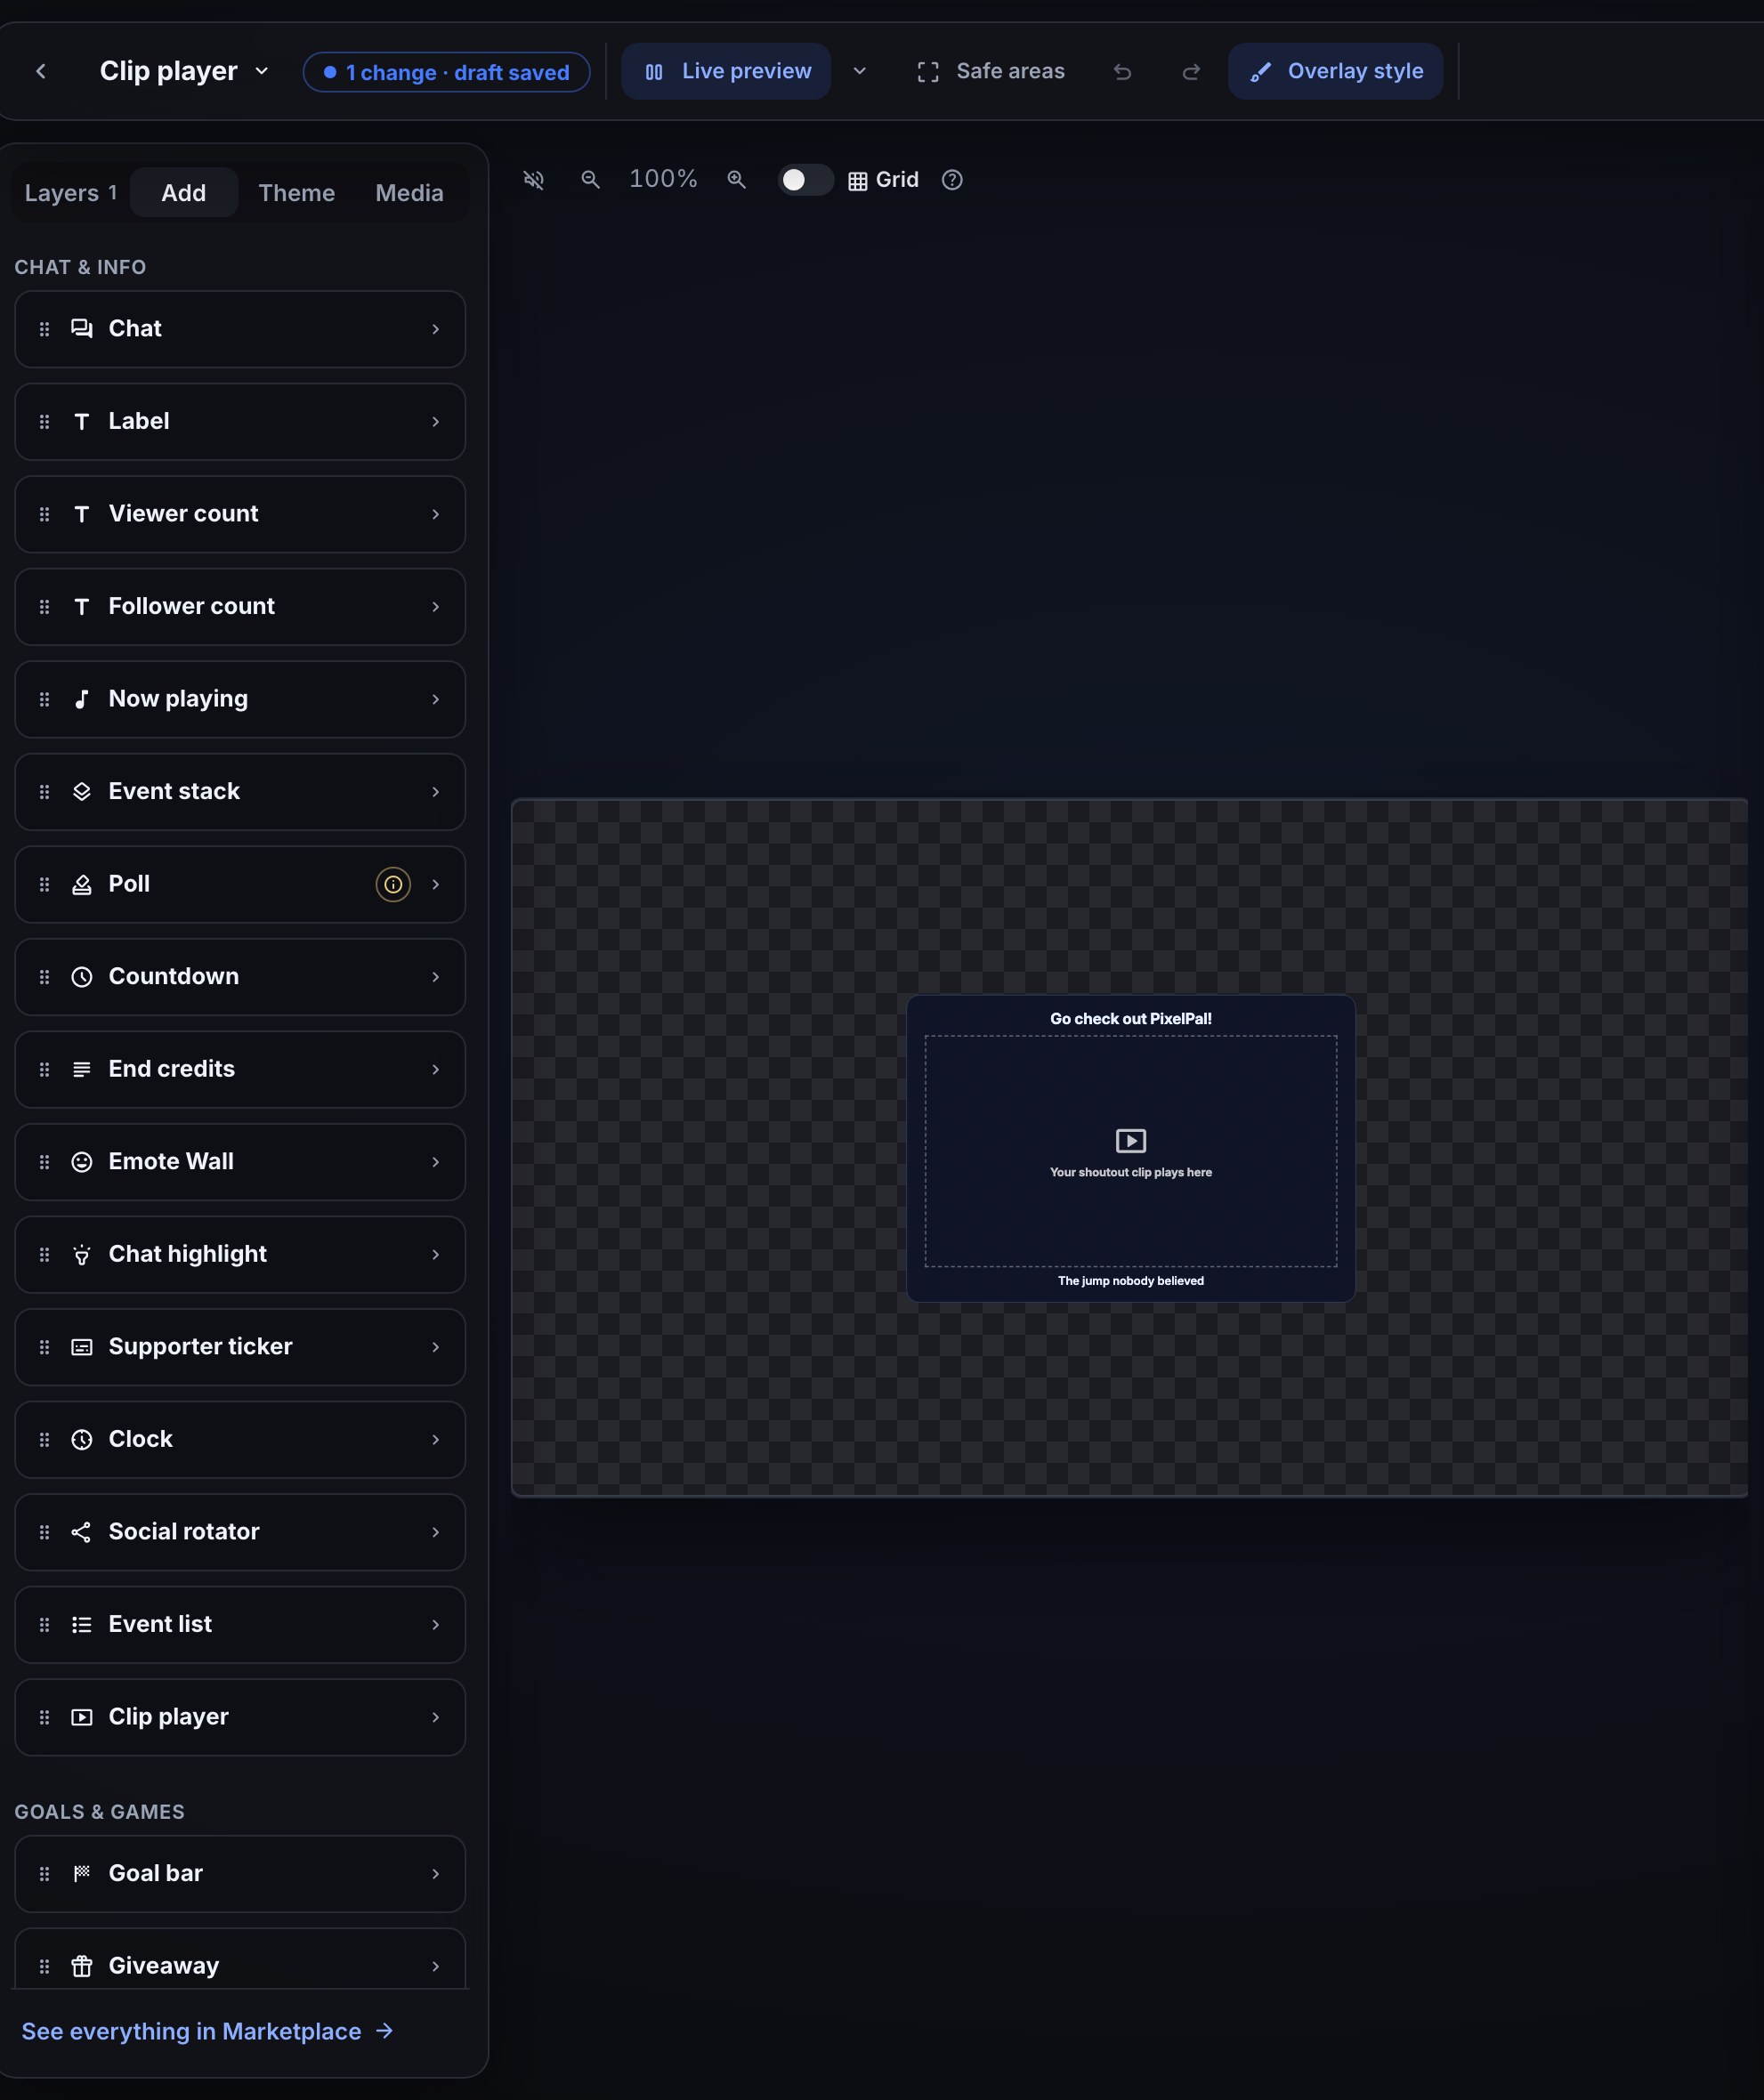
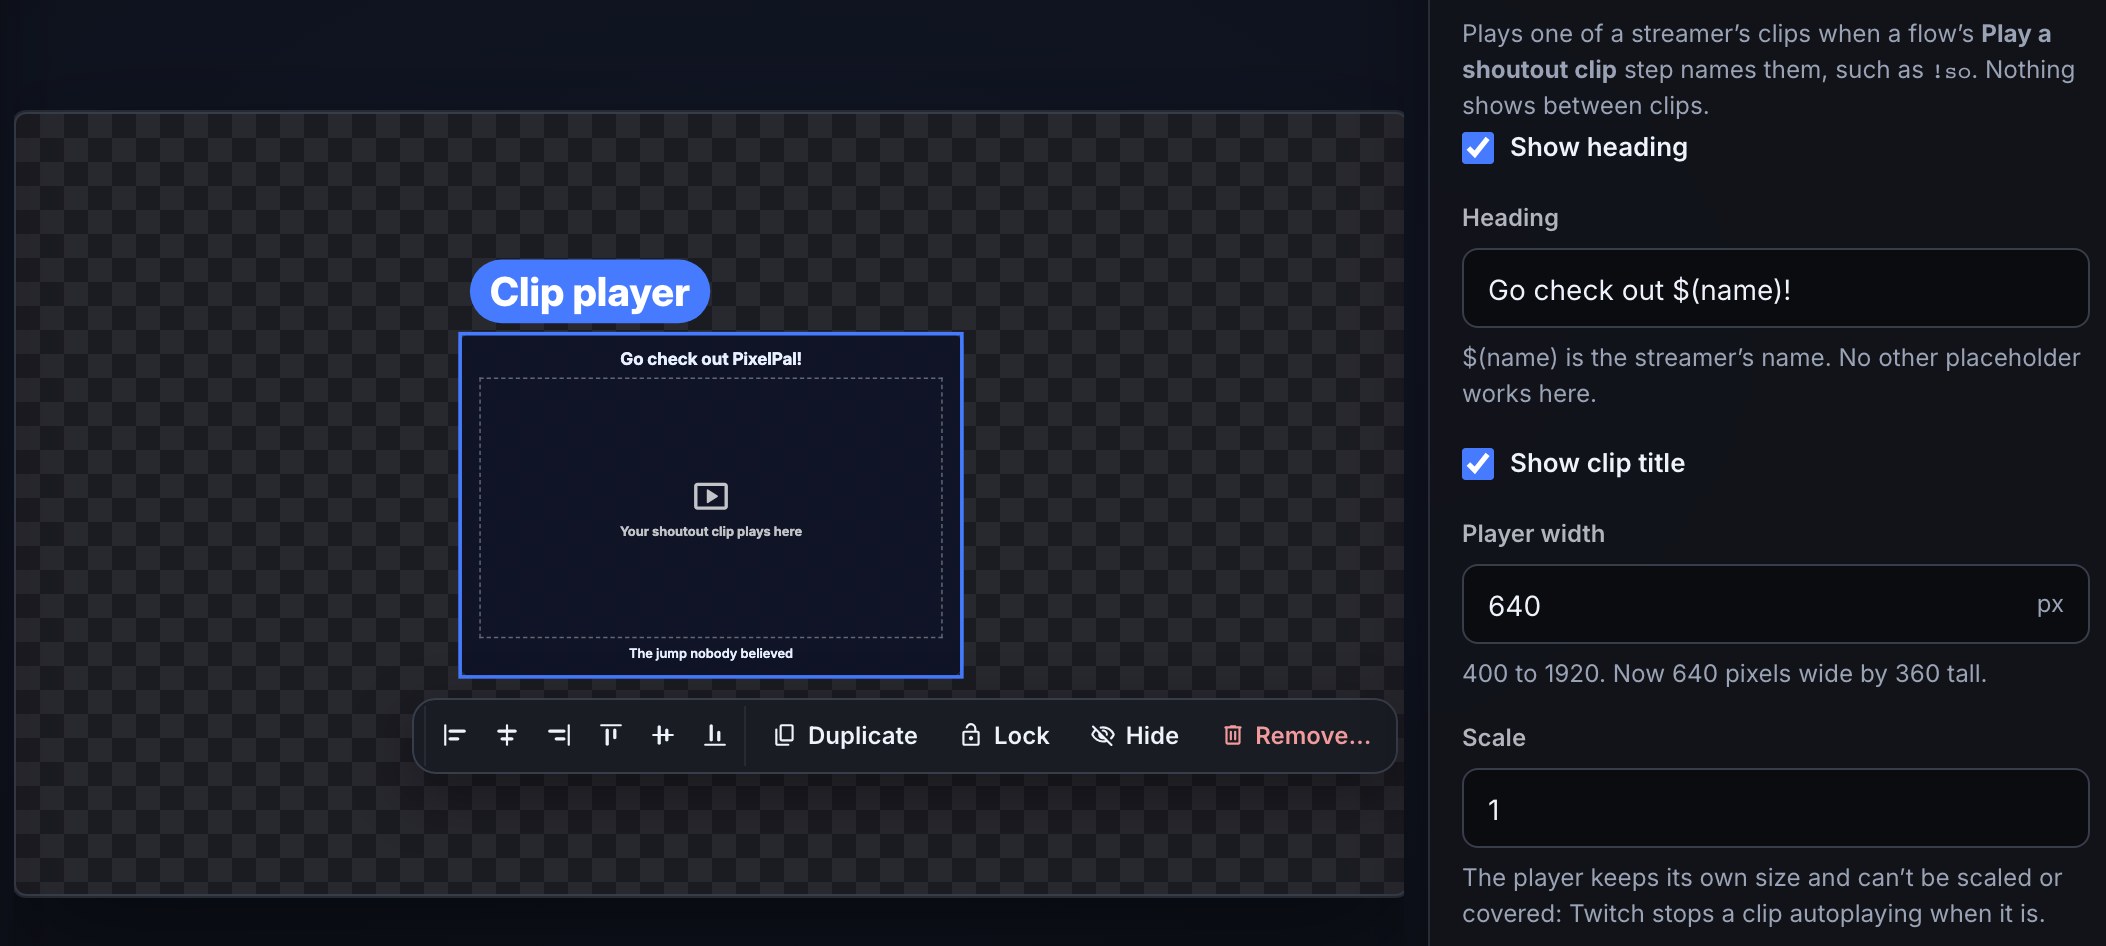
Scale shows 1 and can’t be changed, and the layer has no resize or rotate handles: the player keeps its own size, because Twitch stops a clip playing by itself when its player is scaled or covered. Use Player width to make it bigger or smaller. The layer’s Style and Parts still dress the panel round the clip — its background, frame, heading and title — but the player itself can’t be styled.
2. Turn on the !so shoutout
The Starter pack’s Shoutout flow plays the clip. When you or a moderator type !so pixelpal, it shouts PixelPal out in chat, sends Twitch’s own shoutout, then plays one of PixelPal’s clips on your Clip player. Viewers can’t use it: the flow checks for moderators and you first. Add permissions and cooldowns shows how to change who can.
If you don’t have Shoutout yet:
- Open Flows, press Add, and add Shoutout on its own (it is in the Starter pack). It arrives paused.
- Switch it on.
If you added Shoutout before 29 September 2026, the Starter pack shows Update ready under Marketplace → Installed:
- Open Marketplace, then Installed, and open Starter.
- If you haven’t changed your Shoutout, choose Update: it gets the clip step in place and stays on or off as it was.
- If you have changed it, the row asks “Keep your version?”. Use the new one replaces it with the new Shoutout and keeps your version in the flow’s History. Keep mine leaves it exactly as it is; to add clips to it yourself, open it and put Play a shoutout clip after Shout out a streamer, with Whose clip set to
$(1)(Use the step in your own flow).
Update what you added explains updates in full. Without a Clip player on your overlay, !so works as it always has: the shoutouts go out and no clip shows.

What viewers see
Nothing, until a shoutout plays a clip. Then the heading, the clip and its title appear together, the clip plays with its sound, and the layer hides again a moment after the clip ends.
- The clip is picked at random from the streamer’s ten most-viewed clips of the past year, or of all time when they have none from the past year. When they have more than one, the next
!sofor them on your channel plays a different one. - One clip plays at a time. A
!sowhile a clip is playing waits its turn, up to three of them; a shoutout past that plays no clip, though the chat shoutout still happens. - Every Clip player on your overlays plays the same clip at the same moment.
- An OBS source that you open or refresh while a clip is playing waits for the next one.
Keep it playing: Twitch’s rules
Twitch only lets a clip start by itself when its player is plainly visible. Keep it that way:
- Leave the layer unscaled and uncovered: no other layer on top of it, and no custom CSS that moves, fades or scales it.
- In OBS, leave crop and filters off the overlay’s Browser Source.
Try it without going live
- In the overlay editor, open Simulate and choose Play one of my clips. It picks one of your own clips the same way
!sopicks one. - If the canvas isn’t at actual size, Studio asks: “Twitch only starts a clip in a canvas at actual size, as OBS shows it. Show the canvas at actual size while it plays? It goes back afterwards.” Choose Show actual size and play. While the clip plays, the canvas is drawn at one screen pixel per overlay pixel whatever your zoom, and scrolled to your Clip player. The Simulate panel closes for the run so nothing covers the player, and a line above the canvas tells you it is playing until the clip is done. Nothing is drawn over the overlay meanwhile. When the clip ends, the canvas goes back to your zoom and where you had scrolled to. Your zoom setting is never changed. Choose Cancel to leave the canvas as it is.
- To play it in OBS too, tick Also play on the live overlay in OBS before you choose Play one of my clips. Viewers will see it.
The canvas is only a preview of where the clip sits; OBS shows the real thing. The canvas plays sound only while its speaker button is on.
Use the step in your own flow
The step is Play a shoutout clip. Its one field, Whose clip, takes a name or a variable: $(1) is the first word after a command, and $(raiderlogin) the raiding channel on a Raid trigger. A leading @ is ignored.
It leaves by Played once the clip is playing or waiting its turn, and by No clip when the name isn’t a Twitch account, the streamer has no public clips, Twitch doesn’t answer, or three clips are already waiting. The run log says which. Connect a Chat message to No clip to say so in chat. Test fire plays no clip: the run log says whose clip it would have played.
Troubleshooting
- No clip plays, and the run log says they have no public clips. That streamer has no clips Twitch shows publicly. The chat shoutout still went out.
- Studio shows Twitch’s play button instead of playing the clip. With the canvas’s sound on, a web browser won’t start a clip with sound until you have clicked the page. Click the canvas once and play it again, or turn the canvas’s sound off with the speaker button beside the zoom to watch it muted. OBS plays it with sound.
- You added the Clip player while OBS had the overlay open, and it stays empty. The overlay reloads itself once when it finds a Clip player it wasn’t ready for. If the player is still empty, refresh the overlay’s Browser Source.
- It doesn’t start in OBS. Something covers the player or it is scaled: move other layers off it, remove custom CSS that moves or scales it, and leave crop and filters off the Browser Source.
!soshouts them out, but no clip plays and the run log has no Play a shoutout clip step. Your Shoutout is the older version: update Starter, or add the step yourself (step 2).- Nothing happens when a viewer types !so. Only moderators and you can use it.
- Simulate says your channel has no public clips yet. Make a clip of your stream, then try again.
Was this guide helpful?
Thanks. Your answer helps us decide which guides to improve.