
The short answer
In Bloopbot you write a custom Twitch overlay in HTML, CSS and JavaScript (or TypeScript) beside a live preview, connect it to raids, follows, subs, cheers and your own channel variables, and show it in OBS through one Browser Source. Bloopbot hosts it and sends it the events, so there is no server to run, no build step and no Twitch API key to manage. This guide builds a raid card that shows the raider's name and party size.
You need:
- Your Twitch channel connected to Bloopbot (Get started).
- An overlay to put it in. Make one on Overlays if you have none (Add an overlay to OBS).
- OBS on the computer you stream from.
- Some HTML and CSS, or a connected AI assistant to write it with you.
1. Open the code beside the preview
- Open Overlays, then Open in Studio on your overlay.
- Choose Add a layer, then press Create custom graphic at the foot of Add.
- Select the new layer and press Edit graphic code in the Graphic section.
The workspace has HTML, CSS and TypeScript tabs on one side and the preview on the other. Plain JavaScript is valid TypeScript, so you can write either. Auto-run refreshes the preview a moment after you stop typing. The starter is already a raid card; you can edit it or replace it.
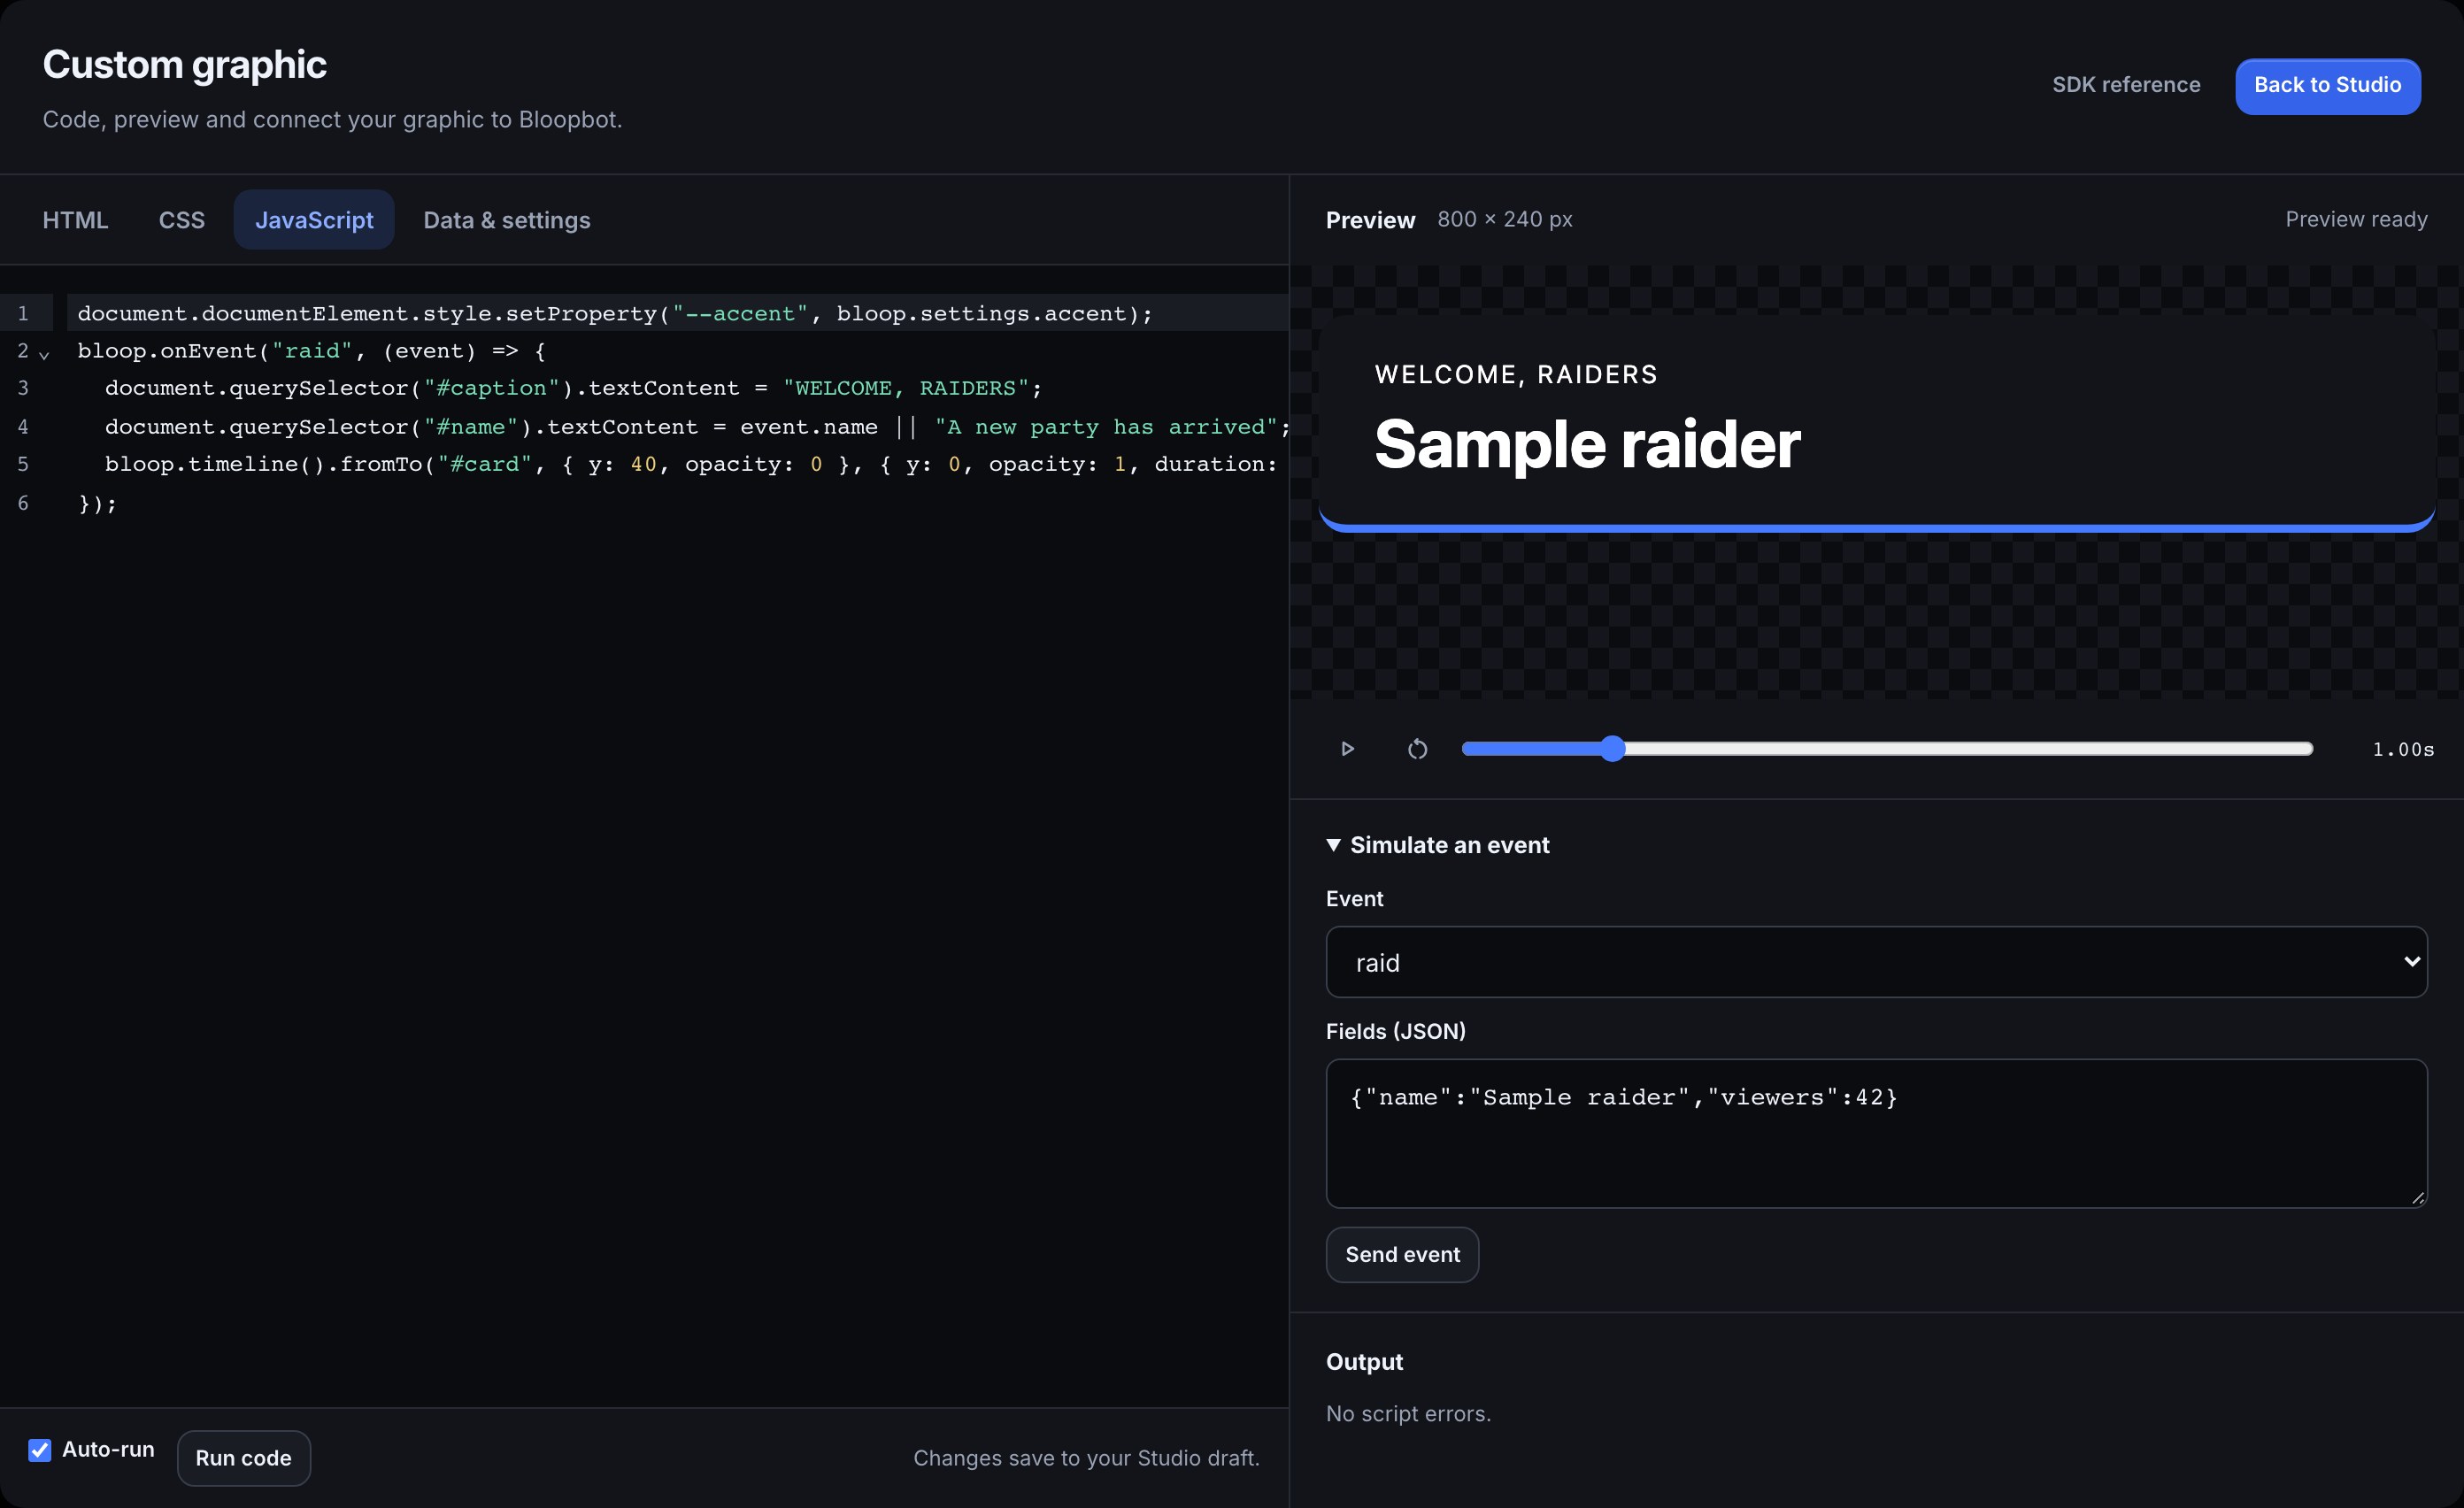
2. Write the card
In HTML:
<div id="card">
  <strong id="name">Someone</strong> is raiding with <span id="viewers">0</span> viewers!
</div>
In CSS, style it as you like, for example:
#card { font: 700 40px system-ui; color: white; background: #6441a5; padding: 24px 32px; border-radius: 16px; opacity: 0; }In TypeScript, show the card when a raid arrives and hide it again after a few seconds:
bloop.onEvent("raid", (event) => {
  document.querySelector("#name").textContent = event.name;
  document.querySelector("#viewers").textContent = String(event.viewers);
  bloop.timeline()
    .to("#card", { opacity: 1, duration: 0.4 })
    .to("#card", { opacity: 0, duration: 0.4 }, 5);
});
bloop.timeline() is a GSAP timeline that follows the preview's clock. The starter already ticks GSAP under Data & settings → Libraries; keep it ticked. CSS animations work without it.
3. Choose what it listens to
Your code hears only the events you tick.
- Open Data & settings.
- Under Events, tick raid. The starter has it ticked already. follow, sub, resub, gift and cheer work the same way.
- Choose Back to Studio. In the layer's Content tab, Triggered by flows lists a flow for each event. If raid says Needs a flow, choose Set up flow.
A flow is what delivers a Twitch event to your overlay, so you can add a check in it later, such as showing the card only for raids over 10 viewers. To show a number that changes, such as a death counter, tick it under Variables and read it with bloop.onVariables(); connect data and expose settings shows how.
4. Test it without going live
- In the workspace, under Simulate an event, choose raid. The sample is
{"name":"Sample raider","viewers":42}; change the name or the number if you like. - Press Play preview. The card should show Sample raider is raiding with 42 viewers! and fade away after five seconds.
- Check Output if nothing happens: it shows script errors and anything that failed to load.
Simulated events stay in the preview. They don't reach Twitch, your flows or OBS.
5. Put it in OBS
- Choose Back to Studio, place and size the layer on the canvas, and press Publish. Review the queued flow for raid and choose Create and switch on.
- If this overlay isn't in OBS yet, copy its address from Overlays and add it to OBS as a Browser Source at 1920 × 1080, as Add the Browser Source shows. An overlay already in OBS picks up the new layer by itself.
- To see it in OBS before a real raid, open Simulate on the Studio canvas and, under Test events, tick Also play on the live overlay in OBS — viewers will see it, then play a raid. If you are live, your viewers see the test too.
The card now plays on stream every time someone raids you.
Prefer your own HTML file?
To keep the file on your own computer and point OBS at it, use a custom overlay instead: Bloopbot gives you a starter file and a private address that sends it the events you choose. Connect your own HTML overlay walks through it. A custom graphic in Studio is easier to share, because it can go in a pack or on the Marketplace.
Troubleshooting
- The preview stays blank. Open Output. A script error or a library you use but haven't ticked under Libraries shows there.
- A font, picture or script from another website doesn't load. Graphics run in a sandbox that blocks remote scripts and media. Google Fonts load, pictures from other websites load through
bloop.loadImage(), and your own files go in your media library. Author a custom graphic in Studio lists what is allowed. - It works in the preview but not on stream. Check you pressed Publish and switched on the raid flow, and that the scene with the Browser Source is showing. If you cannot see anything has more checks.
- Every method and limit: the Custom graphics API.
Was this guide helpful?
Thanks. Your answer helps us decide which guides to improve.