
Before you start
Use a Custom graphic layer when you want your own layout, animation or canvas drawing inside an overlay. You need an overlay open in Studio and some HTML, CSS or JavaScript knowledge, or a connected AI assistant to help write the source. Your graphic can fill the overlay or sit beside built-in layers.
Upload any pictures, sounds or videos to your media library first. Declare any channel variables you want to display on Variables. This guide uses a raid card with a colour setting; it needs no media or variables.
1. Open code beside the preview
- Open Overlays, then Open in Studio on your overlay.
- Choose Add a layer, find Custom graphic under Media, and add it.
- Select its layer and press Edit graphic code in the Graphic section.
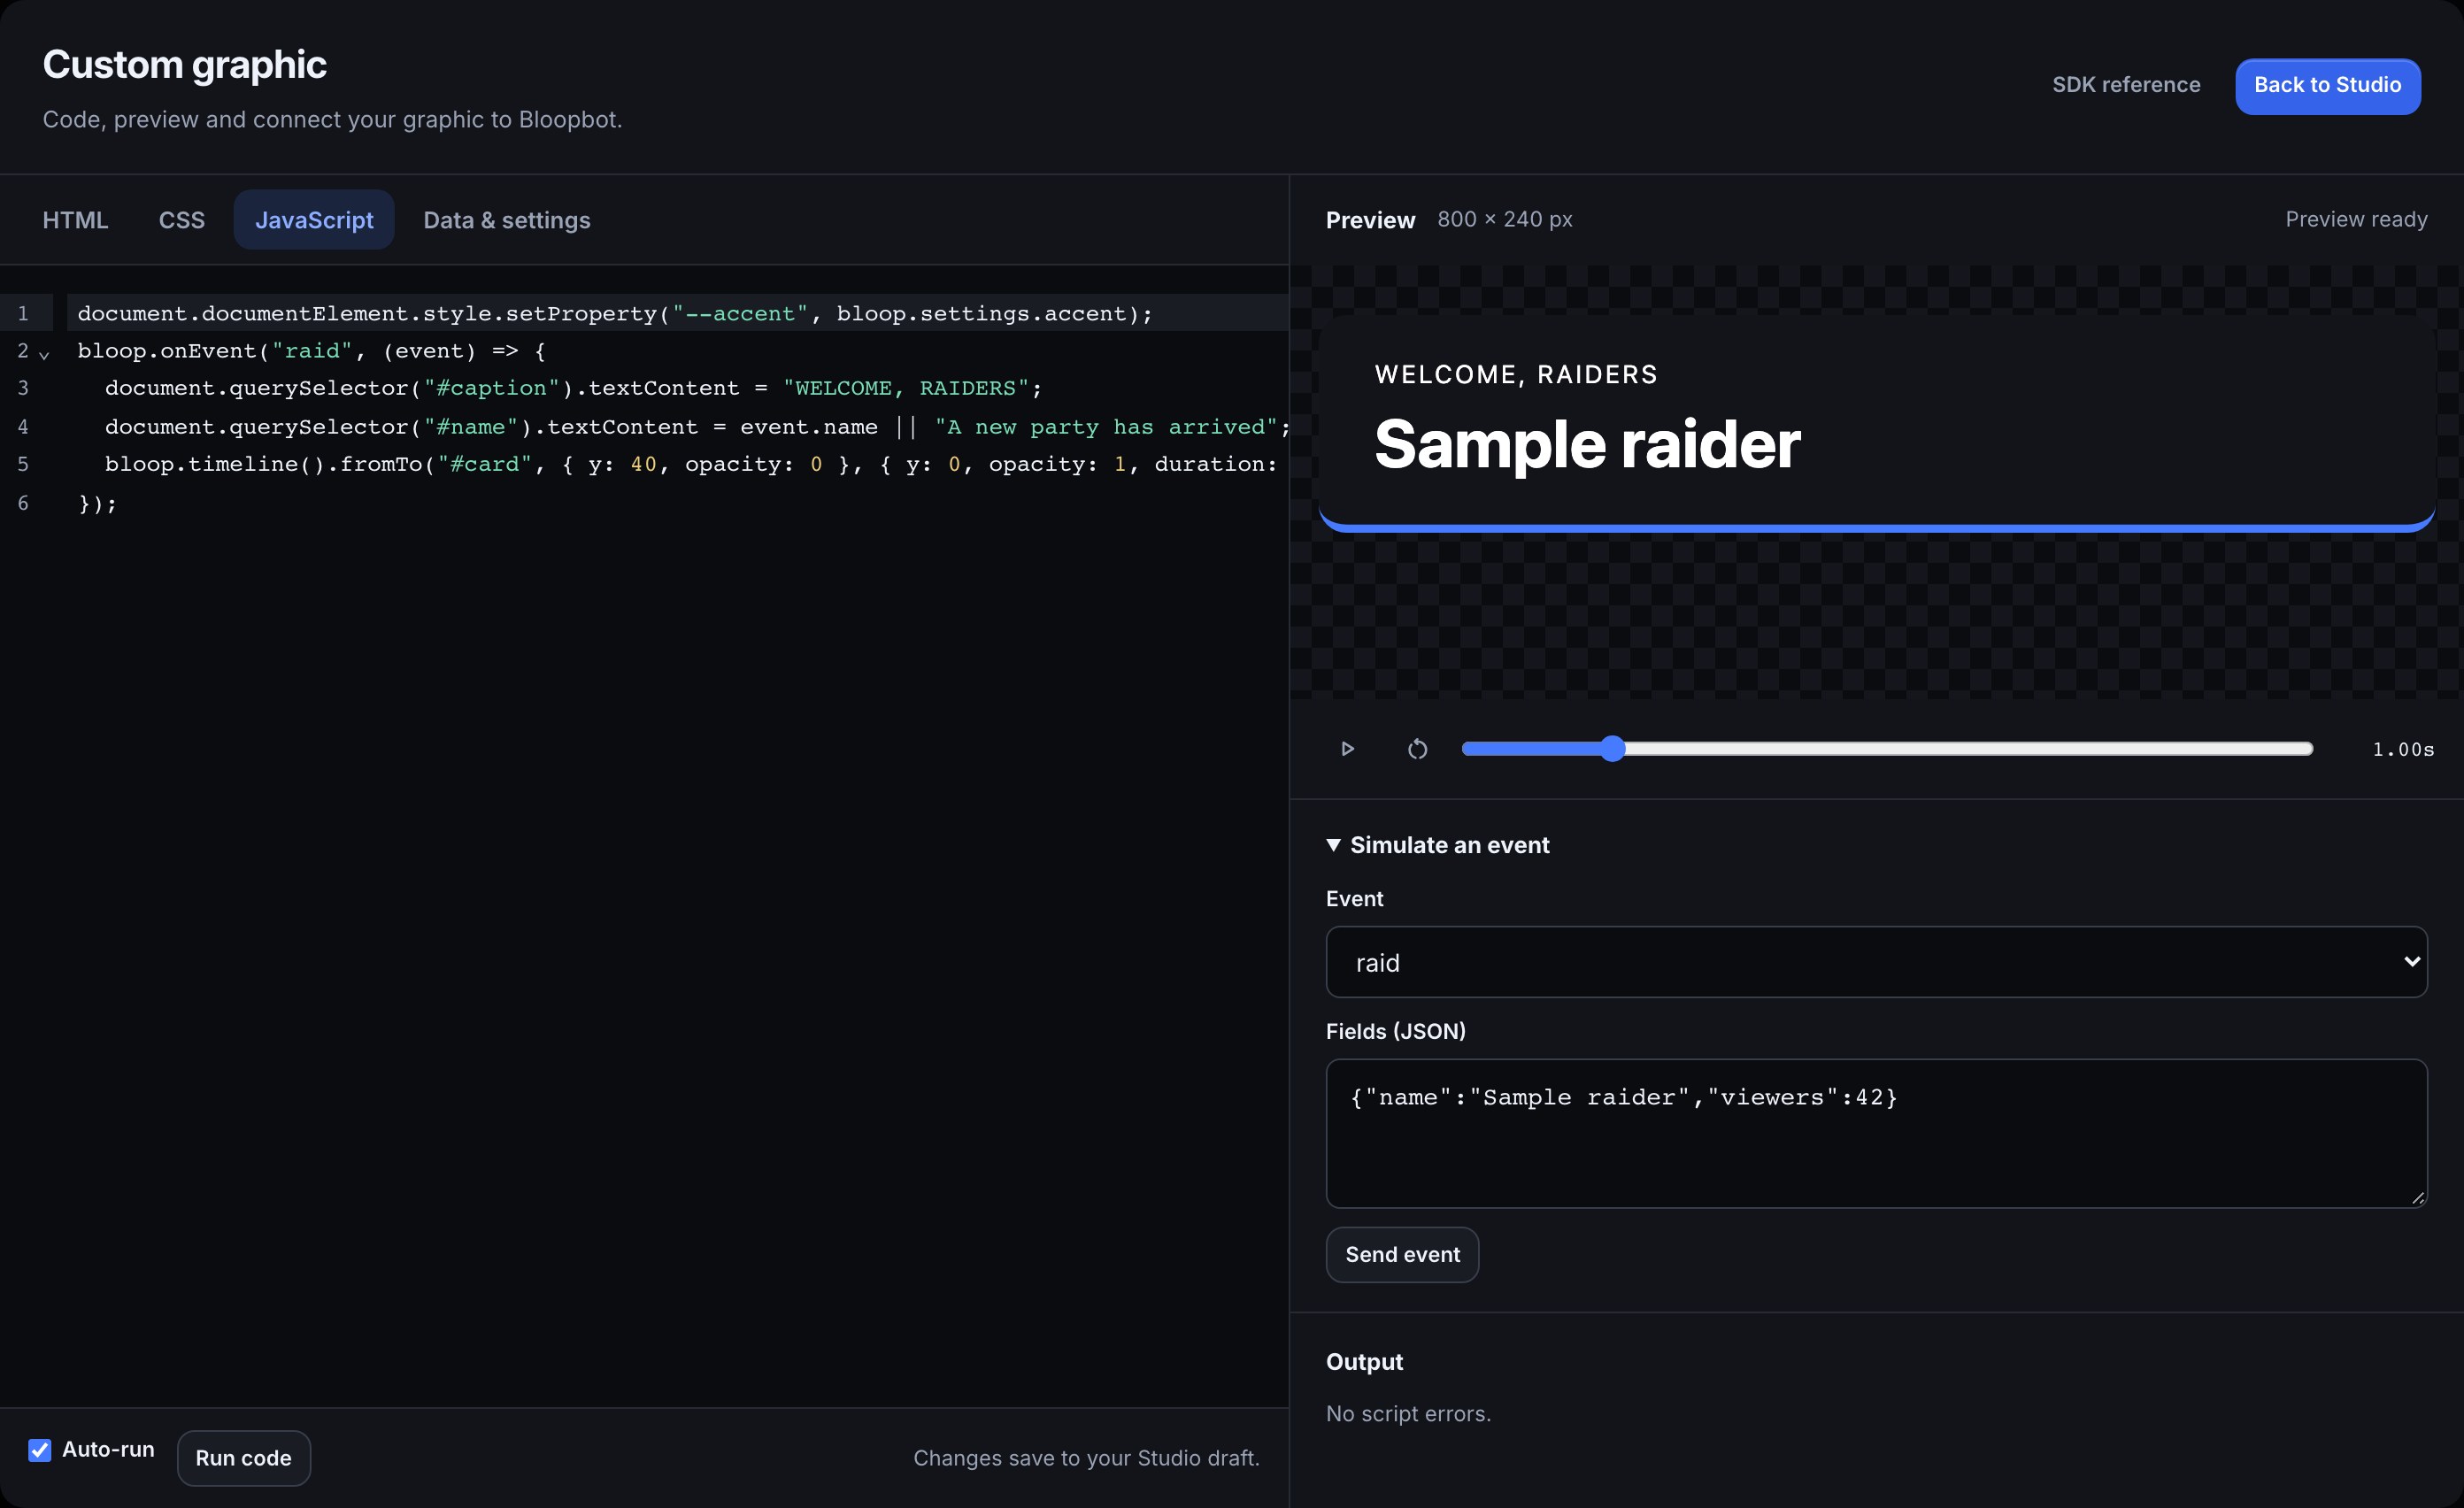
- Use the HTML, CSS and JavaScript tabs to change the card. The preview sits beside the code on wide screens and below it on narrow screens.
The starter already has a card, an Accent colour setting and a raid animation. For a first edit, change the text inside the HTML card or its padding in CSS. Auto-run refreshes the preview after a short pause in typing. Turn it off and choose Run code when you prefer to run changes yourself.
Changes save to your Studio draft. Back to Studio closes the workspace; Escape does the same. The draft does not reach OBS until you publish.
2. Connect data and expose settings
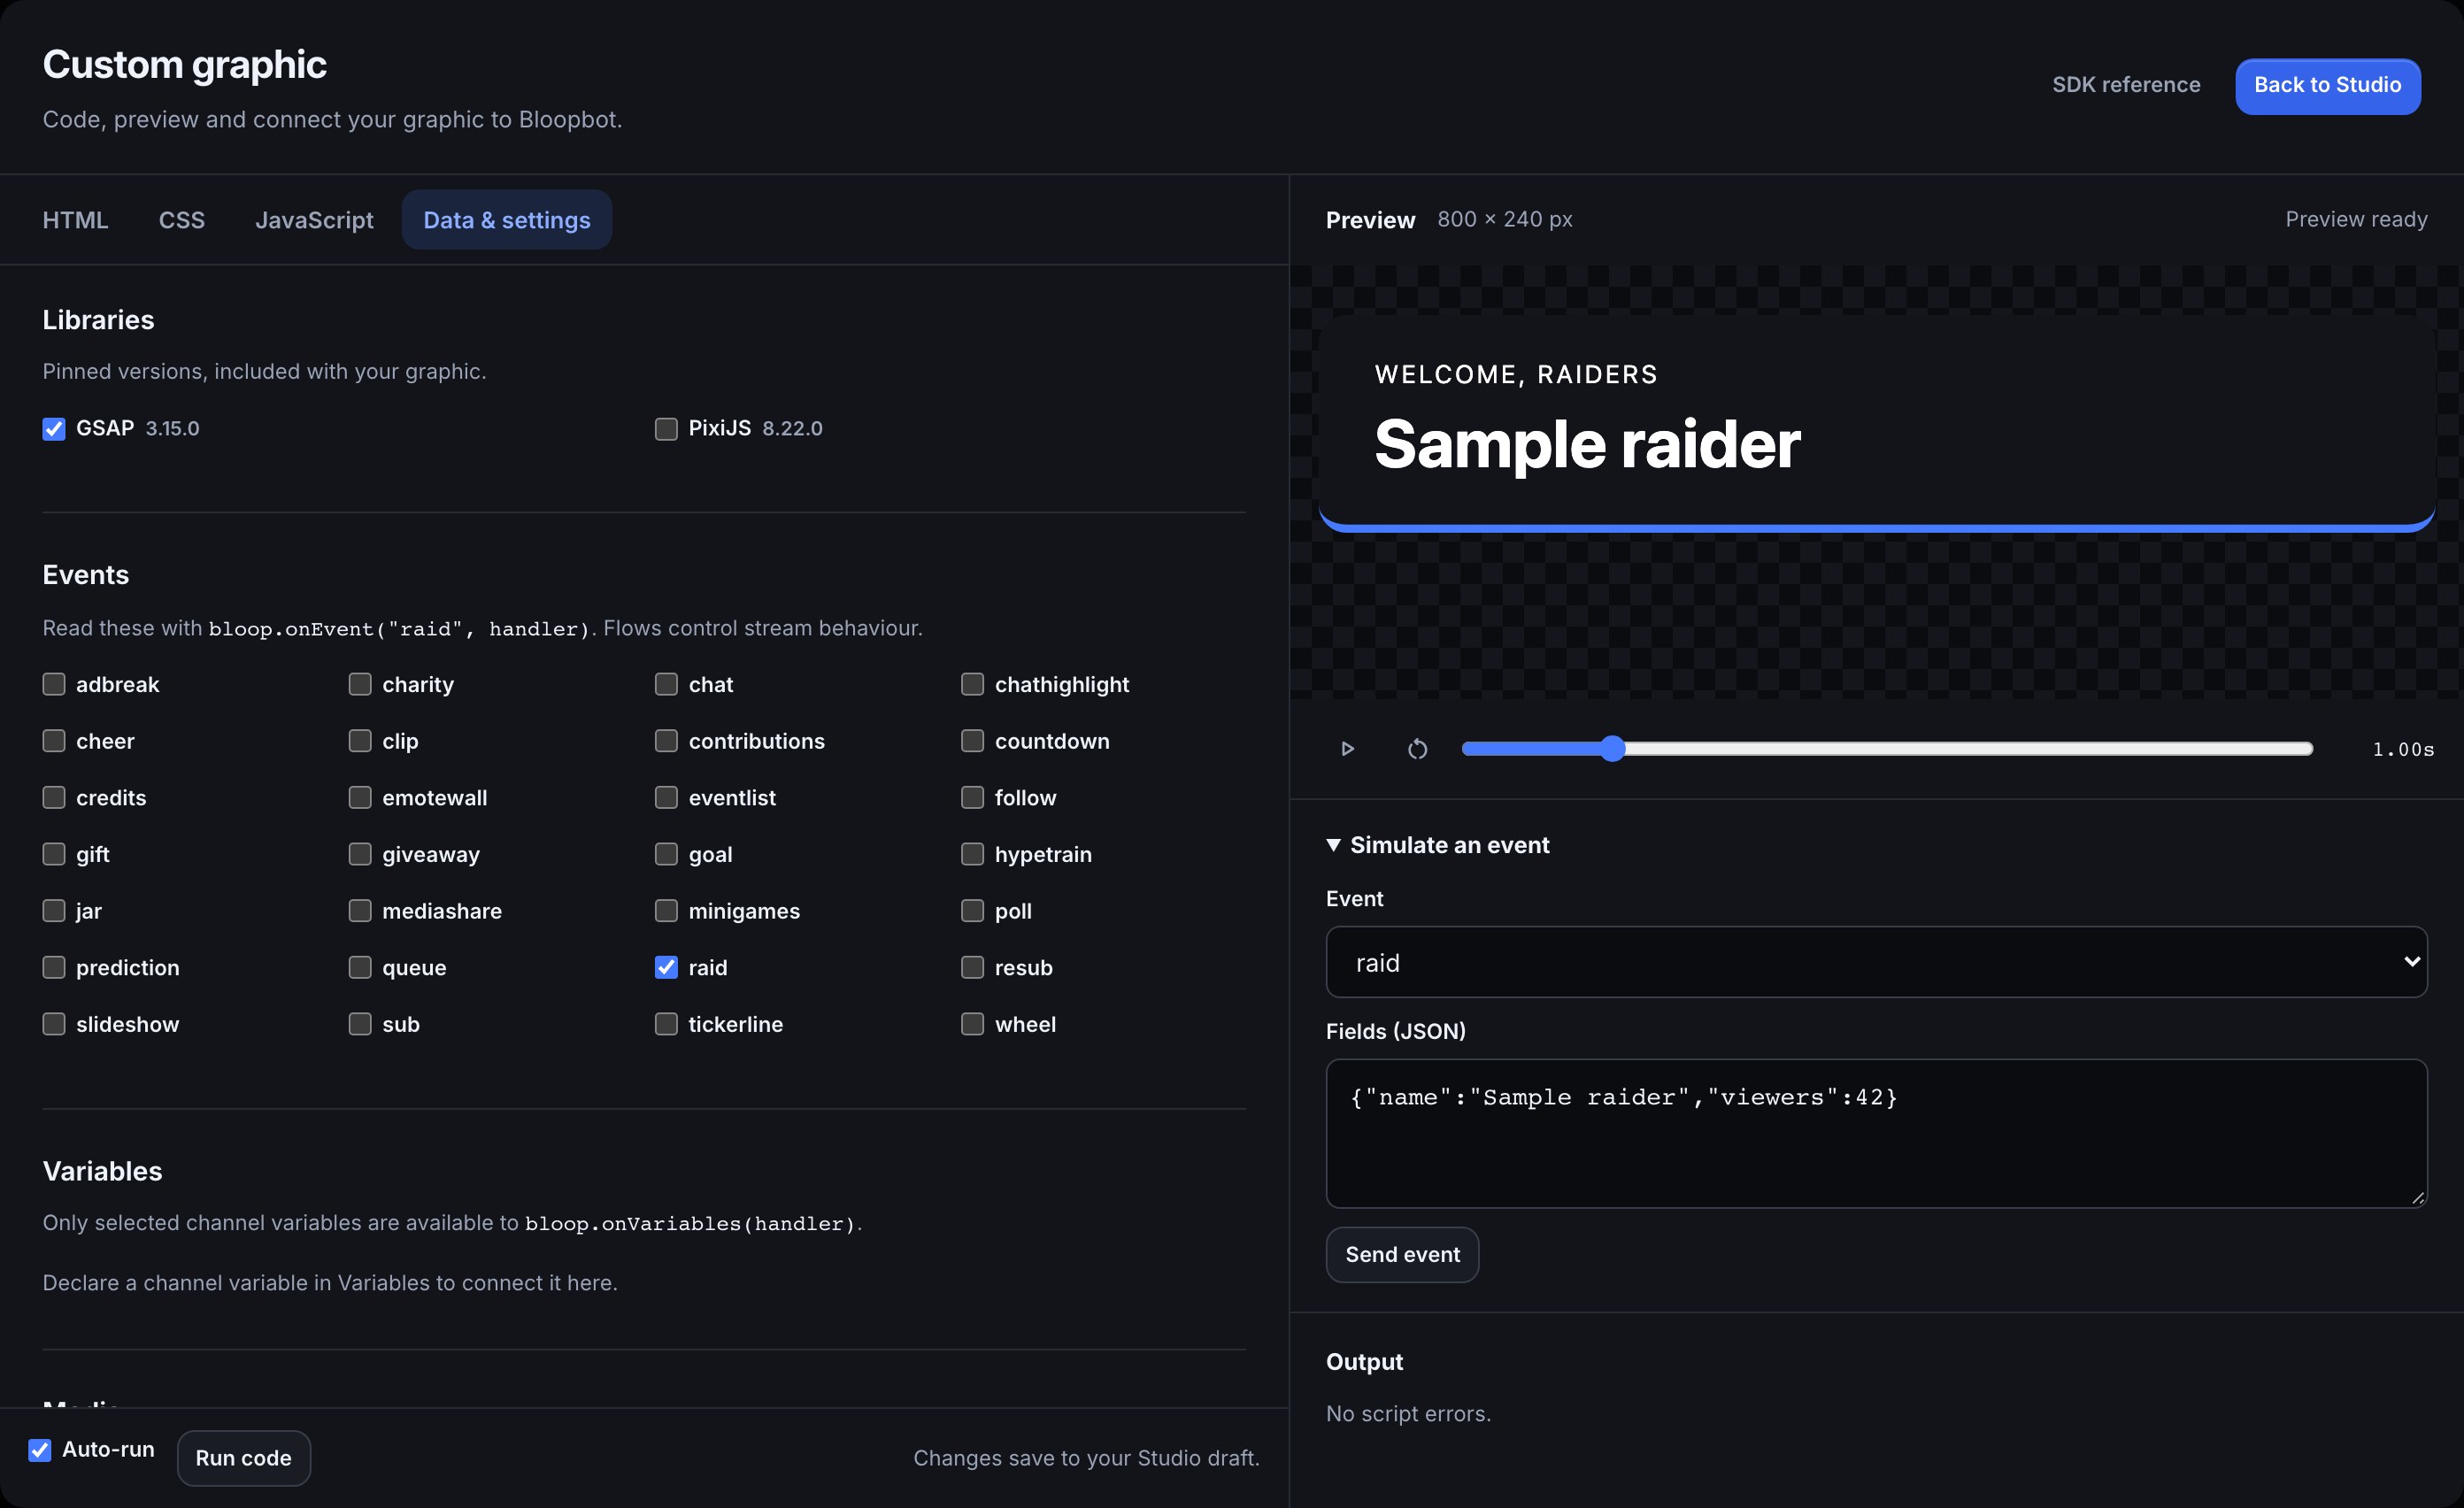
Open Data & settings in the workspace.
- Under Libraries, enable GSAP for animation or PixiJS for canvas/WebGL drawing. These are the versions included with Bloopbot.
- Under Events, tick only the events your code reads. The starter selects raid and uses
bloop.onEvent("raid", handler). - Under Variables, select declared channel variables. Read their current values with
bloop.getVariables()or receive updates withbloop.onVariables(handler). - Under Media, give a library file a name such as
portrait. Read its local URL asbloop.assets.portrait. - Under Exposed settings, add a text, colour, number, flag or select control. Read it as
bloop.settings.name. These controls appear in the normal Studio panel, so someone adding your pack can customise it without editing code.
For example, a number variable named wins can fill a score:
bloop.onVariables(values => {
  document.querySelector("#score").textContent = String(values.wins ?? 0);
});
Add an element with id="score" to HTML and select wins under Variables first. Channel variable names use lowercase letters, digits and underscores. A flow can change that variable when a command or event happens; the graphic displays it.
The SDK reference covers every method, the manifest and limits. Source runs in its own sandbox and receives the data you selected. It cannot read the dashboard, cookies or storage. External script imports, fetch, sockets and nested players are blocked; bind library media instead. Named custom messages, leaderboard boards and Stage queues use the separate HTML overlay SDK.
3. Test a chosen moment
- Under Simulate an event, choose raid.
- Leave the sample fields as
{"name":"Sample raider","viewers":42}and choose Send event. - Press Play preview to watch the animation. Pause preview stops the shared clock.
- Move Preview time to revisit a moment. The graphic reruns its code and replays the recorded events up to that time.
- Choose Reset preview to clear sample events and start again. Preview length in Data & settings sets the time range, up to 60 seconds.
The name should change to Sample raider and the card should animate. These events stay in the preview; they do not trigger Twitch, a flow or an OBS test. Output shows script and loading errors.
Use bloop.timeline() for GSAP animations, bloop.schedule() for delays and bloop.onTick() for canvas updates. CSS animations also follow the preview clock. Native timers and a library's independent ticker keep their own clock and cannot reproduce a paused or sought preview. A Pixi application should stop its ticker and render from onTick.
Ask an assistant to author it
Allow your connected assistant to read and edit overlays. Ask it to discover graphics, edit the complete Studio draft and render a preview before publishing. You can give it a concrete brief:
Create a custom graphic in Studio: a transparent raid card with an editable accent colour. Use the graphics layer and bundled GSAP. Subscribe only to raid. Render a preview at 500 ms with a sample raid from PixelPal, then leave the source in the draft for me to review.An assistant can supply sample event fields, variable values and a timestamp for a rendered preview. Those are simulated values. If you change Studio while it works, its old draft revision is refused; ask it to reread the draft.
If it does not look right
- Blank preview: read Output, check your element IDs, and choose Run code after fixing the source. An undeclared event or a timeline without GSAP reports an error.
- A variable is missing: declare it on Variables, select it in Data & settings and use its lowercase key. Viewer variables are unavailable to graphics.
- Media is missing: choose an existing library file for its binding. Graphics load at most 8 MB per file and 32 MB total; larger files need a smaller version even if the library accepted them.
- Seeking differs from playback: use the SDK clock methods and stop independent tickers. Preview history keeps the latest 256 events; reset before a fresh test.
- A save is refused: the workspace lists the setting field and reason. Repair the label, default, options or value before publishing.
- OBS has the older graphic: close the workspace and Publish the Studio draft. Keep the existing overlay Browser Source URL.
Was this guide helpful?
Thanks. Your answer helps us decide which guides to improve.