
Before you start
You need to be live on Twitch, with clips enabled for your channel. Your bot account needs permission to make clips. The ready-made Clip it flow allows moderators and you to use !clip and includes a cooldown.
1. Open the clip flow
- Open Flows → Explore packs, choose Starter and install Clip it. If you already have it, open your copy from Flows.
- Switch to Canvas and select Create a clip.
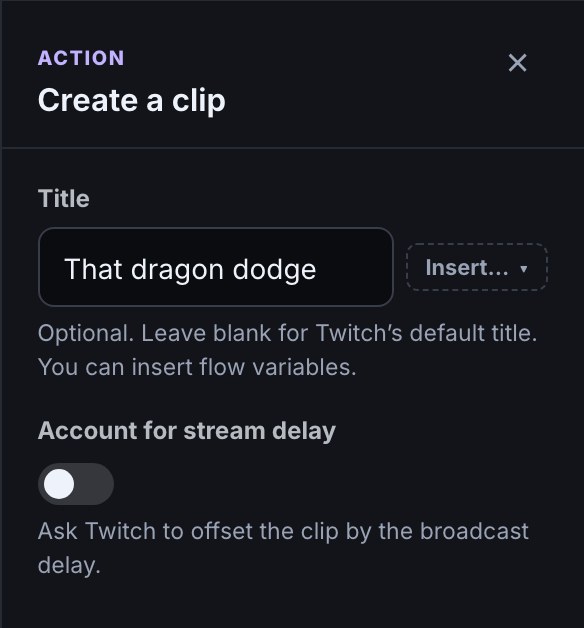
- In Title, type the name you want on each clip. Leave it empty to let Twitch choose the title.
- Choose Save, then turn on the flow if it is paused.
2. Let a moderator name the moment
Enter $(query) in Title to use everything typed after the command. For example, when a moderator types !clip That dragon dodge, the clip is titled “That dragon dodge”. Typing !clip alone leaves the title to Twitch. The Insert… menu beside the field offers other flow values, such as $(user) for the person who used the command.
To keep everyone else from making clips, leave the ready-made Who can trigger check connected before Create a clip. Add permissions and cooldowns explains those checks.
3. Check the result
Use Test fire and expand the Run log. When the test reaches Create a clip, its line shows the title it would request. The ready-made Clip it flow checks for a moderator first, and the default test viewer is turned away at that check. A test does not create a Twitch clip or post in chat. While you are live, use the command as a moderator in Twitch chat to check the real result: the bot replies with the clip link, and the clip uses your title.
If the flow says you are not live, try again during a stream. If Twitch refuses the clip, check that clips are enabled and that your bot account has the clip permission. Twitch can also refuse a title that fails its moderation checks; try a different title. A blank Title uses Twitch’s default.
Was this guide helpful?
Thanks. Your answer helps us decide which guides to improve.