
Choose a file where you use it
Your media library holds the pictures, sounds and videos you use in overlays, alerts, flows, giveaways and other parts of your channel. Start at the field where the file will be used; you do not need to leave the task to add a file.
- Open the part you are editing, such as an Image layer in Overlays or Cover art on a giveaway's Prize step.
- Press Choose from library. Walk into a folder, pick a tag or search by file name to find it; filter by file type when the picker offers several types. Preview a picture, play a sound or watch a clip before choosing. Organise with folders and tags explains how the folders and tags get there.
- Pick the file and press Use file. For a Slideshow or Marketplace previews, pick several and press Use files. Files that do not fit the field say why they cannot be picked.
- Save or publish the thing you are editing as you normally would. The new file choice follows that page's usual save or publish step.
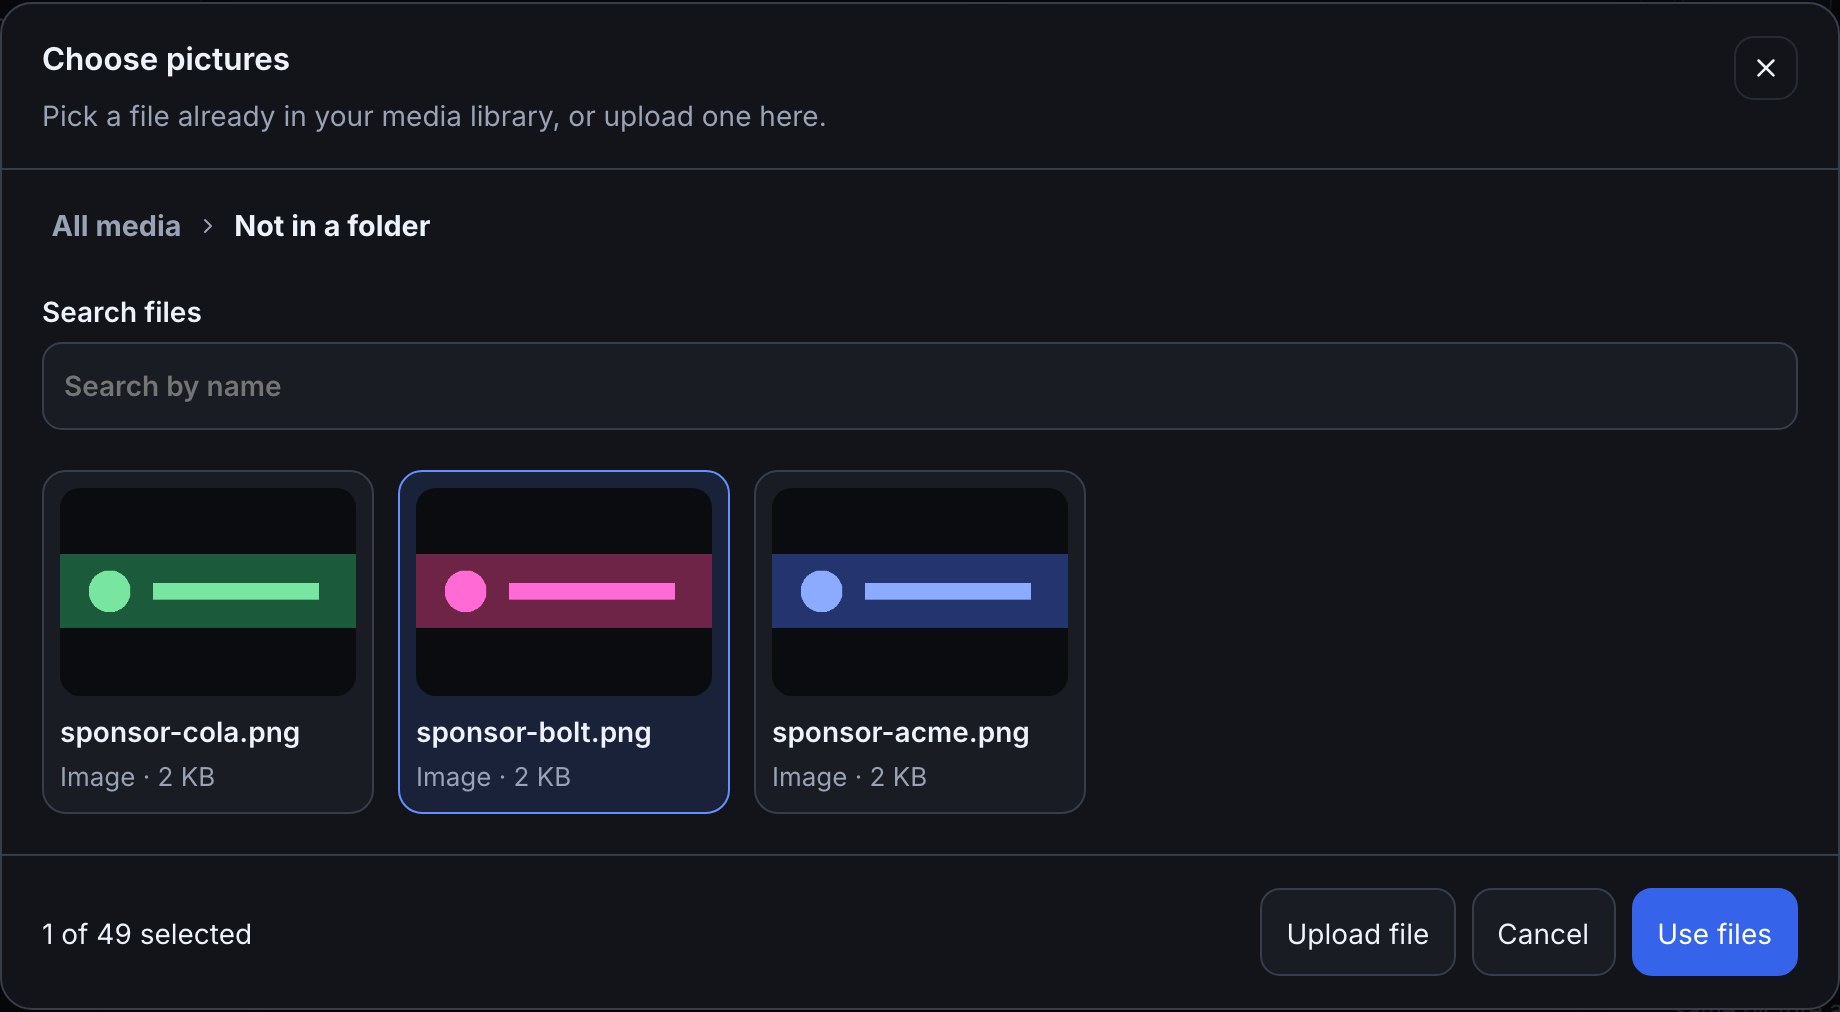
For example, add an Image layer, press Choose from library, pick starting-soon.png, then publish the overlay. The picture appears in that layer in OBS. Choosing a file in a flow changes the flow's draft until you save it; it does not send anything to Twitch by itself.
Upload a new file
Press Upload file beside the same field and choose a file from your computer. A successful upload joins your media library and becomes the choice for that field. You can also upload from the picker when it is open, add several files in the Media tab of the overlay editor, or press Upload file on the Media library page. Where the file lands is in Organise with folders and tags. Images and sounds can be up to 5 MB each; WebM video can be up to 25 MB. The Media storage line in What your plan includes shows the space your channel has. The same limits hold when a file travels in a shared listing or a .bloop.zip bundle file, which holds up to 95 MB in all (List your flows and themes in the marketplace).
If an upload is refused, the previous choice stays in place and the message explains what to change. A file can be refused for its type, size or remaining storage space. For Marketplace covers and previews, a picture also has to be 16:9, such as 1920×1080; the picker shows its dimensions before you choose it.
Organise with folders and tags
Once you have more than a handful of files, sort them. Open Overlays and press Media library. The Folders list on the left has All media at the top, Not in a folder for files you have not filed, then your folders. A file lives in one folder at a time. Tags are the other way to find things: a file can carry several, and a tag works across every folder.
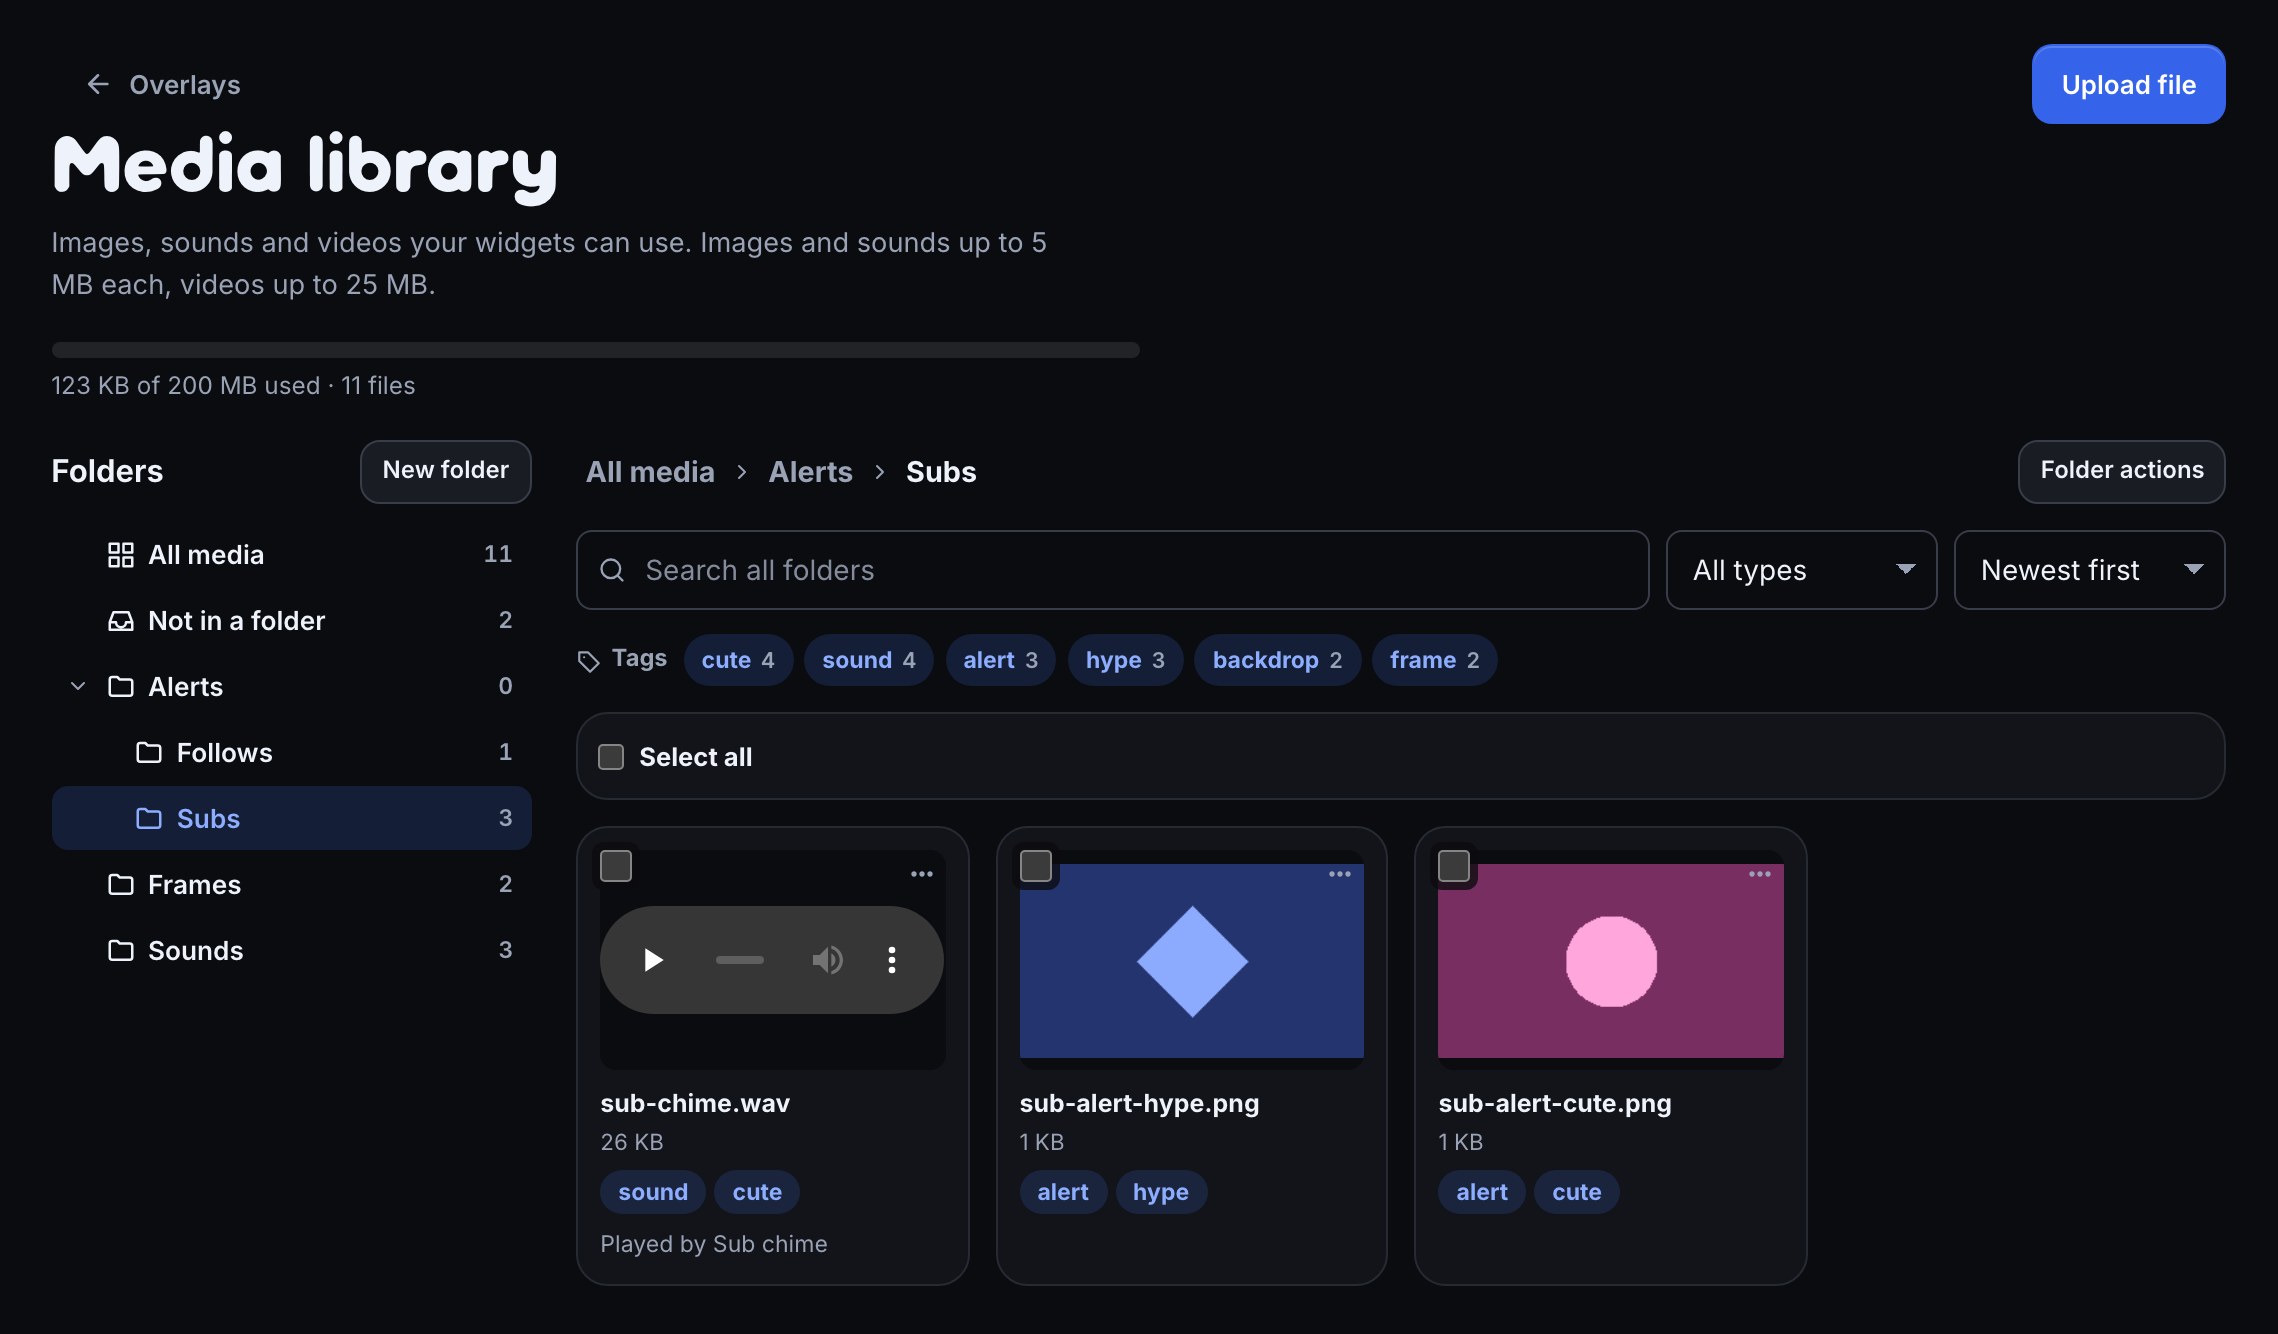
- Press New folder, type a name (up to 48 characters) and press Create folder. With a folder open, the new one goes inside it. Folders nest up to three levels, such as Alerts, Subs.
- Open a folder to work on it. Folder actions offers Rename…, Move to…, Share to marketplace (Share a media pack) and Delete…; the trail above the files (All media › Alerts › Subs) takes you back up.
- To file a picture or sound, drag its tile onto a folder in the list, or use its three-dot icon (More) and choose Move to…. Select several files first and drag any one of them to move the lot. Not in a folder in the list is a place you can drop files too.
- To tag a file, select its three-dot icon (More) and choose Edit tags…. Type a tag and press Enter, remove one with the cross beside it (Remove tag), then Save tags. A tag is up to 32 characters and a file carries up to 20.
- Press a tag chip above the files to see only files with that tag, from every folder. Press it again to clear it. With a tag chosen, Rename tag… appears: it renames the tag on every file at once, and if another tag already has that name the two merge.
- Type in Search all folders to look by file name across every folder. Each result names the folder it is in, or says Not in a folder, so you can tell two files with the same name apart. Clear filters brings the folder back. Use the type and sort selects to narrow by Images, Sounds or Videos and to order by Newest first, Name or Largest first.
- To rename a file, select its three-dot icon (More) and choose Rename….
Moving, tagging and renaming a file never breaks what uses it: an overlay, alert, theme or flow that points at the file keeps working, because it points at the file and not at its folder or its name.
For example, to keep your sub alerts together, make a folder Alerts with Subs inside it, drag sub-alert-cute.png and sub-chime.wav onto Subs, and tag both cute. Next month, pressing the cute chip lists everything cute from every folder at once.
Work on several files at once
Tick the box on a tile, or Select all to take every file shown, and a bar appears above the files with the count. Move to… files them in a folder you choose, Add tag adds one or more tags to all of them, Remove tag lists the tags the selection carries and removes the ones you tick, Share to marketplace starts a media pack from them, and Delete… removes them. Clear selection starts over. Shift-click a second tile to take everything between two.
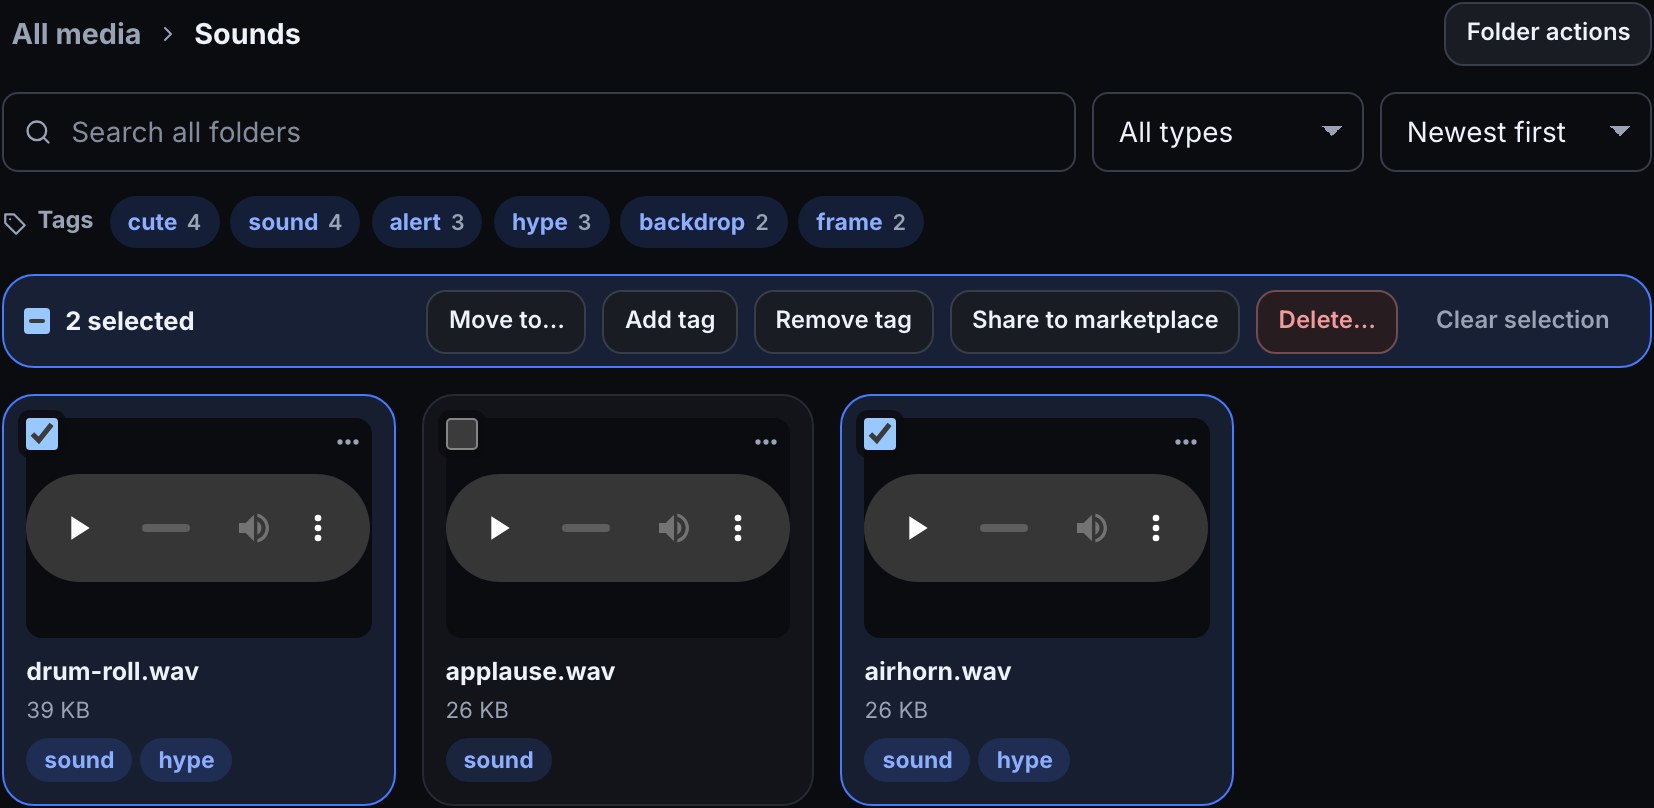
A file something still uses is never deleted this way: the message names what uses it, so you can change that first, and the other files in the selection still go. If a file would go over 20 tags, the message says which file, and the rest still get the tag.
Delete a folder
Choose Folder actions then Delete…. Deleting a folder deletes its subfolders and every file in them, so it first counts what would go. If any of those files is still used, the box lists each one and what uses it, and warns that whatever uses it will show nothing afterwards: an overlay layer draws no picture, a flow plays no sound. You confirm by typing the folder's name; Delete folder stays greyed out until it matches. A folder with nothing in use only needs the button.
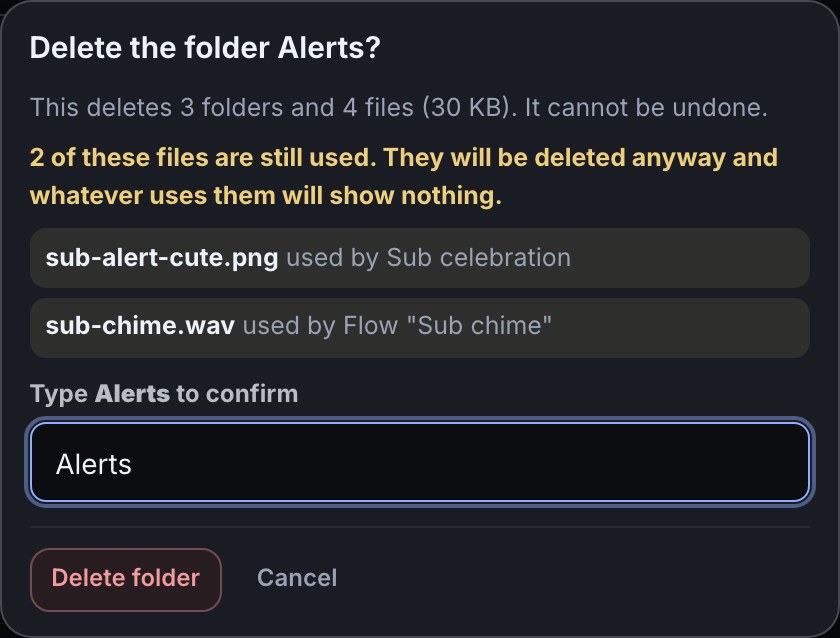
There is no undo. To keep a file the folder holds, move it out first, or use Move to… on the folder itself to file the whole folder somewhere else.
Uploads and duplicates
Upload file on the Media library page puts the new file in the folder you have open, or at the top level when you are looking at All media or Not in a folder. If the file is already in your library, Bloopbot does not keep a second copy: it says Already in your library at the folder it is in, with Show to jump there. The existing copy stays where it was. The same goes when you upload from a picker or field.
In Studio and in every picker
You do not have to leave what you are doing. Studio's Media tab and every Choose from library picker show the same trail, subfolders, tag chips and search, and list files with their folder when the search or a tag spans every folder.
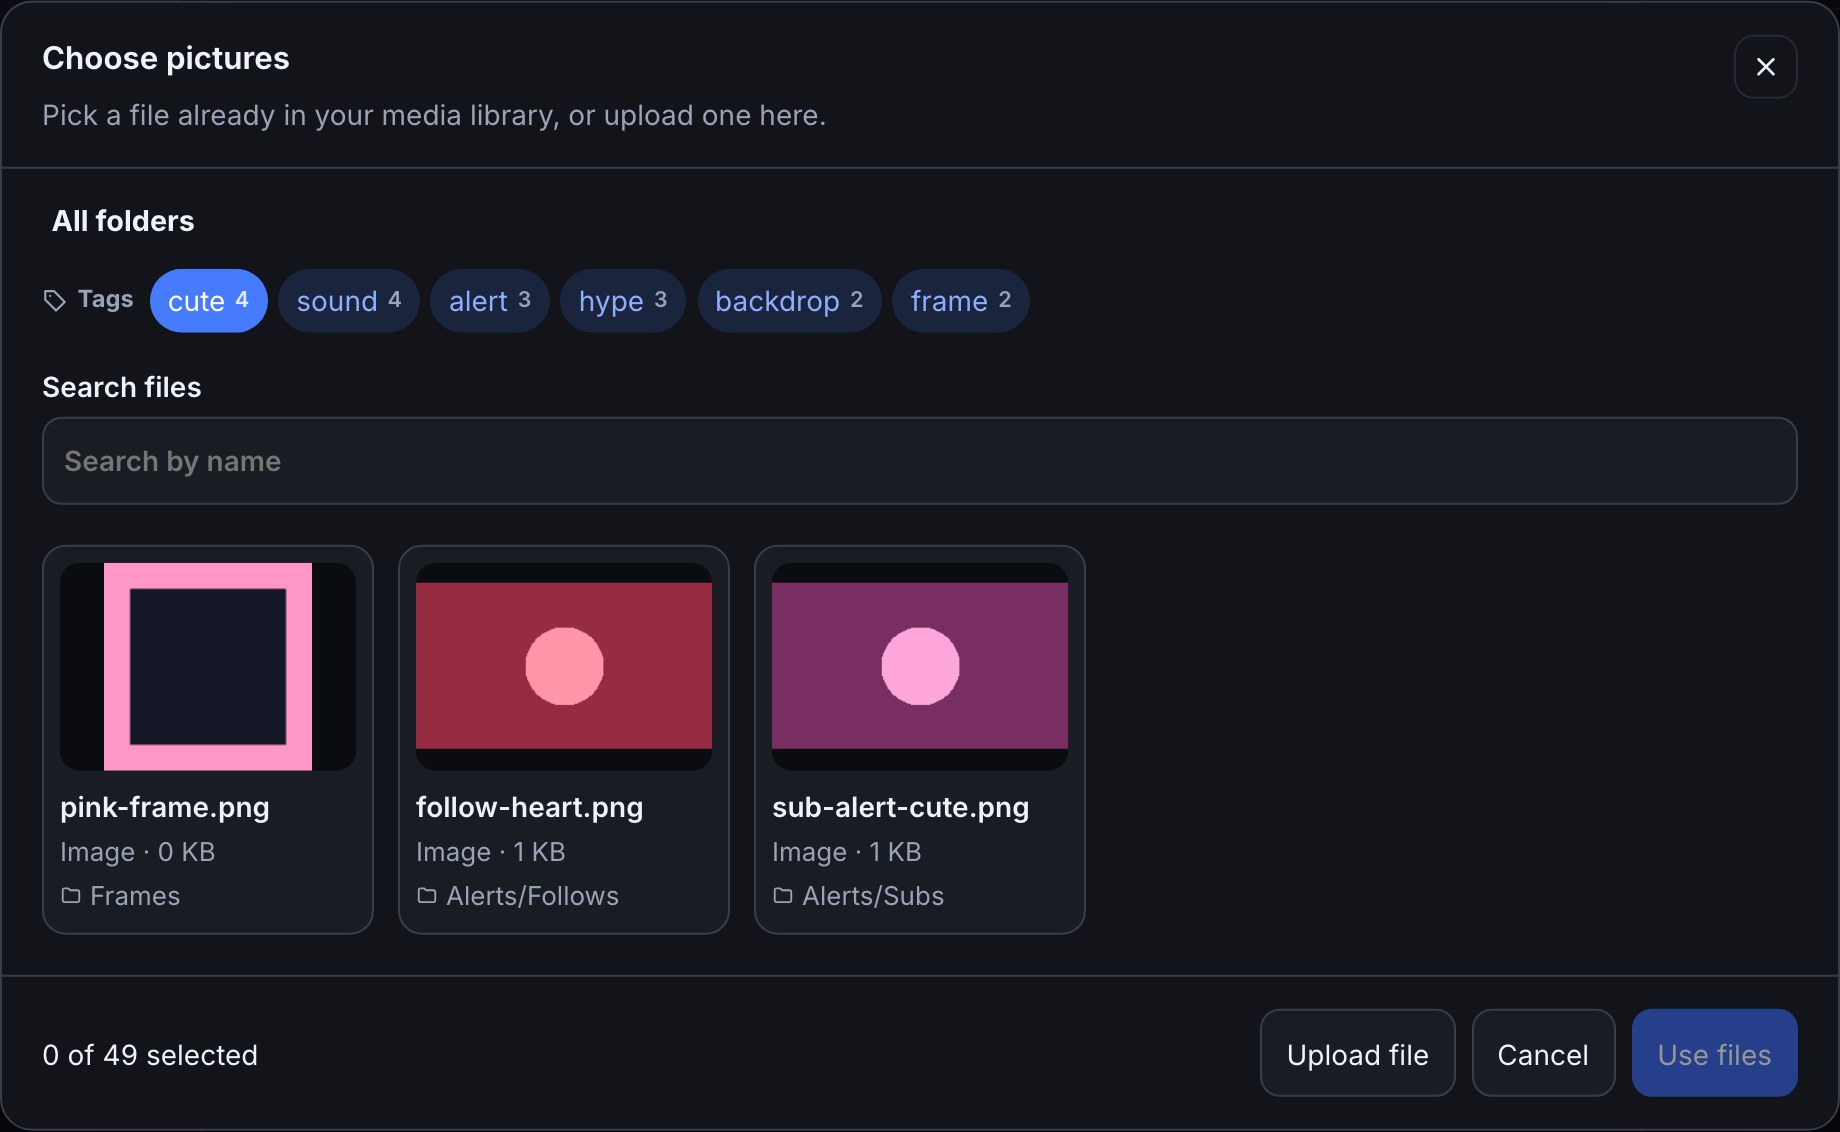
- Uploading from the open picker or from the Media tab puts the file in the folder on screen. Pressing a field's own Upload file button, with no picker open, puts it at the top level.
- The Media tab can also rename a file, edit its tags and move it, from a file's three-dot icon (More). Creating, renaming and deleting folders, and renaming tags, are done on the Media library page.
- The library, the tab and the pickers remember the last folder you were in, on that device, and open there next time.
- A picker only shows the files that suit its field, such as pictures for a frame, so a folder can look emptier there than on the library page.
Files you add from the marketplace land in a folder named after the listing, inside a folder called Marketplace (The Marketplace). Rename or move them like any others.
Pictures for frames
A frame is a picture drawn as a border round a panel, a chat line or an alert card (Put a frame around panels, chat lines and cards). Its picker lists images only, and these suit it best:
- A PNG or WebP with a see-through middle. The panel’s own colour and background then show inside the frame. These formats keep the see-through parts and soft edges.
- Corners at least as big as the frame is thick. A picture is cut into nine pieces, and the four corners are drawn as they are. A 96 × 96 picture with 32-pixel corners works well: type 32 as the Corner size.
- A GIF works too. A JPEG works for a solid frame, but it cannot be see-through, so its corners are solid squares.
- Not accepted: SVG pictures, videos and sounds. Save vector art as a PNG first.
Upload it from the frame’s own control with Upload file, or add it to the Media tab first and pick it with Choose from library. A file a theme or an overlay uses as a frame cannot be deleted from your library until you change that use, like a background image.
Replace or remove a file
Press Choose from library or Upload file again to replace a choice. Press the bin icon (Remove) beside them to clear it where the field allows an empty choice. If a file was deleted from the library, the field says Missing file instead of silently clearing the saved choice; pick another file or remove it. A slideshow keeps a missing picture in its ordered list so you can see which entry it skips on stream.
If the media library cannot load, press Try again where it appears, or refresh the page and reopen the picker. If a file cannot be deleted, it may still be used by a published overlay or another record; change that use first. Arrange your overlay explains the slideshow's ordering and missing-picture behavior.
Was this guide helpful?
Thanks. Your answer helps us decide which guides to improve.