
Before you start
You need an overlay. Add an overlay to OBS takes you from New overlay to a Browser Source; everything below happens in that overlay’s editor, and what you arrange is its layers.
You can also ask a connected AI assistant to create an overlay with a starting layer, or have it edit an existing overlay's Studio draft. Open the overlay in Studio to review draft changes, then press Publish when you want OBS to show them. If you edit the draft in Studio before the assistant saves, its older save is refused; ask it to read the overlay again first.
You can write your own widget with HTML, CSS and JavaScript inside Studio and place it on any overlay. Its expanded workspace puts code beside a live preview, with selected channel data and controls for whoever adds it. Author a custom graphic walks through the code, and Reuse your widgets in every overlay through placing it.
1. An overlay is a surface of layers
In a short desktop window, Studio keeps the canvas and both panels inside the window. Scroll inside Layers, Add, Media or the selected layer’s settings to reach their lower items. Publish stays in the top bar, and the position numbers stay at the foot of the settings panel. Use Zoom to fit above the canvas to see the whole overlay.
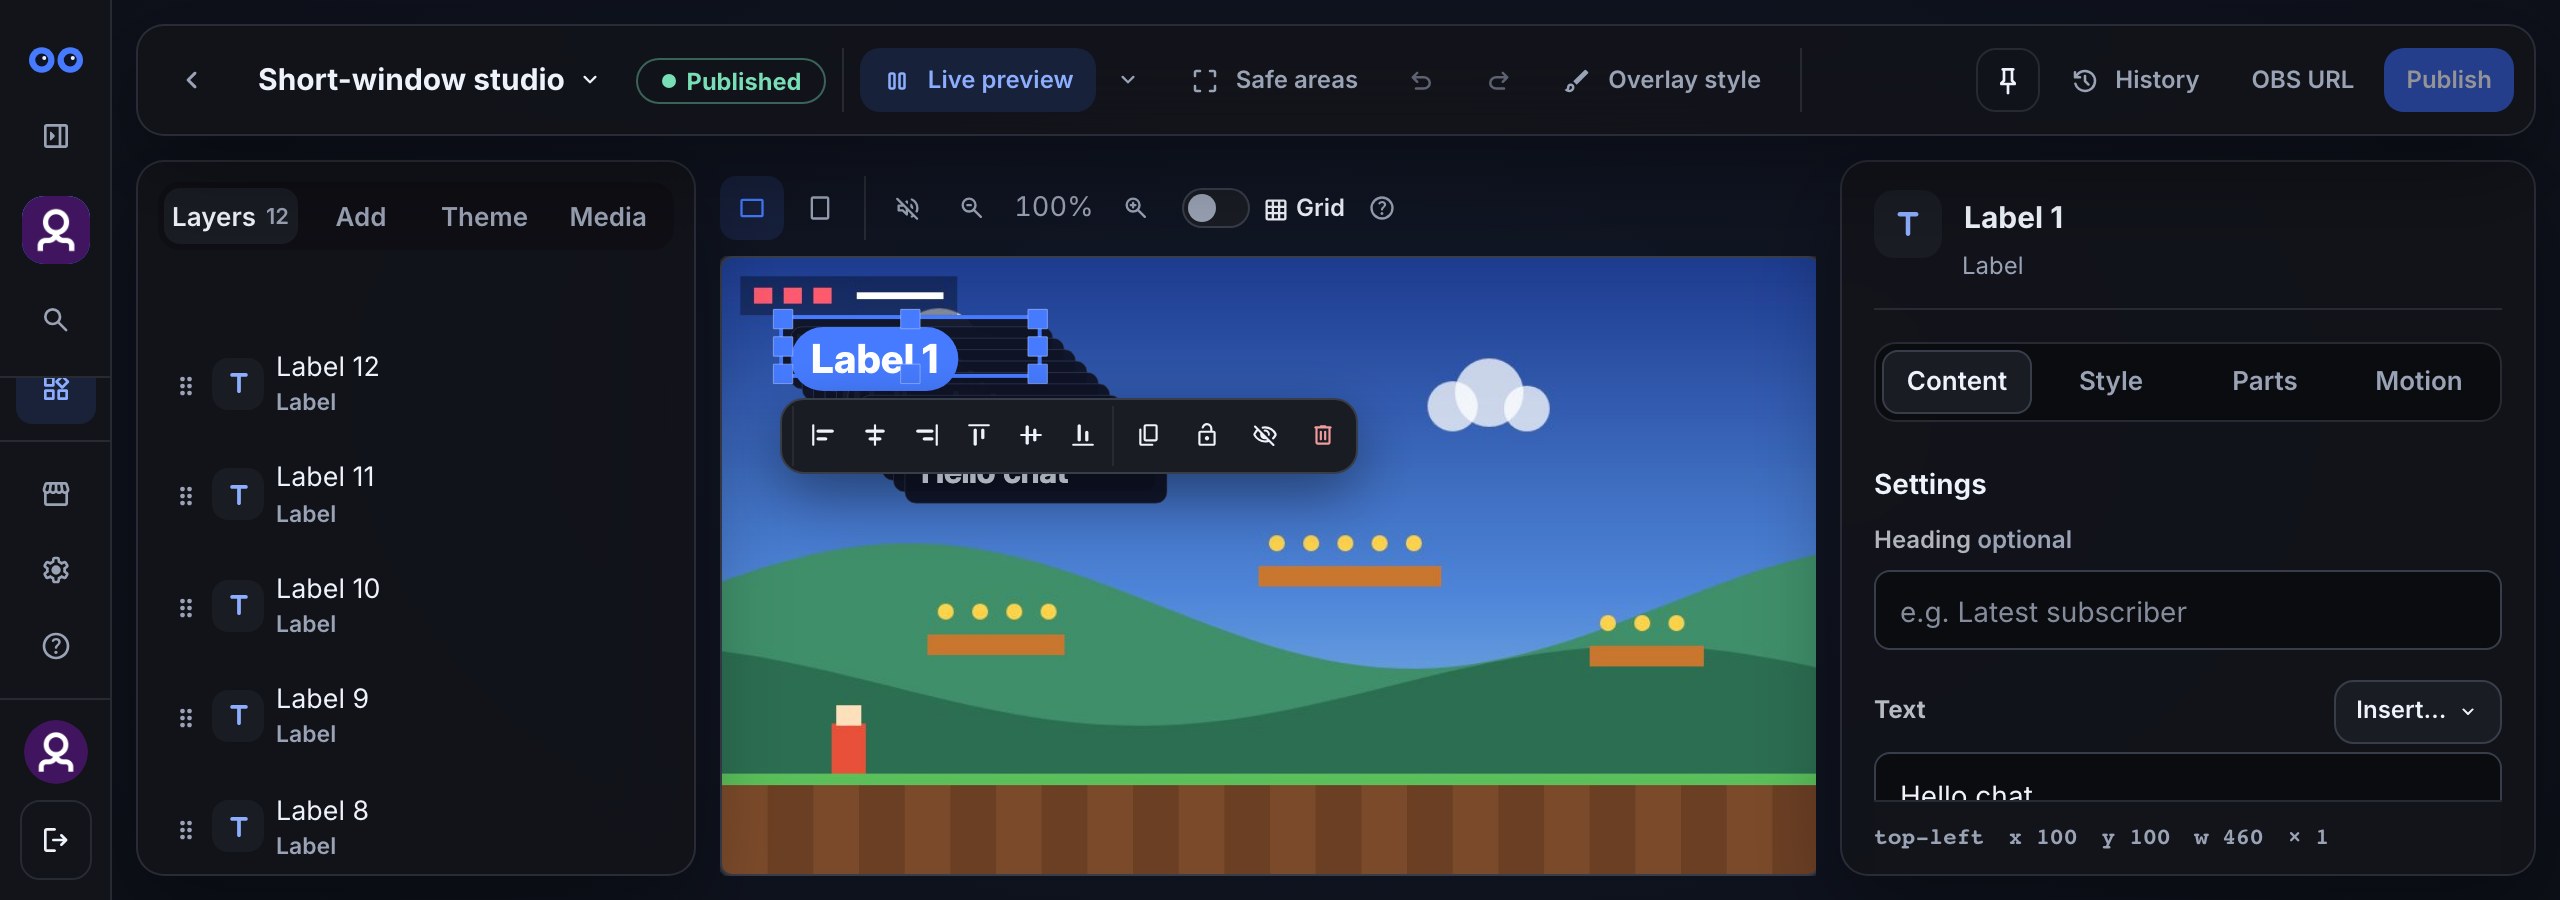
Every widget is made of layers. A layer has its own type, its own place on the 1920 × 1080 canvas, its own width and — if you want — its own look. The Layers tab on the left lists the whole overlay, and the top of the list draws on top: drag a row, or use its up and down arrows, to change which layer covers which. Hover over a row or focus it with your keyboard to show its arrows, lock and visibility controls over the right side. On a touch screen, select the row to show its controls below the label.
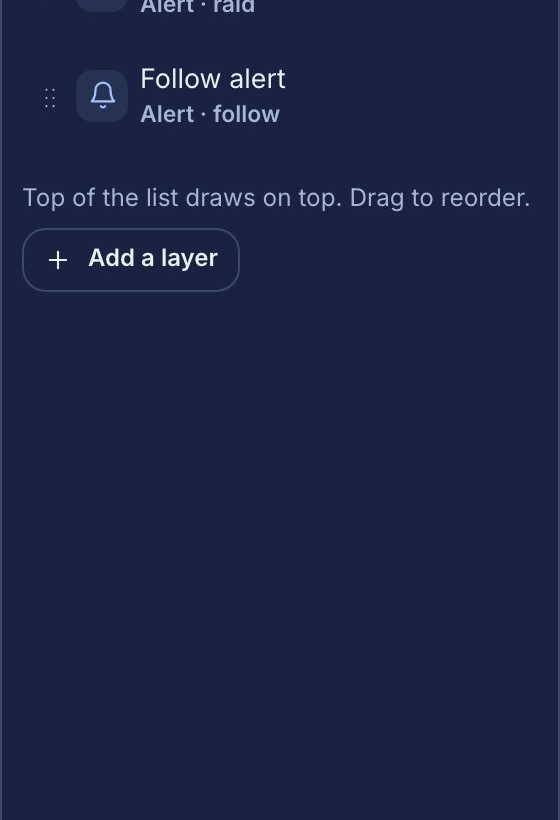
An overlay starts with a whole layout when you added one of Bloopbot’s ready-made overlays from Browse templates on the Overlays page, or with nothing at all when you made it with New overlay. An empty surface is a real starting point, not a broken one — the editor opens it on the Add tab (step 3), where the first layer comes from. Until you place one, the Layers tab says Nothing is placed on this overlay yet, and Add a layer under the list brings you back to Add.
2. Move and size a layer
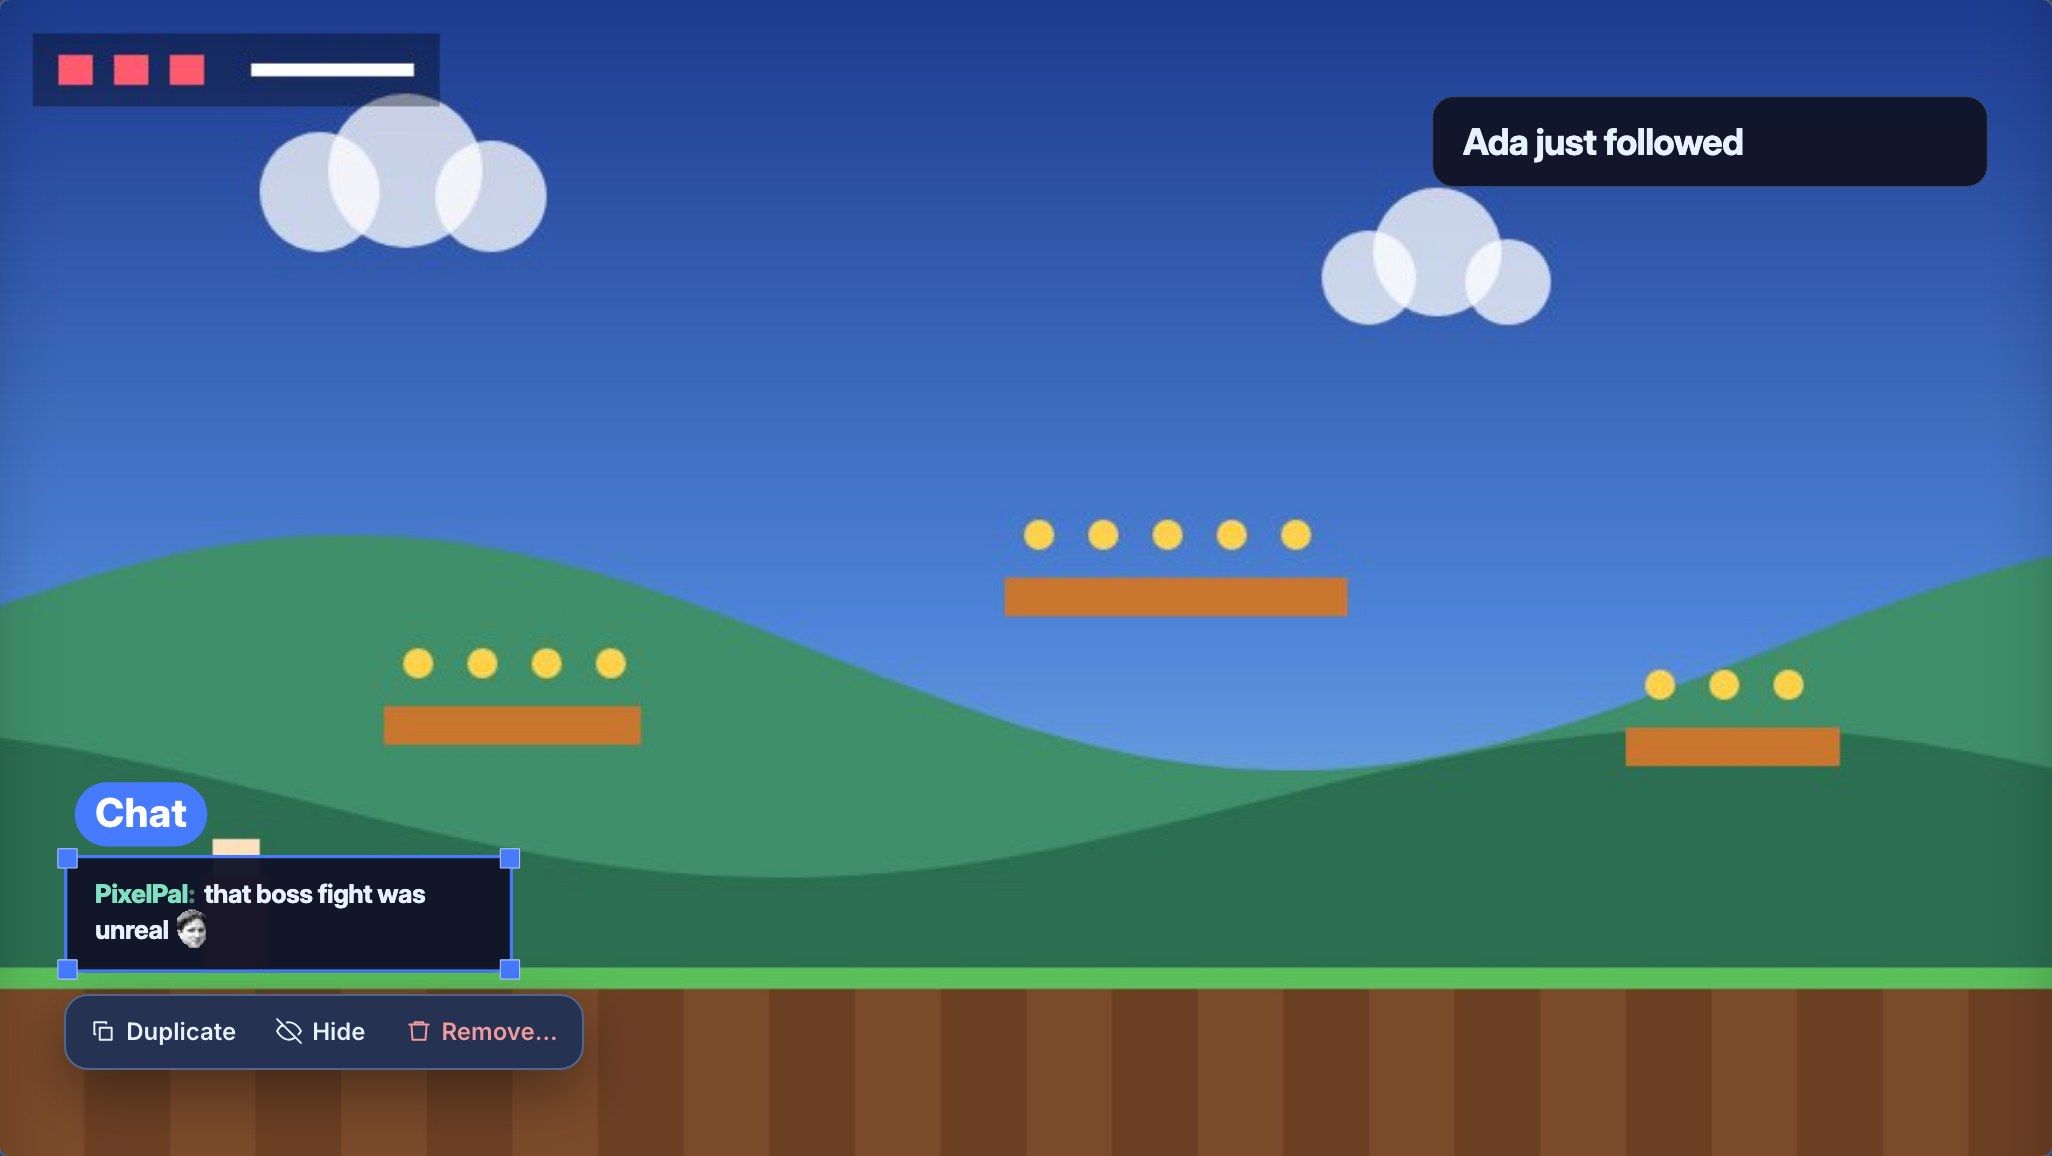
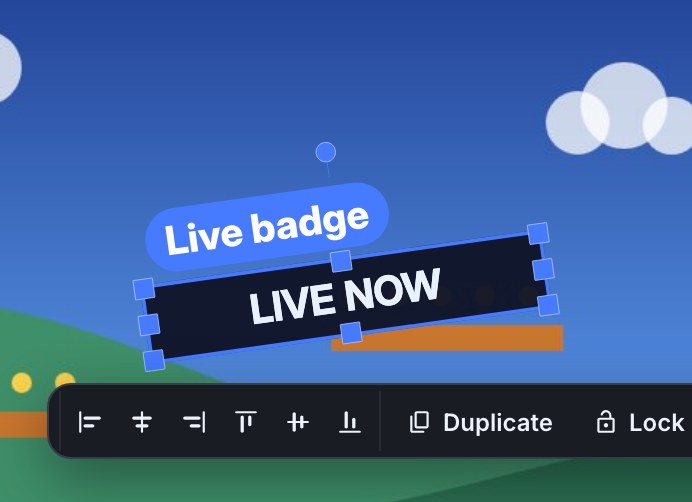
- Click a layer on the canvas to select it. Its name and its handles appear over it, with a small toolbar underneath: the six Align buttons, Duplicate, Lock, Hide and Remove…, and on an alert or Media layer Test, which plays it on the canvas only. Where layers overlap, a click picks the smallest one under your pointer, so a small layer is never stuck behind a full-screen one such as your alerts or chat. To reach the layer underneath, click the selected layer again; each click picks the next layer under your pointer, then goes round to the first again. Hidden layers are skipped, and a locked layer comes after the others.
- Drag it where you want it. The box follows your pointer, and the layer lines up with the middle of the canvas, its edges and the other layers when you get close.
- Drag any of its handles to change its size (step 2a has the details).
- Nudge a selected layer with the arrow keys — one pixel at a time, or ten with Shift held.
- Changed your mind? Undo steps back through your changes and Redo puts them back.
- You do not need to save: each change goes into your draft about a second after you make it, and the chip in the top bar counts it — 1 change · draft saved. OBS keeps showing the version it already has until you press Publish (step 5).
Alert layers move and size the same way. Their workspace starts with message, picture, sound and editor test; Layer appearance · Local, Parts · Layer and Motion · Layer change the selected placement, while Layout & timing · Shared design changes every placement using its design. To put one alert big in the middle of one overlay and small in a corner of another, see Show alerts on stream.
2a. Resize from any edge, rotate, and snap to a grid
A selected layer shows eight square handles — the four corners and the middle of each edge — and a round handle above its name for turning it.
- Drag an edge handle to change that one side: the side you drag follows your pointer and the opposite side stays where it is. Drag a corner to change both width and height; hold Shift while dragging a corner to keep the layer’s proportions.
- Drag the round handle to rotate the layer around its own centre. Hold Shift to turn it in 15-degree steps. The outline and handles turn with it, and the resize handles keep working along the layer’s own sides.
- A layer you move snaps its edges and centre, and a handle you drag snaps the edge it moves, to the canvas edges and centre and to the edges and centre of every other layer. With Safe areas on in the top bar it snaps to the action-safe margin too. Hold Alt to drag or resize without snapping. A rotated layer, or a corner held with Shift, resizes without snapping.
- Turn on Grid above the canvas for an even grid to snap to as well, and pick 8, 16 or 32 pixels from the size next to it. It is off until you turn it on.
- Nudge a selected layer’s width with Alt and the left or right arrow — one pixel at a time, or ten with Shift held.
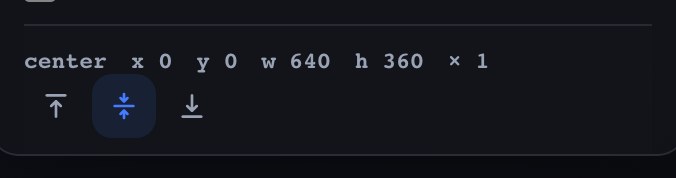
The numbers at the foot of the settings panel show where the layer sits, including its height and rotation once it has them. The reset icon (Reset rotation) there puts a turned layer upright again. A layer you never resize from its top or bottom keeps sizing itself to its own content, exactly as before.
Once a layer has a height, its content no longer has to sit at the top of the box. Three buttons at the end of the numbers at the foot of the settings panel put it at the top, in the middle or at the bottom:
- Select the layer and drag its top or bottom handle to make the box taller than what it shows.
- At the foot of the settings panel, choose Align content top, Align content middle or Align content bottom. The content moves on the canvas straight away, and in OBS once you publish.
For example, stretch a BE RIGHT BACK label to the height of your camera frame and choose Align content middle, and the words sit centred against the camera. Content taller than its box still runs off the bottom edge, never the top.
The buttons don't appear on a layer without a height, or on layers that already fill their whole box: Image, Shape, Chat, Emote Wall, End credits, Supporter ticker, Slideshow, Support Jar, Clip player and Media share player. These buttons move a layer's content inside its own box. The Align buttons in the toolbar move whole layers against the canvas or each other.
2b. Work on several layers at once
To select more than one layer:
- Shift-click or Cmd/Ctrl-click layers on the canvas or rows in the Layers list.
- Drag a box across empty canvas: every layer it touches is selected.
- Press Cmd/Ctrl+A to select every layer on the overlay.
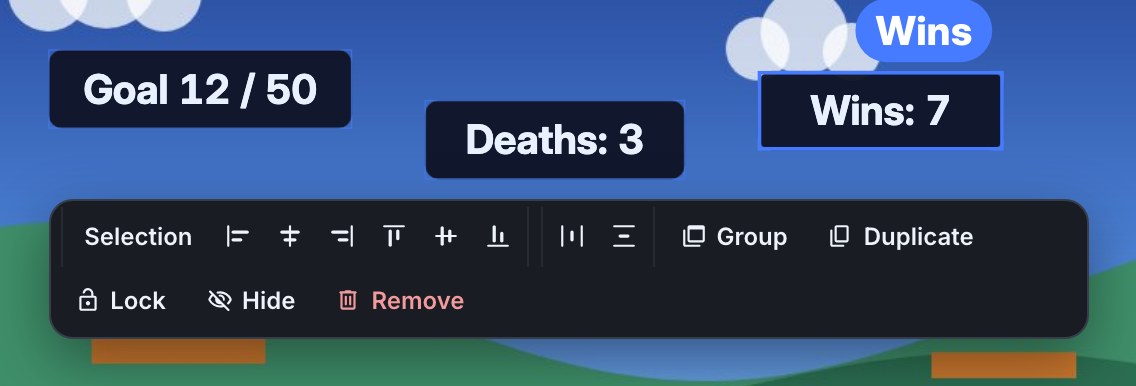
A click on one member of a selection, without dragging, selects just that layer again. With more than one layer selected, the toolbar under them offers:
- Align — left, centre, right, top, middle or bottom. The switch at its start says what they line up against: Selection (the outer edge of the whole selection) or Canvas (the 1920 × 1080 canvas). A single layer’s own toolbar aligns it to the canvas, so one click centres it or puts it flush against an edge.
- Distribute, horizontally or vertically, once you have three or more selected: it spaces the ones in between evenly, without moving the two at either end.
- Group, which ties the selection together (step 2c).
- Duplicate, Lock, Hide and Remove, applied to every layer selected. Remove here, and Delete on the keyboard, remove the whole selection at once; Undo brings it back.
Dragging or nudging any member of a selection moves every layer in it together, by the same amount.
2c. Group and lock layers
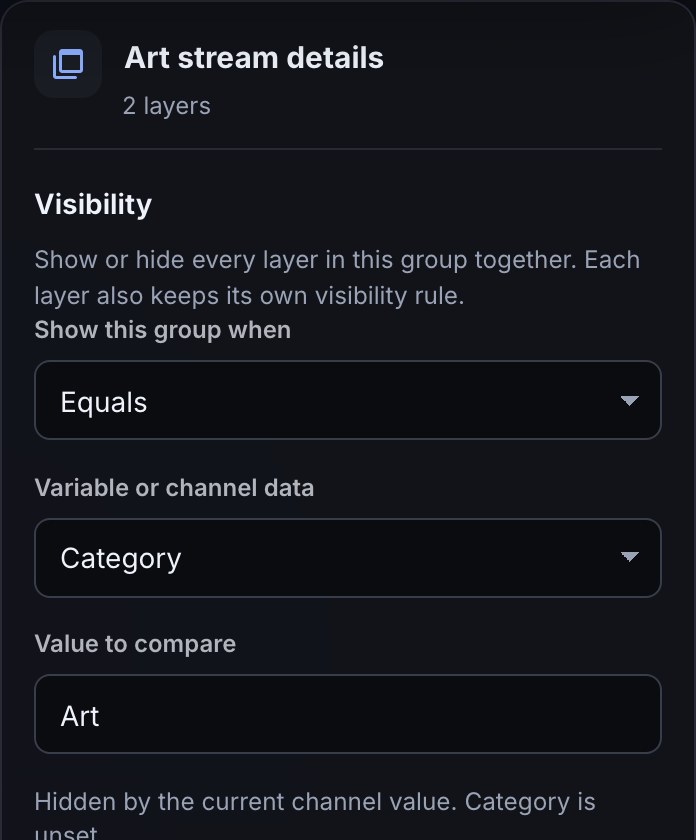
Groups. Select two or more layers and press Group in their toolbar, Group selected layers below the Layers list, or Cmd/Ctrl+G. The list shows a group heading above its members. The arrow beside the heading folds those members away and opens them again; the heading stays, so you can still rename the group or ungroup it while it is folded. Click that heading to open the group's settings on the right. Change Group name there to give the collection a useful name, such as “Starting soon details”. Under Visibility, choose a channel variable or channel data field and a comparison to show or hide every member together. For example, choose Category, Equals and Art to show a grouped title and chat box only while the stream category is Art. You can also choose an entrance and exit motion for the group. Each member's own visibility rule still applies, so a member appears only when both rules allow it. The rule waits for its first channel value before showing the group. Use Always show to remove the group rule; Undo restores a name or rule change, and Publish sends the result to OBS.
The heading's Ungroup button takes the members out again. Group headings may appear in more than one place when other layers sit between members, so the list still shows the true drawing order. A click on any grouped member on the canvas selects the whole group, and dragging, nudging, hiding and locking act on all of it. The Align and Distribute controls treat the group's combined outline as one piece, keeping the members in the same positions relative to each other. To work on one member alone, double-click it on the canvas or click its row in the Layers list. That member’s own settings open on the right, including Layer appearance · Local, and it stays in the group. A click on another member, or on the same one after you have clicked away, selects the whole group again. The group’s own settings come back when you click its heading. Ungroup in the toolbar, or Cmd/Ctrl+Shift+G, also takes the layers out of the group. A group holds ordinary layers, never another group, and a copy you Duplicate starts outside any group. If a group does not appear, check that its chosen channel value is available and matches the rule, then check the members' own visibility settings.
Lock. Once a layer is where you want it, lock it so a stray drag cannot move it: press Lock in its toolbar, press the lock beside its row in the Layers list, or press Cmd/Ctrl+Shift+L. A locked layer still draws normally, but it ignores drags, resizing, rotating and nudges, and Remove… is greyed out until you unlock it the same way. Cmd/Ctrl+Shift+L toggles: pressed on a selection that is all locked, it unlocks it. Cmd/Ctrl+Shift+H hides and shows the same way. A copy of a locked layer starts unlocked.
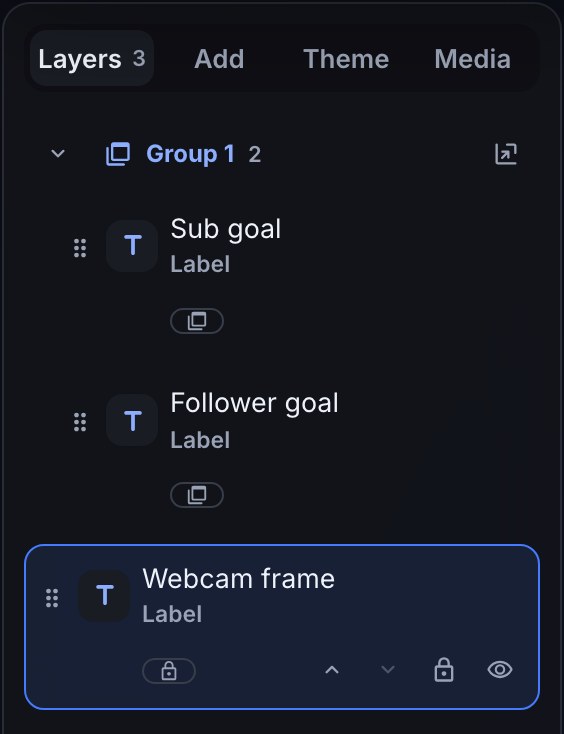
The Layers list marks a locked row with a small lock. Group members sit under their group heading and carry a small group icon.
2d. Zoom, and keyboard shortcuts
Use − and + above the canvas to zoom in for fine placement, or click the percentage to zoom back to fit. Mute preview, the speaker beside those, is on until you turn it off. A sample alert or a media file keeps replaying on the canvas as you edit, and this keeps its sound off. Turn it off when you want to hear a test here. It does not change what OBS plays. Zoomed in, the canvas scrolls: use the scroll bars, your mouse wheel or trackpad to move around it. With the pointer over the canvas, Cmd/Ctrl +, Cmd/Ctrl − and Cmd/Ctrl+0 do the same; anywhere else on the page they stay your browser’s own zoom. Zooming only changes what you see while you work; it is never part of the overlay itself.
Press ? for the full list of shortcuts, including the ones above: duplicate (Cmd/Ctrl+D), group and ungroup (Cmd/Ctrl+G, Cmd/Ctrl+Shift+G), lock and hide (Cmd/Ctrl+Shift+L, Cmd/Ctrl+Shift+H), alongside the arrow keys, Delete, Esc and undo and redo. On a phone the canvas cannot be arranged, so the arranging shortcuts and the zoom keys do nothing there; undo and redo still work.
2e. Show or hide layers from a flow
A flow can press a layer’s eye for you while you stream: a !brb command that brings in your BRB screen and hides your webcam frame, a channel-point reward that shows a Hydrate! banner for ten seconds, or a Stream Deck button that hides your sidebar. Two steps under Overlay in the flow editor do it, Show a layer and Hide a layer, and any trigger can run them.
Before you start, give the layer, or the group it is in, a name you will recognise, and publish the overlay (step 5). A layer you want a flow to bring in can stay hidden in the editor: press its eye so it starts off screen, and Show a layer still brings it in.
- Open Flows, press + New flow, and choose a trigger — for example the Chat command trigger named brb, with a Who can trigger check set to moderators.
- Add a Show a layer step. In Layer or group, type the name as your overlay shows it, such as BRB screen. Capitals and spaces at the ends don’t matter. A group’s name changes every layer in that group.
- Leave On overlay empty to change the layer on every overlay that has one with that name, or type an overlay’s name to change it on that overlay only.
- To show it for a while only, set Hide again after, for example 10 seconds. Leave it empty to keep it shown until a flow hides it. Hide a layer has Show again after instead. The time can also come from an earlier step: on the canvas, drag a data wire from a number of seconds that step hands on to Hide again after, as Starter’s Shoutout does with how long its clip plays (Play a streamer’s clip when you shout them out). When that value isn’t a time between 1 second and a day, the step leaves by error and changes nothing.
- To swap one thing for another, add a Hide a layer step after it for Webcam frame.
- Streaming in Twitch's dual format? Both steps have an Only on choice: Both layouts (the default), Horizontal or Vertical, to change the layer on just one of your two layouts (Vertical overlays for Twitch dual format).
- Save the flow and turn it on. Make a second flow,
!back, that does the opposite.
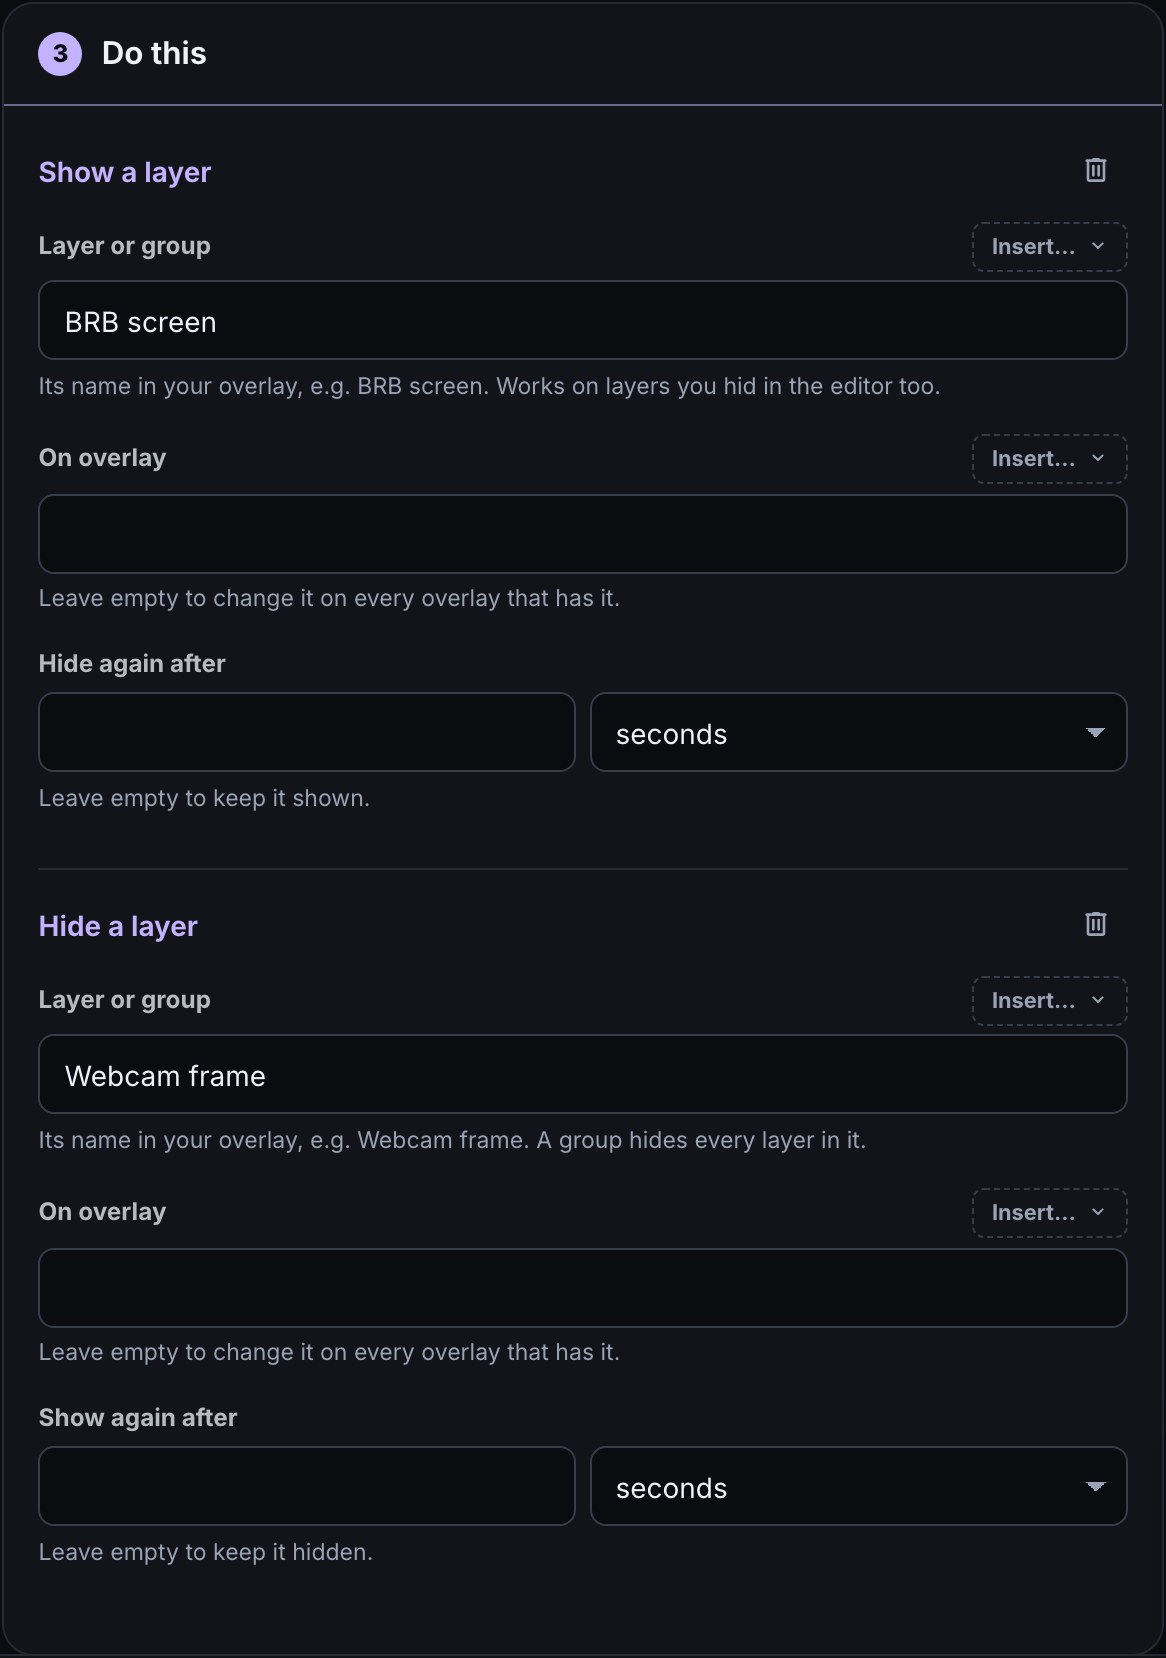
!brb flow’s steps: Show a layer brings in BRB screen, then Hide a layer takes Webcam frame off screen. Both times are empty, so the change stays. Click to enlarge.Example: !brb runs Show a layer for BRB screen and Hide a layer for Webcam frame, and !back runs them the other way round. A reward called Hydrate! runs Show a layer for a hidden Hydrate banner layer with Hide again after set to 10 seconds.
What you should see: the layer fades in or out straight away in every OBS source showing it. A layer with its own Visibility rule plays its When it appears or When it disappears motion instead, and the rule still has to allow it before it shows. The newest step wins, so after hiding a group you can show one layer of it again. The change stays when OBS refreshes the source or you switch scenes, until another step changes it or its time runs out.
A flow’s change is not saved into the overlay: Studio’s canvas keeps showing each layer’s own eye, and publishing does not undo what a flow did. Run the opposite step to change it back. Alert and Media layers can be shown and hidden too: alerts go only to the alert layers on screen, so while you hide one, its alerts play on another overlay that shows that alert, or wait in the queue until one is shown.
Test fire in the flow editor lists the change in the Run log without touching your overlay; use the flow for real to see it on stream. If the run log says No layer or group is called …, check the name in your overlay’s Layers list and that the overlay is published. No overlay is called … means On overlay names an overlay you don’t have.
2f. Glide a layer between sizes with states
A layer can have states: other places and sizes that a flow switches it to while you stream. Give your route map a small Corner state and a large Big one, and a !map command glides it from the corner to the middle of the screen. With three panels, Explore, Face and Route states can each make a different panel the big one.
Before you start, open the overlay in Studio and place the layer where it normally sits (Move and size a layer). That place is its Default state.
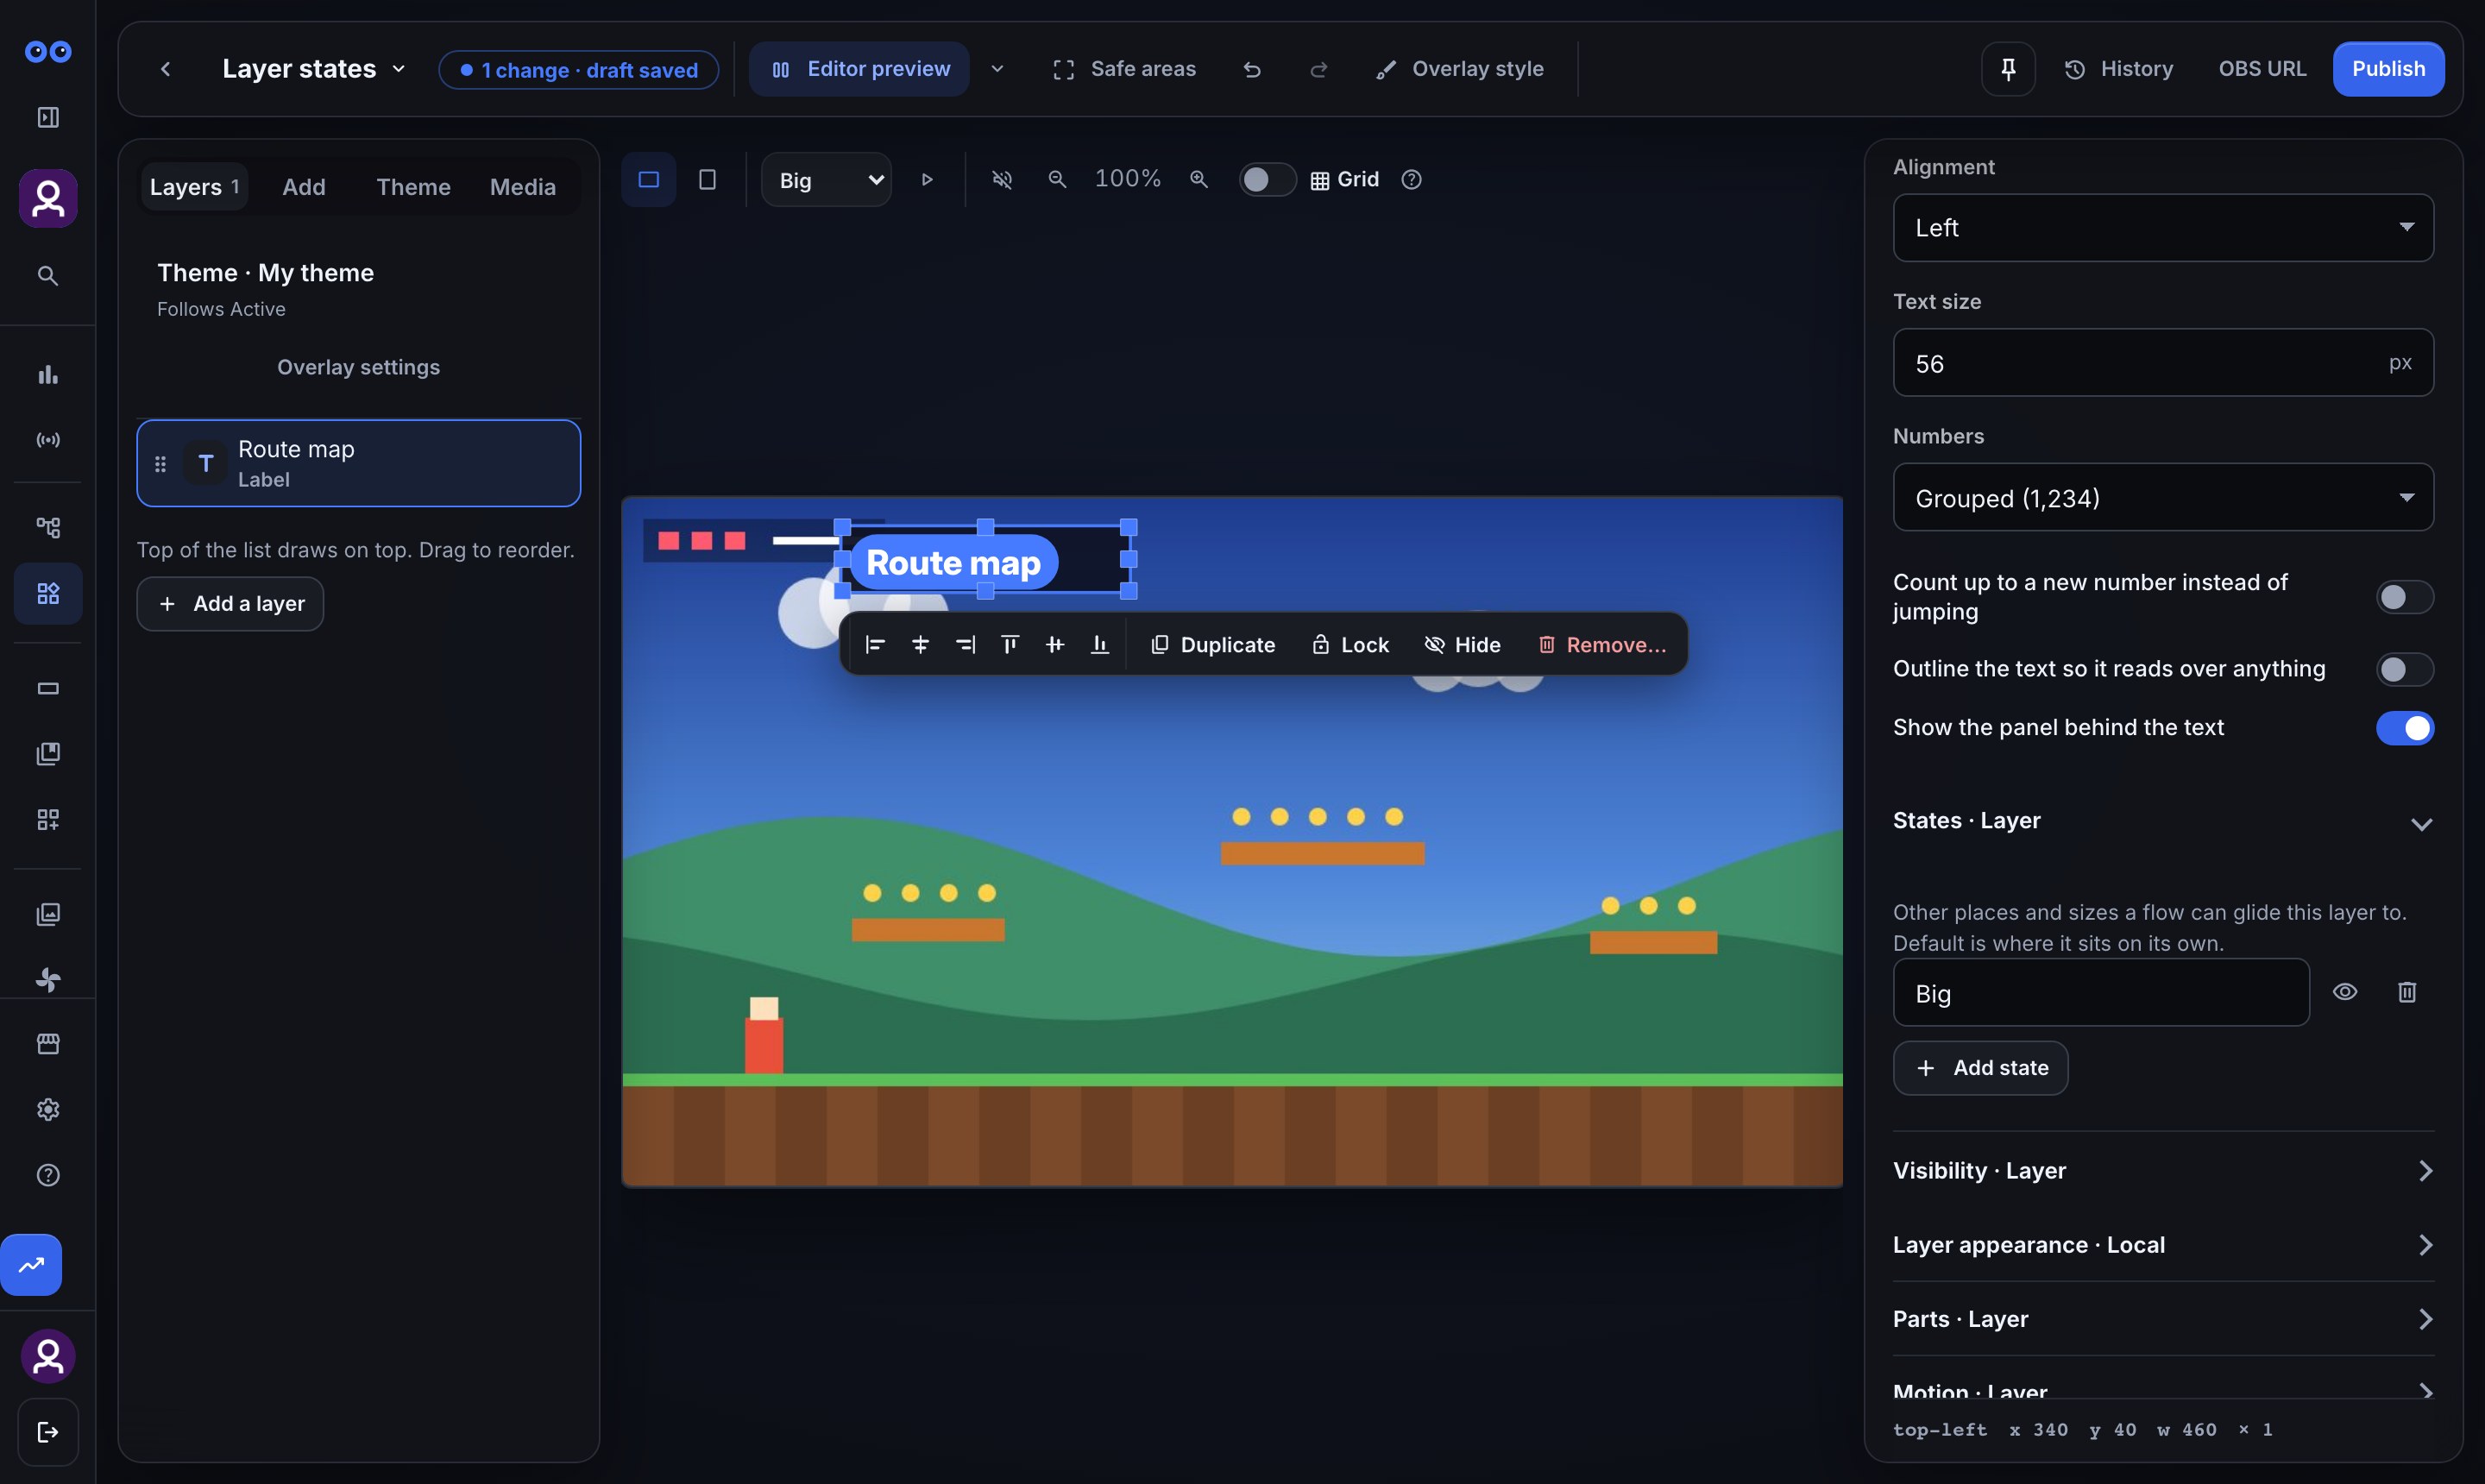
- Select the layer. In the right panel, open States and press Add state. The new state, State 1, starts where the layer is shown now. Type a name over it, such as Big, and press Enter. A layer can have up to six states.
- A state picker appears above the canvas, beside the layout icons, and now shows Big. It stays hidden until some layer has a state. Move, resize or rotate the layer: the change belongs to Big only, and Default stays where it was. Until you do, Big draws just like Default: its row in States reads Same as Default: move or resize the layer while it's shown, and the play icon is off, with the tooltip Nothing to glide: Big matches Default. Fields marked This state, such as the chat box's Messages on screen, can be different in Big too. Every other setting is shared by all states. The eye beside a state in the States list shows it on the canvas (press it again to go back to Default), and the bin deletes it.
- Pick Default in the state picker, then Big again, and press the play icon beside it. Its tooltip reads Preview the glide from Default to Big. The canvas plays the glide from the state you had before to the one you picked.
- Publish the overlay (step 5).
- Open Flows, press + New flow and choose a trigger, for example the Chat command trigger named map. Add the Change layer state step from Overlay. In State, type Big; in Layer, type the layer's name, such as Route map. Capitals and spaces at the ends don't matter. Leave On overlay empty to change it on every overlay that has the layer.
- To glide back on its own, set Go back after, for example 20 seconds. Leave it empty to stay in the state until another step changes it. To go back to the layer's own place, type Default as the state.
- Under More options, Transition is Glide or Instant. Glide time (ms) (100 to 3000, 600 to start) and Easing (Smooth, Snappy, Bouncy or Linear) shape the glide. Only on works as on Show a layer: Both layouts, Horizontal or Vertical.
- Save the flow and turn it on.
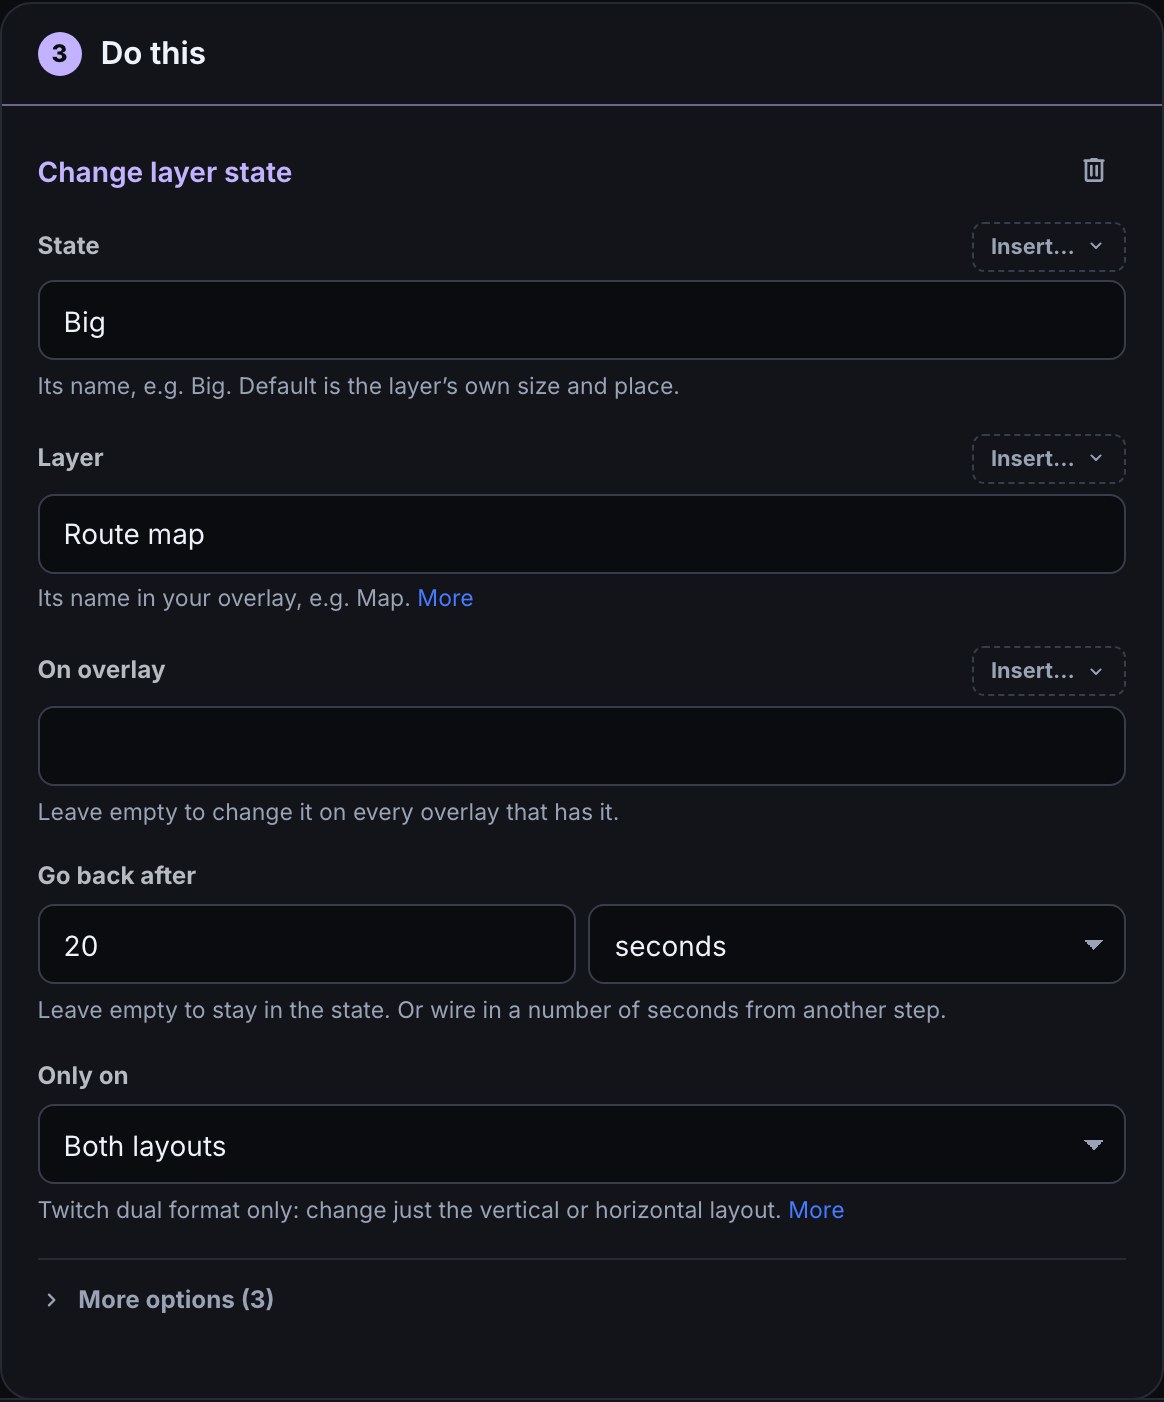
!map flow’s Change layer state step: State Big, Layer Route map, Go back after 20 seconds. Click to enlarge.Switch the whole overlay at once. Leave Layer empty, and every layer that has a state with that name glides into it together, while every other layer goes back to Default. Three tabs that pick which panel is big work like this: give the map, the face cam and the main cam each an Explore, a Face and a Route state, then make three flows whose Change layer state step has an empty Layer and the state Explore, Face or Route.
The state the whole overlay last switched to is in $(overlay.state) (Last overlay-wide layer state in the variable picker). Use it in a custom graphic or a chat reply, for example to light up the tab that is showing. It is empty until a flow switches the whole overlay.
Example: a Label layer named Route map has a Corner state at 300 × 300 in the bottom right and a Big state at 1200 × 800 in the middle. !map runs Change layer state for Big on Route map with Go back after set to 20 seconds.
What you should see: the layer glides to its new size and place in every OBS source showing the overlay. Its content is drawn again at each size on the way, so text stays sharp. An OBS source refreshed later opens straight in the current state. If a viewer's computer is set to reduce motion, or the step is set to Instant, the change happens at once. The Clip player and the Media share player move to their new place but keep their size.
A flow's change is not saved into the overlay. Studio shows each layer in Default until you pick a state, and publishing does not undo the change, except that a layer goes back to Default when you delete the state it is in and publish. Test fire lists the change in the Run log without moving anything; run the flow for real to see it. If the run log says … has no state called …, check that state's name on that layer in Studio, and that the overlay is published.
A state can have its own Shape and Outline too (Shape a layer). Pick the state in the state picker above the canvas, then change them under Layer appearance · Local: they are marked This state, and the reset icon (Use the Default shape or Use the Default outline) hands them back. Choosing None in a state draws the plain box there, so a camera panel can lose its angles when it goes big.
3. Mix the types you want
One overlay can hold pieces of different types — a goal bar along the bottom, a chat box in the corner, a counter in the other — instead of one Browser Source for each. They all come from the Add tab:
- Choose Add at the top of the left panel, beside Layers. Use Find a widget… to search names and descriptions, your own widgets included, or choose Alerts, Media, Chat & info or Goals & games to narrow the list. All shows every group. If nothing matches, choose Clear filters.
- Drag a layer’s name onto the canvas: the layer lands where you drop it, at that type’s usual size. Nothing asks first — a new layer does nothing until you set it up.
- For a quick add, press the Add icon beside a layer’s name. Add puts the layer in the middle of the canvas. Select the name instead to open its full gallery in the left panel. The built-in example and every widget listed under that type appear as full-width cards, one below another, even if your search matched only one of them. Select a card to put that widget in the middle of the canvas. The heading explains what the type does and whether this overlay already shows it. Either way the new layer is selected and the left panel switches back to Layers. Back, or Esc, returns to the list with your search and category kept.
- Give it a name you will recognise: the name at the top of the settings panel on the right is where you type it. To take a layer off screen without losing it, press the eye beside its row, or Hide on the toolbar under it.
- A row with your own widgets under it shows a count and an arrow beside Add: open it to place one. More, at the end of a section, holds the rest (Place it on another overlay).
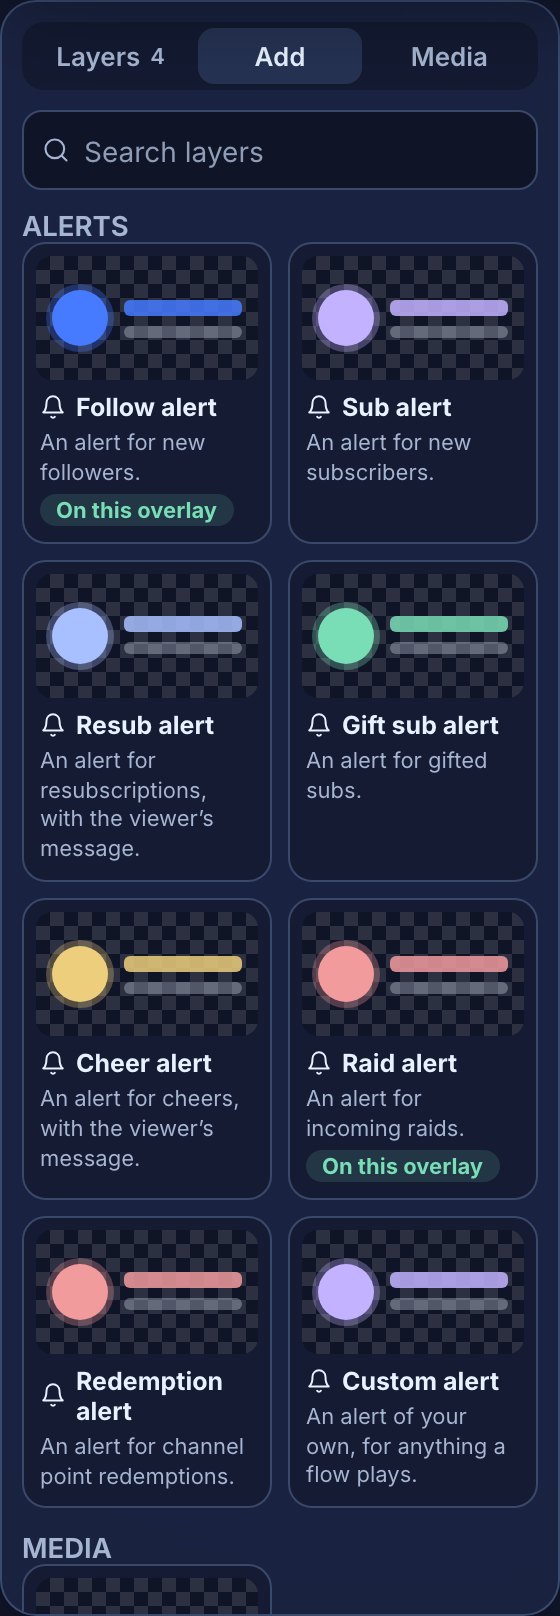
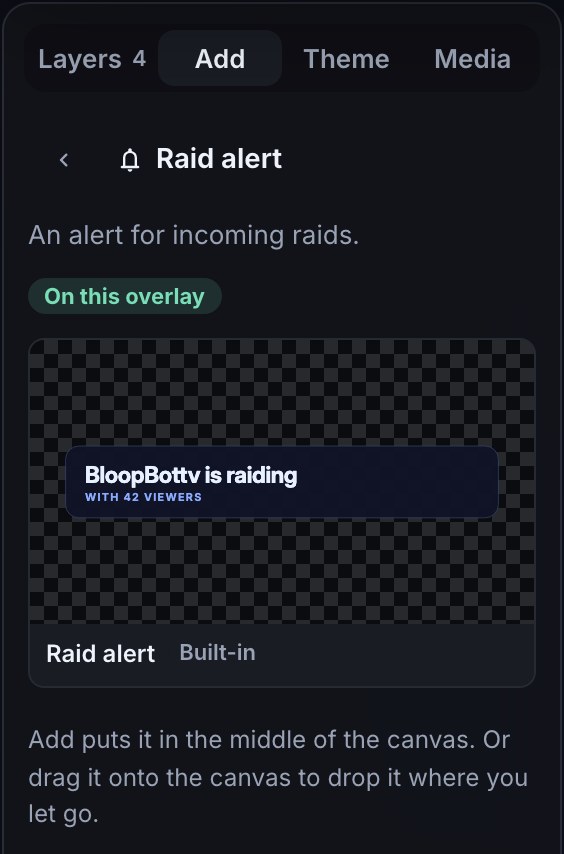
To build your own widget, choose New widget at the foot of Add. It stays outside the categories and search results. The widget goes on your Widgets page too, ready for any overlay: see Reuse your widgets in every overlay and Author a custom graphic.
A widget holds up to 24 layers — when it is full the Add tab says This overlay holds as many layers as it can — and every type is offered on every widget: two counters, or two chat boxes, are simply two pieces of the overlay. For ready-made overlays, open Marketplace or Overlays → Add. To add a theme, choose Theme → Add a theme for Browse marketplace or Create new theme (Add a theme).
Alerts work the same way. Each alert type — Follow, Sub, Resub, Gift sub, Cheer, Raid, Redemption and Custom alert — is its own layer, and you can place it on any overlay: raids big in the middle of one, follows small in the corner of another. A layer shows one design, and a design belongs to your channel, not to the layer, so a change you make to it from one layer changes it everywhere it is shown. Every alert, and every file a flow plays, waits its turn in one shared queue and plays one at a time, so nothing overlaps or talks over anything else. The Media layer is where your Play media flows show their images, videos and sounds.
Some layers show something you run from the dashboard. The Viewer queue layer, under Goals & games, shows who is waiting in your viewer queue and follows it as viewers join and are pulled.
To check a mixed overlay piece by piece before you go live, open Simulate in the top bar. Under Test events it lists a test for every type on the overlay, grouped by type. They play on the canvas only; tick Also play on the live overlay in OBS when you want one to reach your stream, where viewers see it.
3a. Add an image or a shape
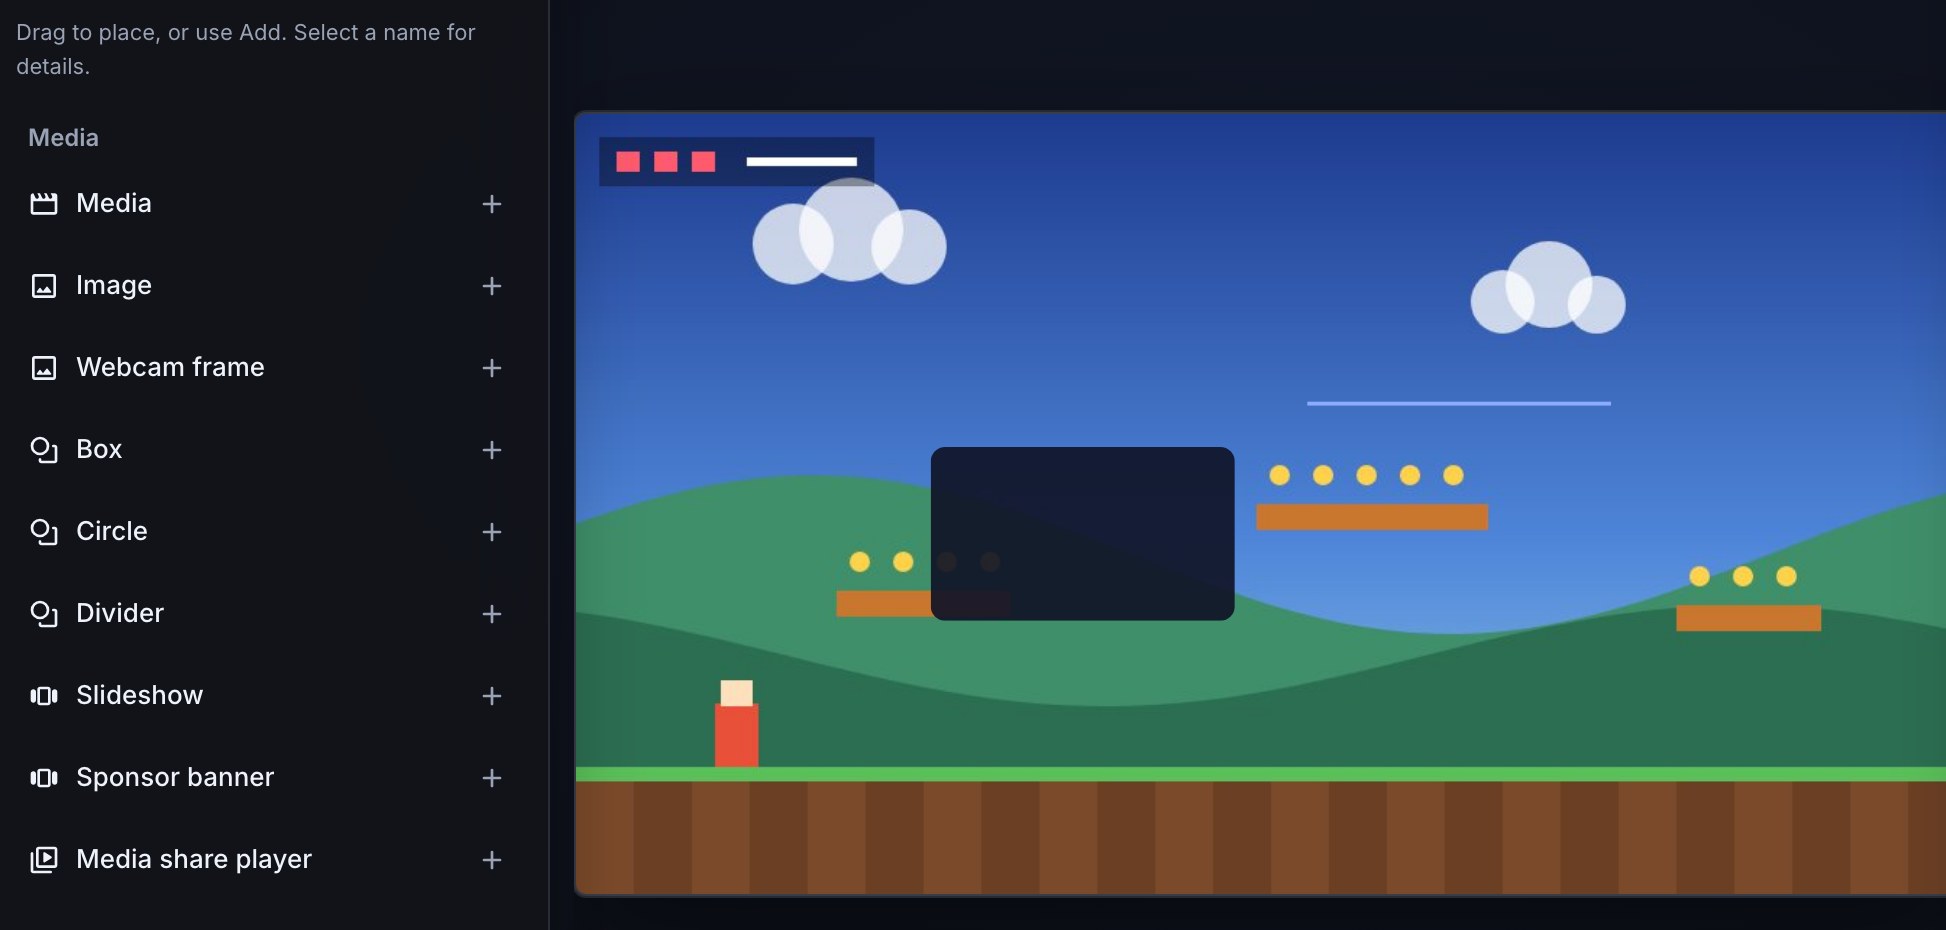
Two more tiles live under Media in the Add tab, for pieces that draw nothing on their own — a picture, or a plain filled box.
- Image shows one file from your media library. Set its Fit — Fit inside the box, Fill the box or Stretch to the box — its Opacity and its Corner radius. A GIF or WebP file keeps playing exactly as it does anywhere else, even when the computer showing it asks for reduced motion; there is no separate animation setting for it. Until you pick a file, and if you later delete that file from your media library, the layer shows nothing at all on stream — the layer stays in the list, ready for a new picture.
- Webcam frame is the same Image layer with a fixed 16:9 box already sized and placed bottom-right, ready for a decorative frame around your camera: upload the frame picture (its centre transparent, where your camera shows through), pick it here, and drag your camera source under it in OBS. If your theme has a Panel frame, the picture wears that too; press None under Panel frame in the layer’s Layer appearance · Local section when your picture is the frame (Put a frame around one layer’s panel, lines or cards).
- Box, Circle and Divider are the three Shape layers: a rounded rectangle, an ellipse and a thin filled bar. Each one's Fill is the same colour, gradient or image control as an overlay's own background (Give the overlay a background) — never a video, since a decorative shape is not worth a video decoder running for as long as OBS shows it — plus a Border width and Border colour for the rectangle and the circle. A rectangle also has its own Corner radius. A Box or Circle wears your theme’s Panel frame as well, whose Frame width replaces its Border width while it is on; a Divider never does. A Divider has a Thickness instead (1 to 40 px): the bar is drawn that thick, centred across the layer's height, so drag the layer's ends to make it longer and use Thickness to make it bolder.
A shape’s Border colour, and its Fill colour or gradient stops, can follow your theme: open the colour’s menu and pick Theme accent, Theme panel or Theme text instead of Custom colour. The shape then changes with your Active theme, which is how the camera frames and bars on Bloopbot’s ready-made overlays follow it. Pick Custom colour to fix it to the colour it shows now. The overlay’s own background has the same menu.
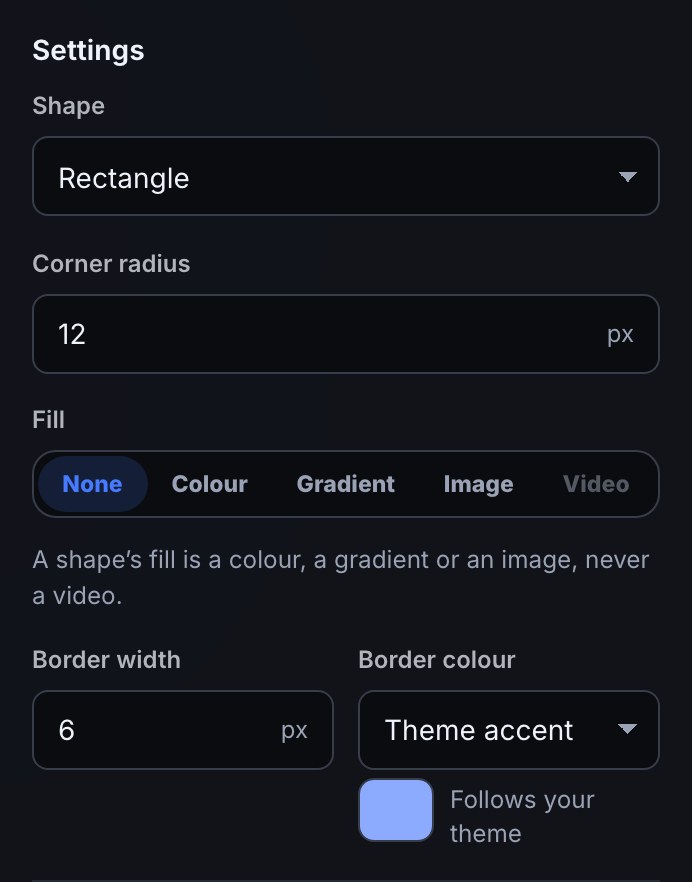
Drag either kind's tile onto the canvas, or open it and press Add, exactly as any other layer (step 3). Webcam frame, Box, Circle and Divider always start at their own size; Add puts them where that tile places them (the webcam frame bottom-right, the others in the middle), and a drop puts them where you let go. The plain Image tile starts from your last Image layer on this overlay — same fit, opacity and rounding — so a second logo matches the first; pick its file and it is ready. A Shape or Image layer resizes and moves like every other layer.
An Image layer's Corner radius rounds the layer's box, separately from any radius your theme gives its panel. With Fill the box or Stretch to the box the picture fills that box, so its corners are rounded too. With Fit inside the box, a picture whose shape differs from the box sits inside it with empty space around it, and the rounding falls on the box's corners in that empty space, not on the picture: size the box to the picture, or pick Fill the box, when you want the picture's own corners rounded.
Under Parts (Style one part at a time), an Image layer has one part, Picture, and a Shape layer one, Shape. Corners or a Border set on that part are drawn instead of the layer's own Corner radius and border, so set them in one place or the other; the layer's own settings are the simpler place.
3b. Show a slideshow or a sponsor banner
A Slideshow layer shows pictures from your media library one after another — your sponsors' logos, fan art, a "coming up" reel. You'll find two tiles for it under Media in the Add tab:
- Slideshow starts a 16:9 box in the middle of the canvas that fits each picture inside it and changes every 8 seconds.
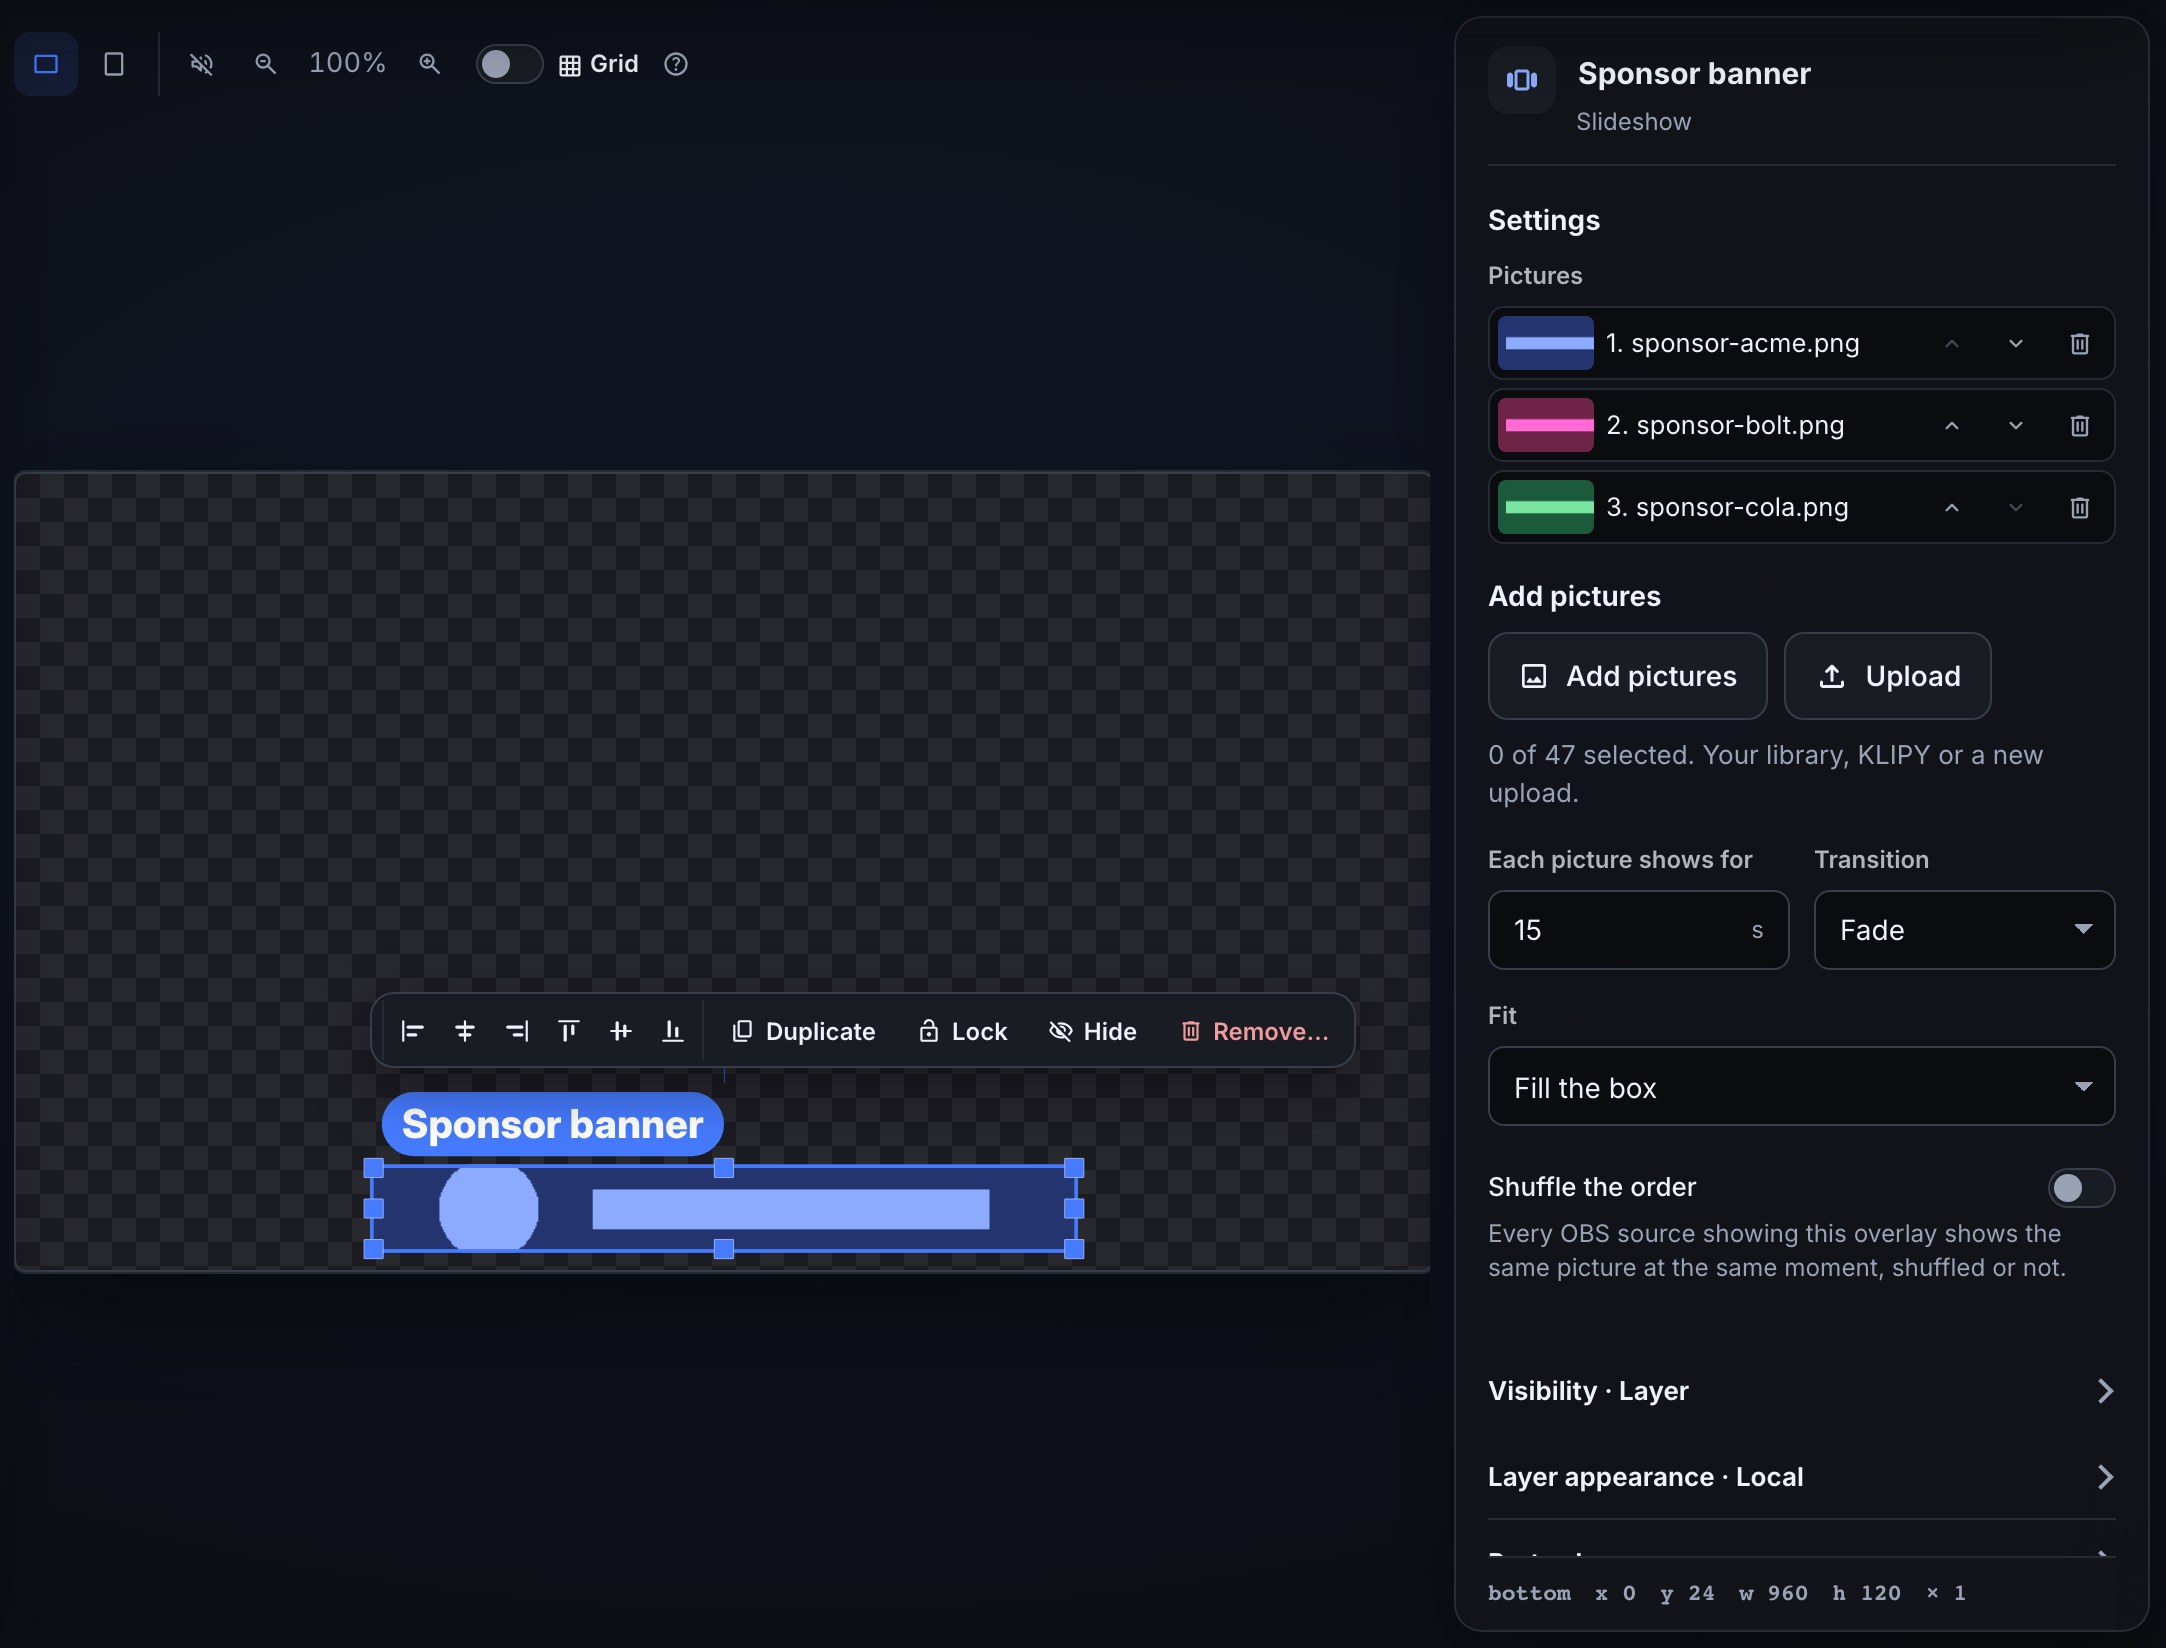
- Sponsor banner starts a wide, short strip along the bottom that fills its box with each picture and changes every 15 seconds — made for a row of logos.
Both tiles make the same kind of layer, so you can turn one into the other by changing its settings or dragging its box. To build one:
- Drag the Sponsor banner (or Slideshow) tile onto the canvas, or open it and press Add.
- In the layer's settings, press Add pictures to add several pictures at once, or Upload to add a new picture there. PNG, JPEG, GIF and WebP all work, and a GIF or WebP keeps playing while it is on screen.
- The pictures show in the order of the Pictures list. Use the up and down arrows to reorder them, or the bin to take one out. You can add the same picture again so it comes round twice as often. A slideshow holds up to 50 pictures.
- Set Each picture shows for (2 seconds to an hour), the Transition — Fade, Slide or Cut (no transition) — and the Fit: Fit inside the box, Fill the box or Stretch to the box, as on an Image layer.
- Tick Shuffle the order if the pictures shouldn't always come in the same order. A shuffled slideshow still shows every entry in the list once before any comes round again, and never shows the same entry twice in a row. A picture you added to the list twice counts as two entries, so now and then it can stay on screen for two turns running.
- Publish (step 5).
Example: three sponsor logos in a Sponsor banner, 15 seconds each, Fill the box, Fade. On stream, each logo stays for 15 seconds and then fades into the next, round and round.
The rotation follows the clock, not the moment a page was opened. Every OBS source that shows this overlay — in two scenes, or a scene and a preview — shows the same picture at the same moment, and so does a source you refresh or add mid-stream. Shuffled slideshows agree too, and so do slideshows a flow has moved (below). The editor's canvas is running the same rotation as your stream, so it shows the same picture.
Move it from a flow. A flow can move a slideshow on for you: a !next command for your mods, a new sponsor's logo when a reward is redeemed, or the first picture again when you go live. Add a Control a slideshow step (under Overlay) to any flow:
- Open Flows, press + New flow, and choose a trigger — for example the Chat command trigger, named next, with a Who can trigger check set to moderators.
- Add a Control a slideshow step and choose what it does under Do what: Next picture, Previous picture or Show picture number….
- For Show picture number…, type the picture's place in the Pictures list in Picture number: 1 for the first. You can use a variable, such as
$(1)for the number after the command, so!slide 3shows the third picture. - In Slideshow layer, type the layer's name as it is called in your overlay, such as Sponsor banner, to move only that one. Leave it empty to move every slideshow on your overlays.
- Save the flow and turn it on.
Example: a !next command with Next picture and Slideshow layer set to Sponsor banner. A mod types !next, and the banner fades to the next logo straight away. That logo then gets its full 15 seconds before the banner carries on round the list as before.
What you should see: the picture changes at once, with the layer's own Transition, and the timer starts again from that picture, so it always gets its whole Each picture shows for. Every OBS source showing the slideshow moves together and stays in step afterwards, and a source you open or refresh later picks up from the same place. A shuffled slideshow shows the picture you asked for and then carries on in its shuffled order, the same on every source.
Test fire in the flow editor lists the move in the Run log without changing your overlay; use the flow for real to see it on stream. If the run log says No Slideshow layer is called …, check the layer's name, or leave Slideshow layer empty. … has only 3 pictures means Picture number is past the end of the list. A slideshow moves only once you have published the overlay it is on. If the picture you asked for has been deleted from your media library, the next picture in the list shows instead.
If you delete a picture from your media library, the slideshow skips it. The Pictures list keeps it, marked Missing file, so you can see why a sponsor never shows up and remove it. A picture a slideshow is still showing on your published overlay can't be deleted from the media library: take it out of the list and publish first. With no pictures, the layer shows nothing on stream.
When the computer showing the overlay asks for reduced motion, Slide fades instead. OBS itself never asks for it.
Under Parts (Style one part at a time), a Slideshow layer has a Frame — the box the pictures show in, where Corners, a Border or a Fill go — and a Picture, which is each picture. In custom CSS they are .w-slideshow and .w-slide.
3c. Roll end credits
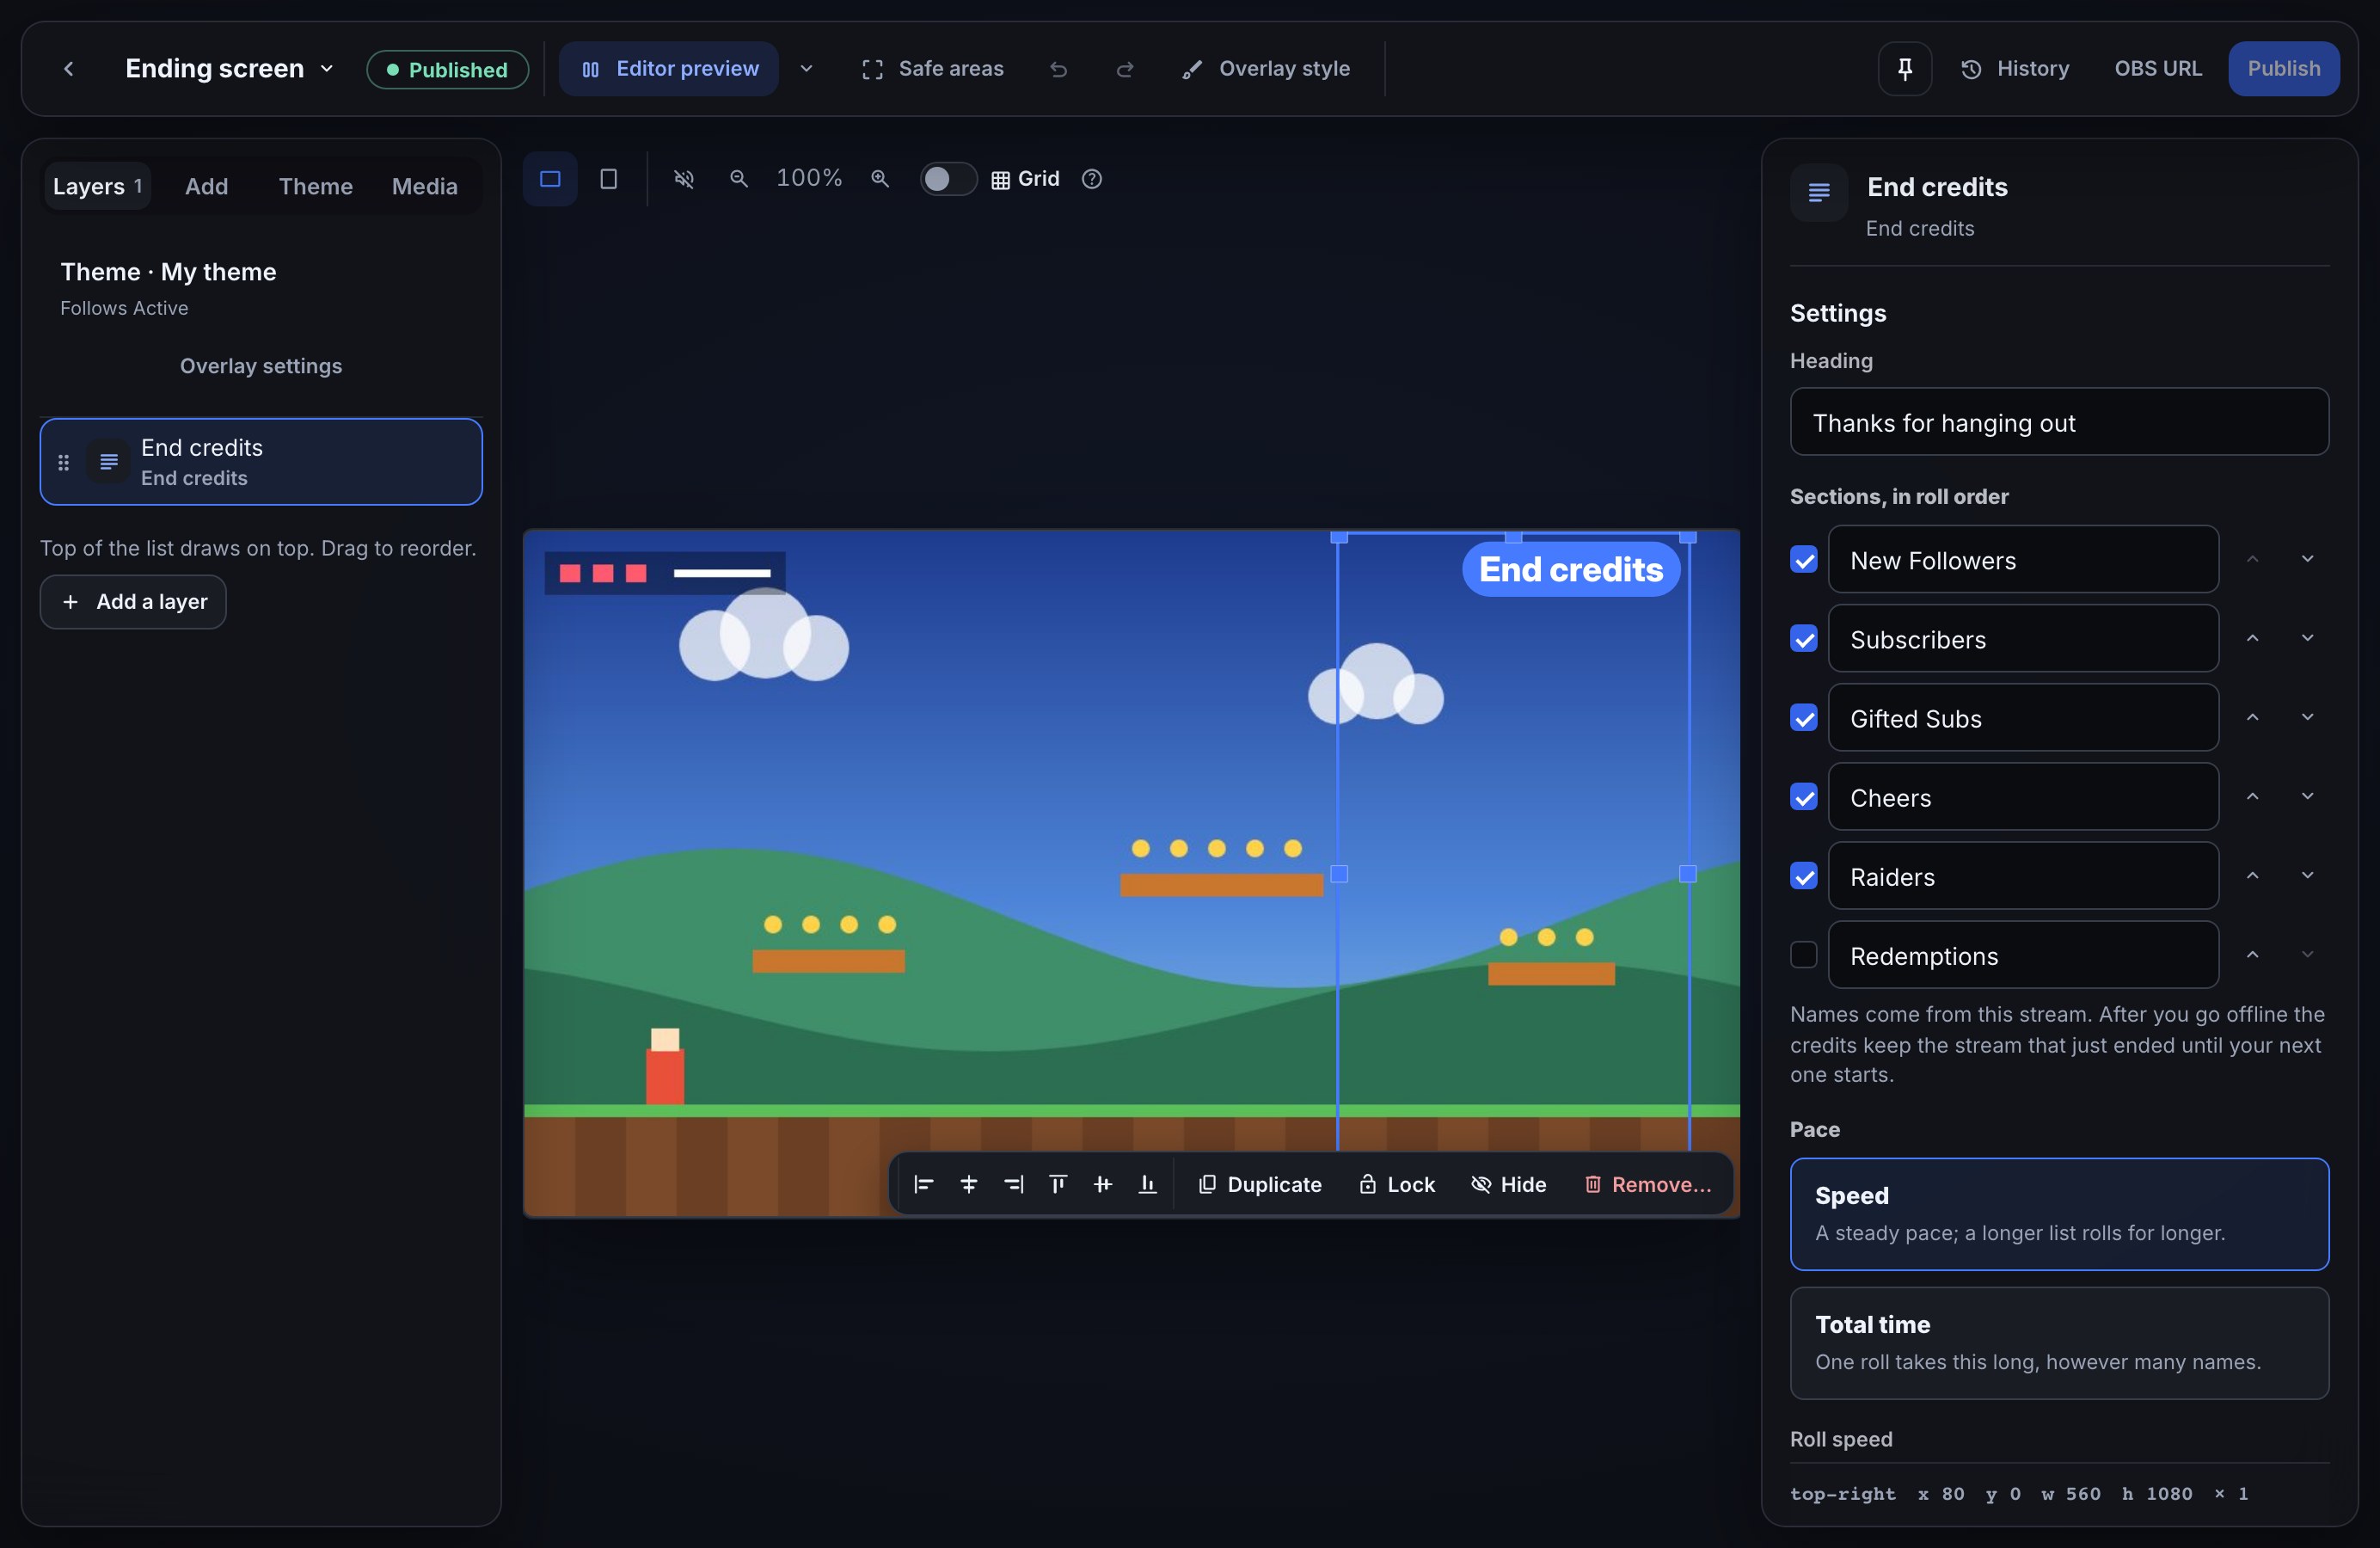
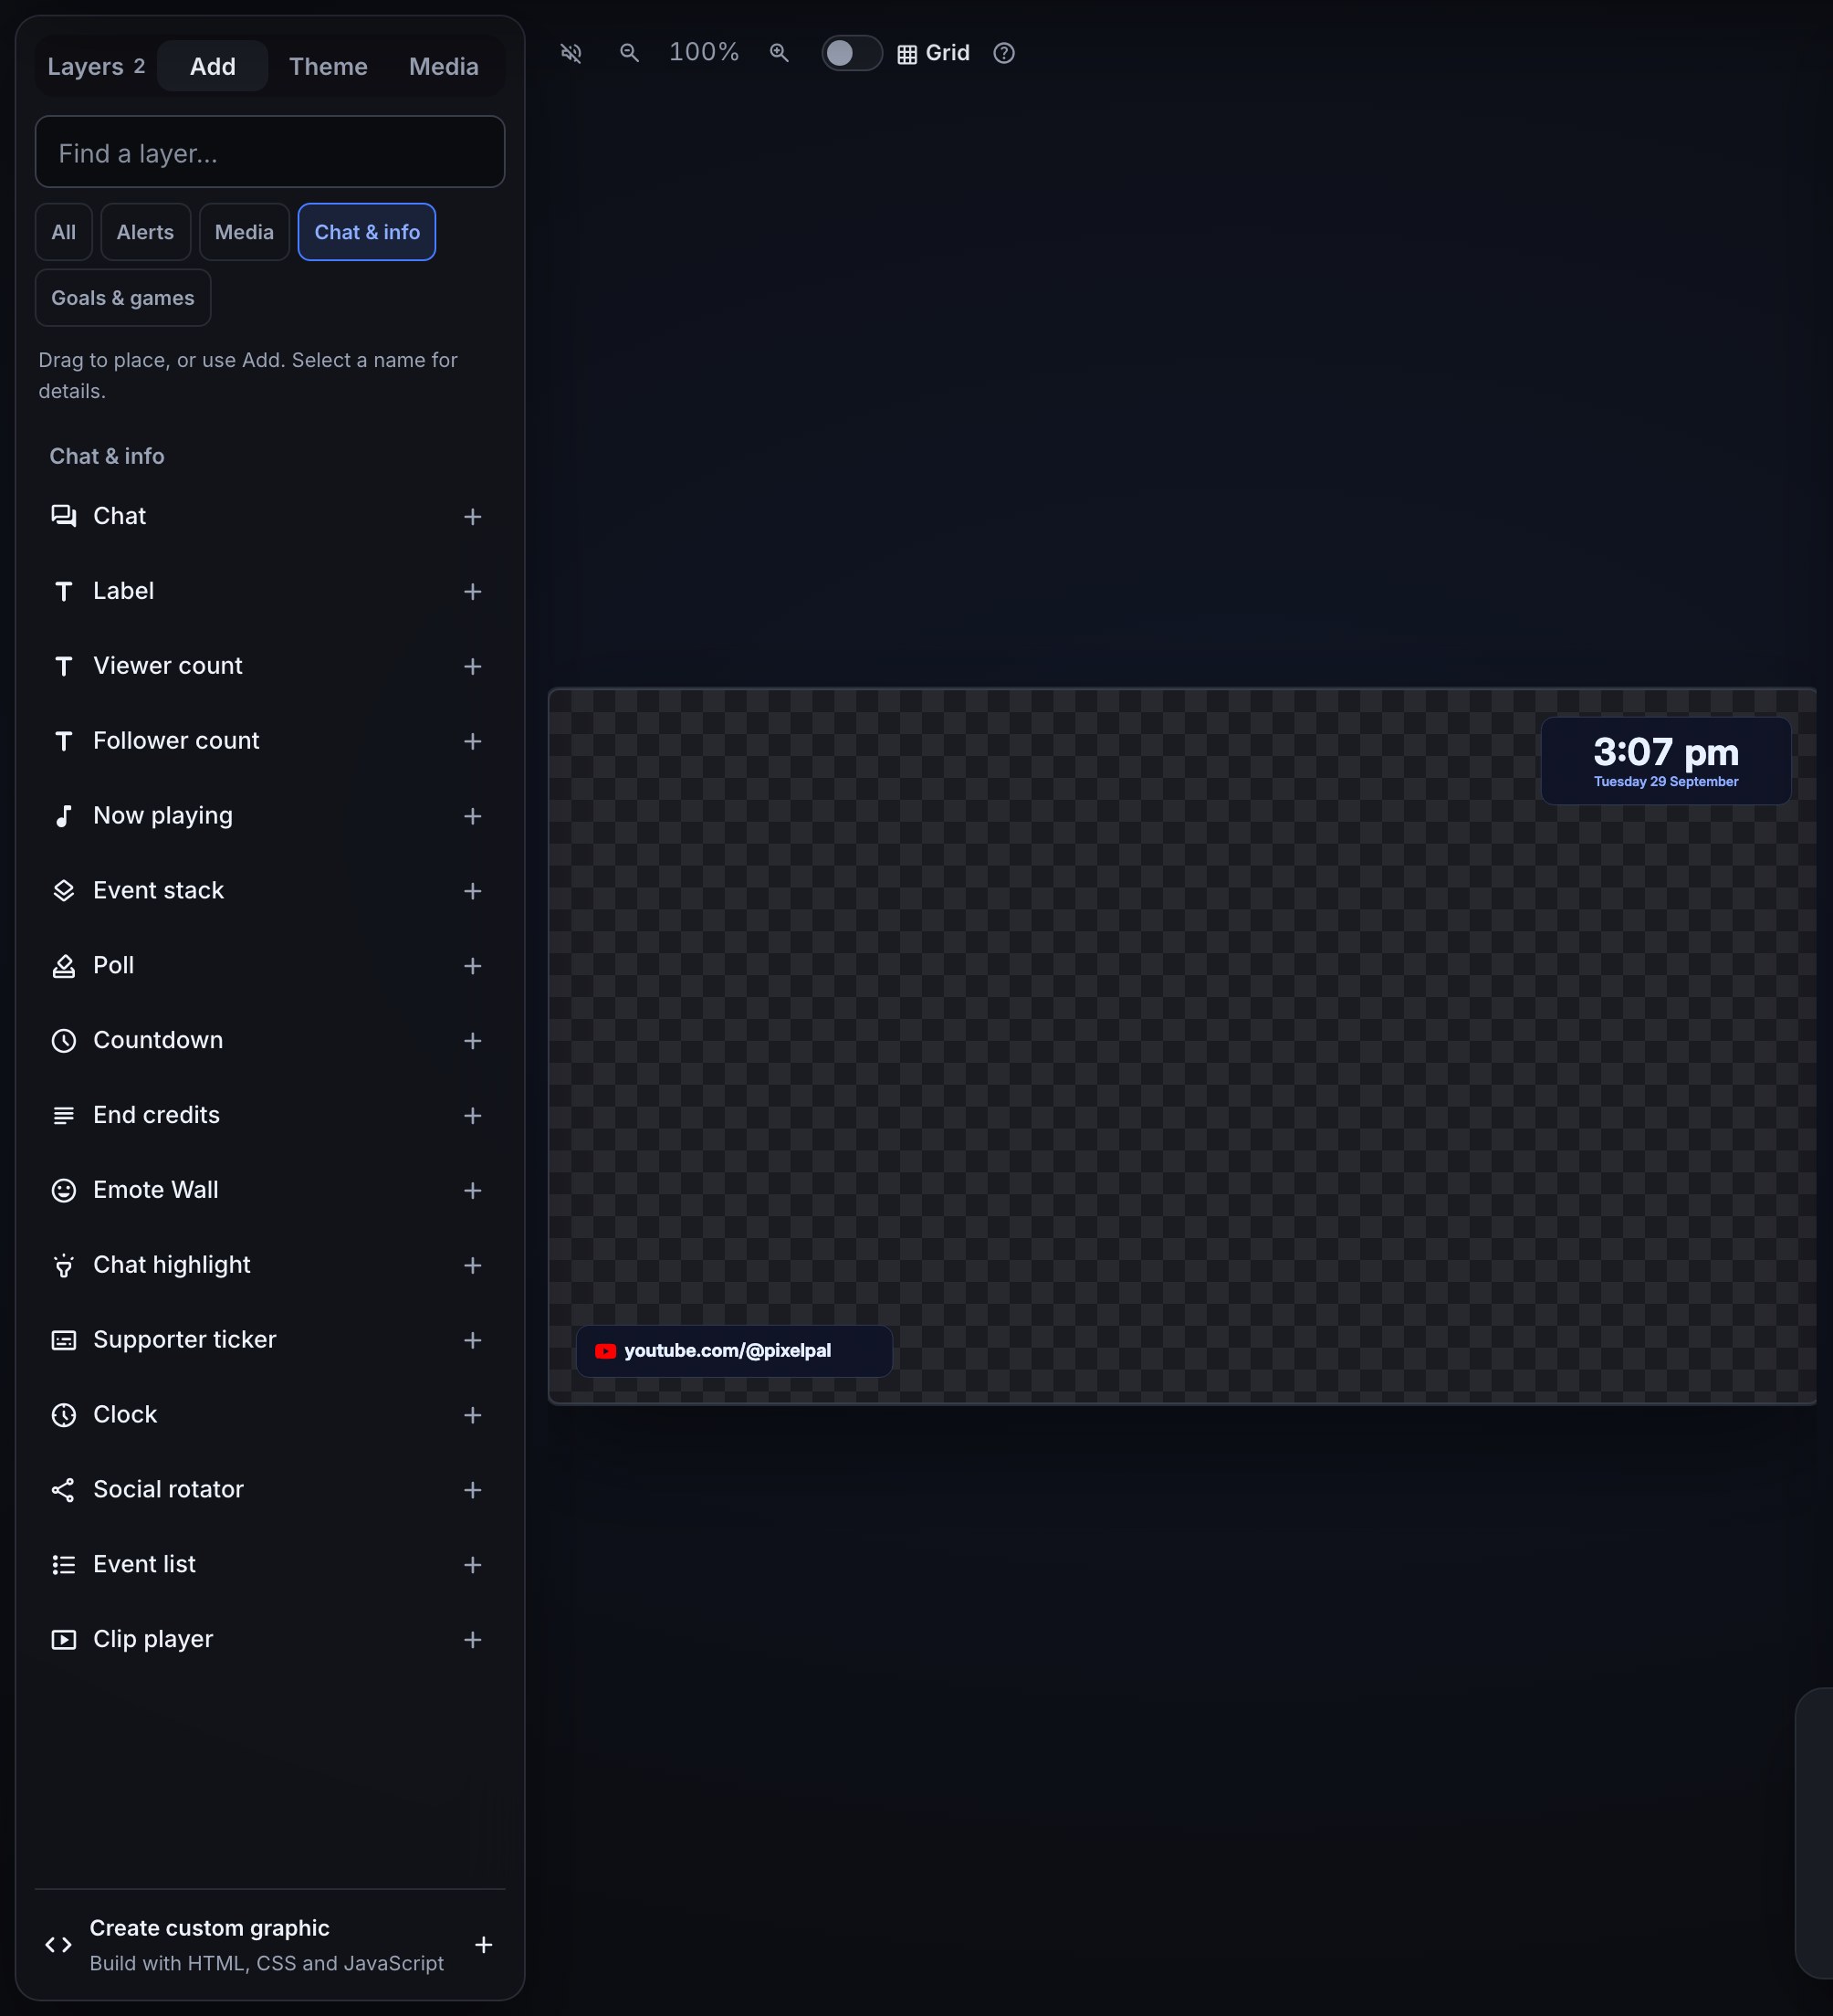
An End credits layer rolls the people who supported your stream, section by section — new followers, subscribers, gifters, cheerers and raiders — then an end card. It is made for the screen you show when the stream ends: its card drops in as a full-height column on the right, leaving the middle of the screen clear.
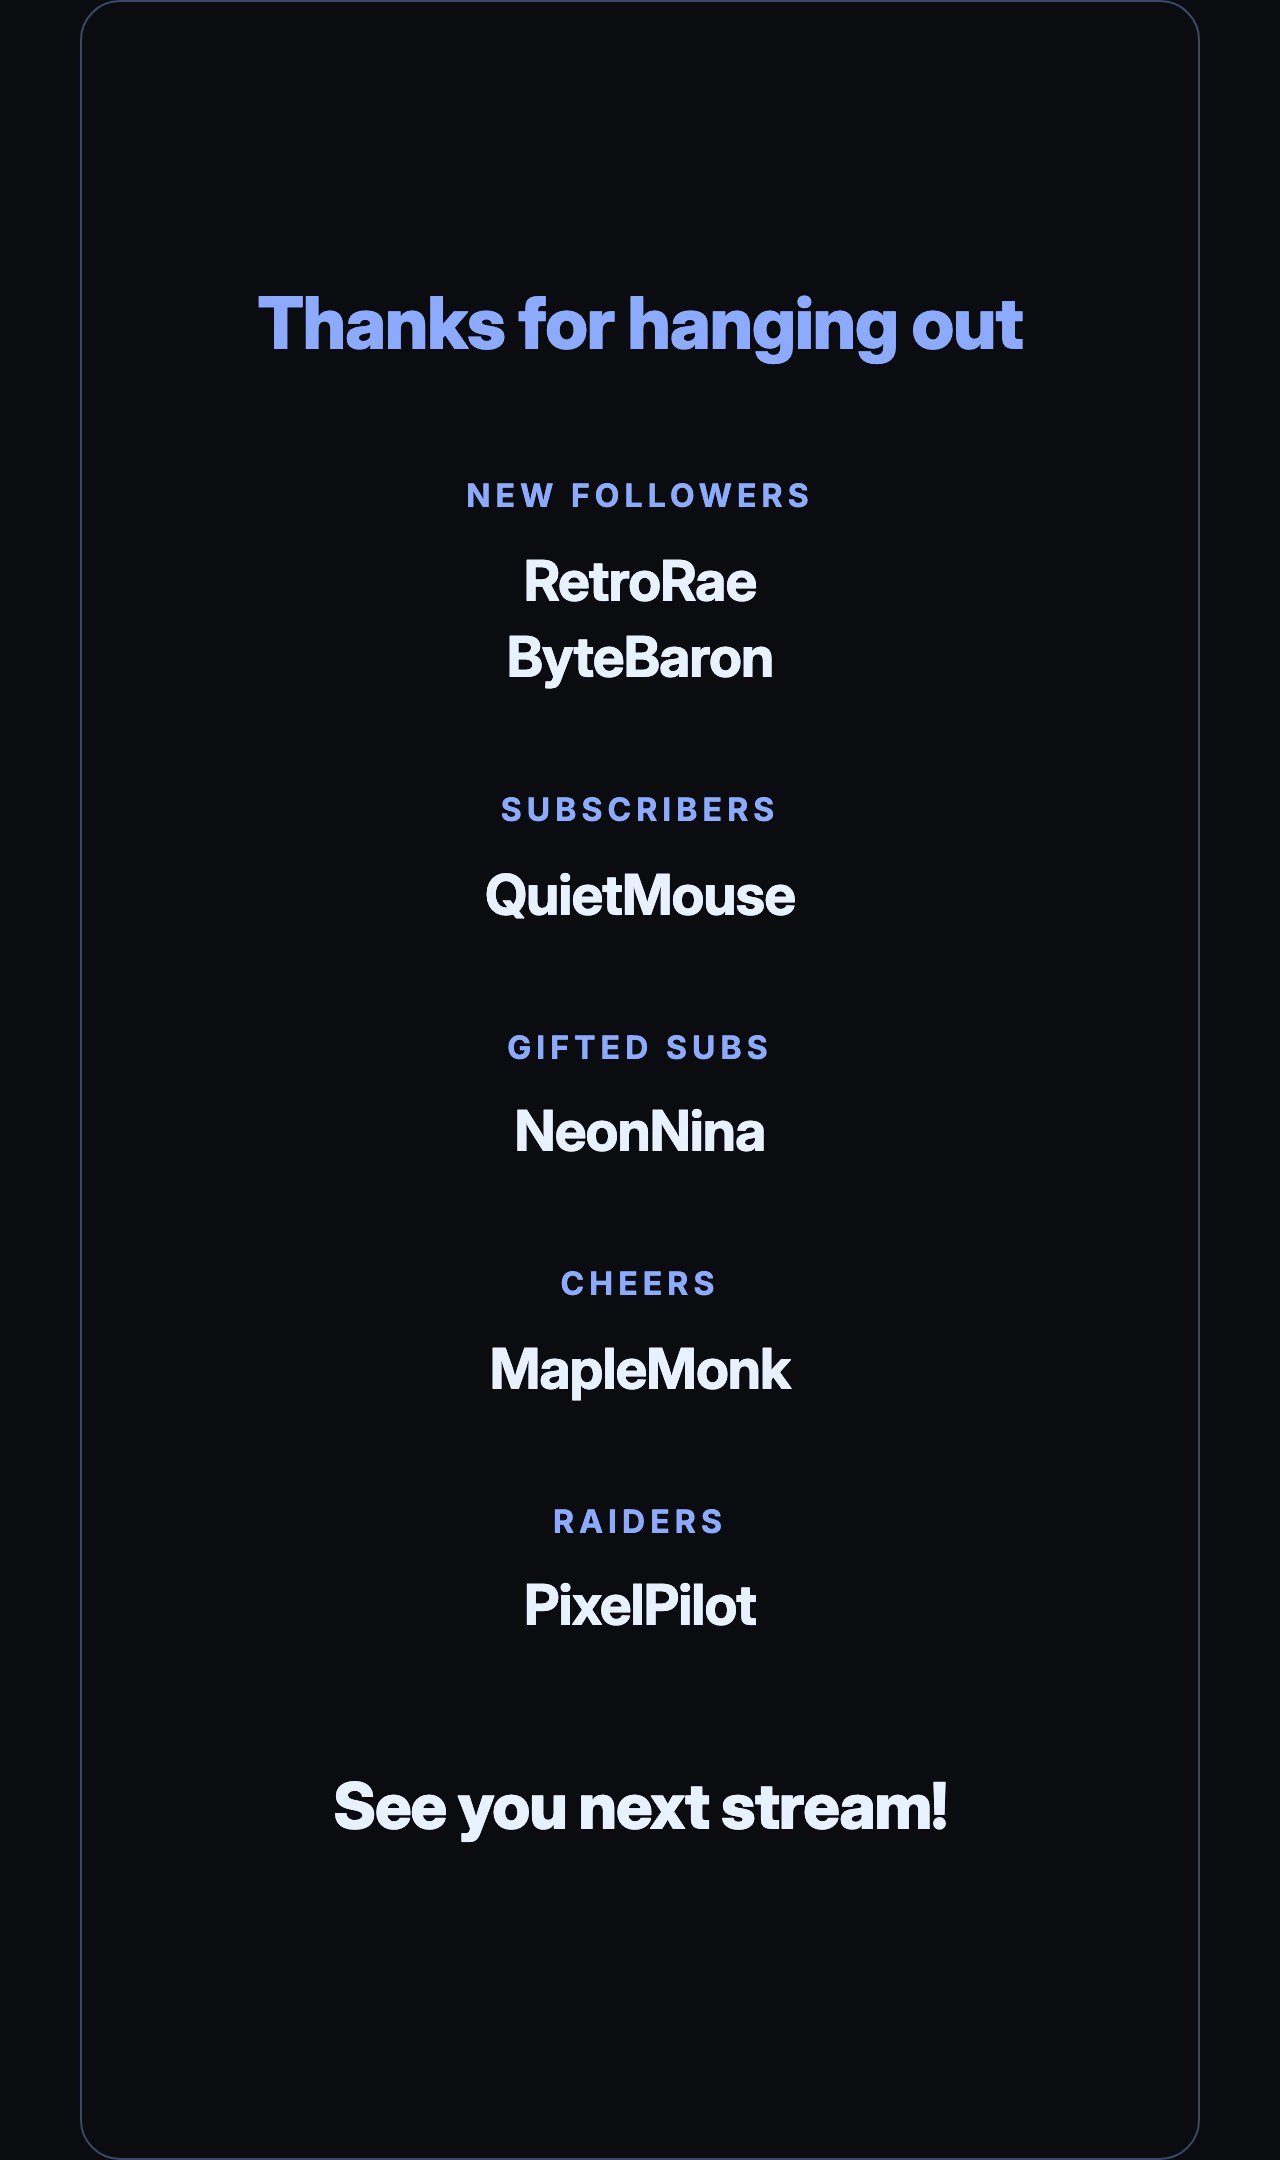
- Choose Add and drag the End credits tile from Chat & info onto the canvas, or open it and press Add. Or, on the Overlays page, press Browse templates and add Stream ending, which comes with an End credits column already placed.
- Under Settings, type the Heading the roll opens with, such as Thanks for hanging out (leave it empty for none).
- Under Sections, in roll order, tick the sections you want, type each one's title, and use the arrows to change the order. Redemptions — everyone who redeemed a channel-points reward — is off to start with.
- Choose the Pace: Speed rolls at a steady number of pixels a second (10 to 400), so a long list rolls for longer; Total time makes one roll take the same number of seconds (10 to 900) however many names there are.
- Leave Loop on to roll again from the top after the end card — the end card leaves the top of the column and the next pass starts from the bottom, so the column is briefly empty between passes — or turn it off to stop with the end card in the middle of the column.
- Type the End card line, such as See you next stream!, and what the layer says When nobody is listed yet — Thanks for watching! to start with.
- Press Publish.
The names are this stream's, and each viewer appears once per section, in the order they first supported you. Each section starts with up to the 50 people who most recently supported you that way; names that arrive while the overlay is open are added to those, so a source left open all stream can list more (up to 200 a section), and refreshing the source in OBS starts again from the 50 most recent. A name that arrives mid-roll joins its section and the roll carries on from where it was — it never starts over. After you go offline the credits keep the stream that just ended, so they are still there when you switch to your ending screen, and they start empty again when your next stream begins. If the computer showing the overlay asks for reduced motion, the credits fade from one page to the next instead of scrolling: the heading, then each section a screenful at a time, then the end card.
To try it before you go live, open Simulate in the top bar and press Test credits. It rolls made-up names — never a real viewer — with one more follower arriving a few seconds in, on the canvas; tick Also play on the live overlay in OBS to show it on stream. When the demo's roll ends, your real supporters come back on their own. Nothing about the test reaches Twitch or changes any real data.
Roll them from chat or a flow. The Mod commands pack includes Roll the credits (!credits). Add it from Flows → Add and switch it on. When a moderator types !credits, every End credits layer on your overlays starts again from the top with this stream's supporters; !credits Ending rolls only the layer named Ending (the name it has in the editor's layer list). In your own flows, the Roll the credits action does the same, with an optional End credits layer name. It follows its error output, and rolls nothing, when none of your saved overlays has an End credits layer, or none with the name you gave; connect a Chat message there to say so.
Do something when they finish. The Credits finished trigger runs when a roll started by Roll the credits reaches its end: the end card settles in the middle of the column, or, with Loop on, the end card leaves the top at the end of that first pass. It runs once per roll, even with the overlay open in OBS and in a browser at the same time. $(layer) is the name of the layer that finished. When one roll restarts several End credits layers, they can finish at different times: with Only this layer left blank, the trigger runs once, for whichever layer finishes first; with a layer named in Only this layer, it runs when that layer finishes, whether or not another layer finished before it. For example, Credits finished then Chat message with Thanks for watching, see you next time! When nobody supported the stream, the layer shows its When nobody is listed yet message for five seconds and then counts as finished.
Credits finished only runs while an overlay with that End credits layer is open, because the overlay is what tells Bloopbot the roll ended. A roll that simply plays when the overlay loads, the later passes of a looping roll and a Test credits demo never run it. Test fire in the flow editor shows what Roll the credits would do without restarting anything on your overlay.
Under Parts (Style one part at a time) an End credits layer has Panel, Heading, Section title, Name, End card and Empty message. In custom CSS they are .w-credits, .w-credits-title, .w-credits-section-title, .w-credits-name, .w-credits-end and .w-credits-empty; each section is a .w-credits-section with its kind in data-section — follows, subs, gifts, cheers, raids or redemptions.
3d. Add a clock or a social rotator
Two tiles under Chat & info in the Add tab draw everything from their own settings: there is nothing to connect and nothing to test.
Clock shows the time of day, and the date if you want it.
- Choose Add and drag the Clock tile from Chat & info onto the canvas, or open it and press Add. Add puts it in the middle of the canvas and a drop puts it where you let go; drag it where you want it.
- In the layer's settings, pick Hours: 24-hour (15:07) or 12-hour (3:07 pm).
- Tick Show seconds for a clock that ticks every second.
- Pick a Date: No date, Short (29 Sep) or Long (Tuesday 29 September). The date shows on its own line under the time.
- Publish (step 5).
The clock shows the time on the computer running OBS, so it always matches your PC's clock, summer time included. There is no time zone to set. Day and month names are always in English.
Social rotator shows one of your socials at a time, with the platform's icon and your handle, and moves on to the next every few seconds.
- Drag the Social rotator tile from Chat & info onto the canvas, or open it and press Add. Add puts it in the middle of the canvas and a drop puts it where you let go; drag it where you want it. It starts with two examples, X and Discord, so you can see it on the canvas.
- In the right panel, each row is one social. Pick its platform and type your handle as you want it to read:
@yourname,youtube.com/@yournameordiscord.gg/yourserver. Use the arrows to reorder the rows and the bin to take one out. - Press Add for another row. It starts on a platform you have not listed yet, with an empty handle to fill in. A rotator holds up to 12.
- Set Seconds each (3 to 60), the Transition (Fade, Slide or Cut (no transition)) and the Icon colour: Brand colours or Theme text colour.
- Publish (step 5).
The platforms are X, YouTube, TikTok, Instagram, Twitch, Discord, Kick, Bluesky, Threads, Facebook, Reddit, Patreon, Ko-fi and Website, a globe for any other link. A handle is text on your overlay: viewers can't click it, so write it the way people should type it.
Example: Twitch twitch.tv/pixelpal, YouTube youtube.com/@pixelpal and Discord discord.gg/pixelpal, 6 seconds each, Fade. On stream, each one shows for 6 seconds and then fades into the next, round and round.
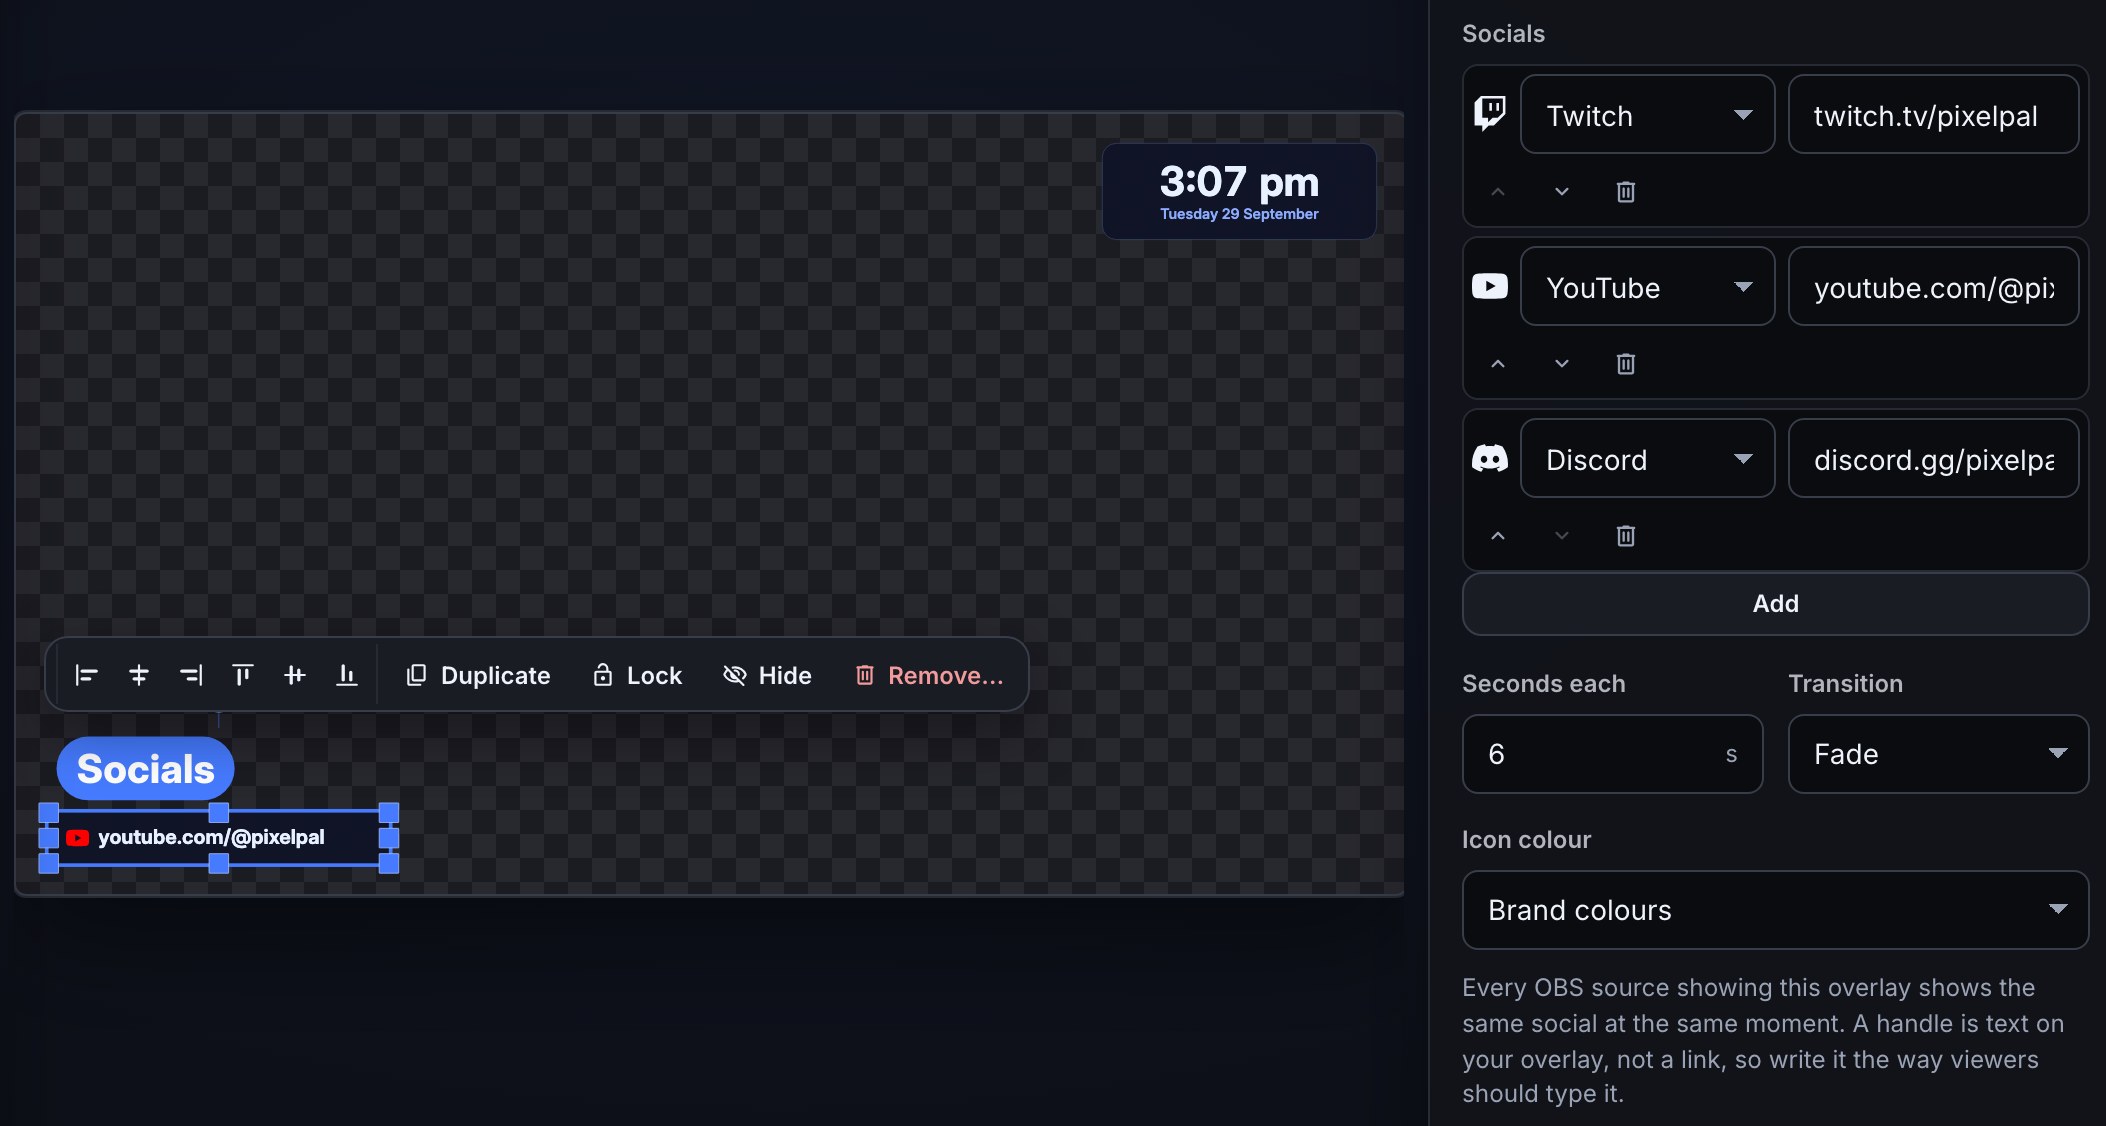
Like a slideshow, the rotation follows the clock, not the moment a page was opened. Every OBS source showing this overlay, and the editor's canvas, shows the same social at the same moment. With one social the layer simply shows it; with none it shows nothing on stream. With Brand colours, an icon whose brand colour is black, such as X, Threads or TikTok, draws in your theme's text colour instead, so it never disappears on a dark panel. When the computer showing the overlay asks for reduced motion, Fade and Slide change without moving. OBS itself never asks for it.
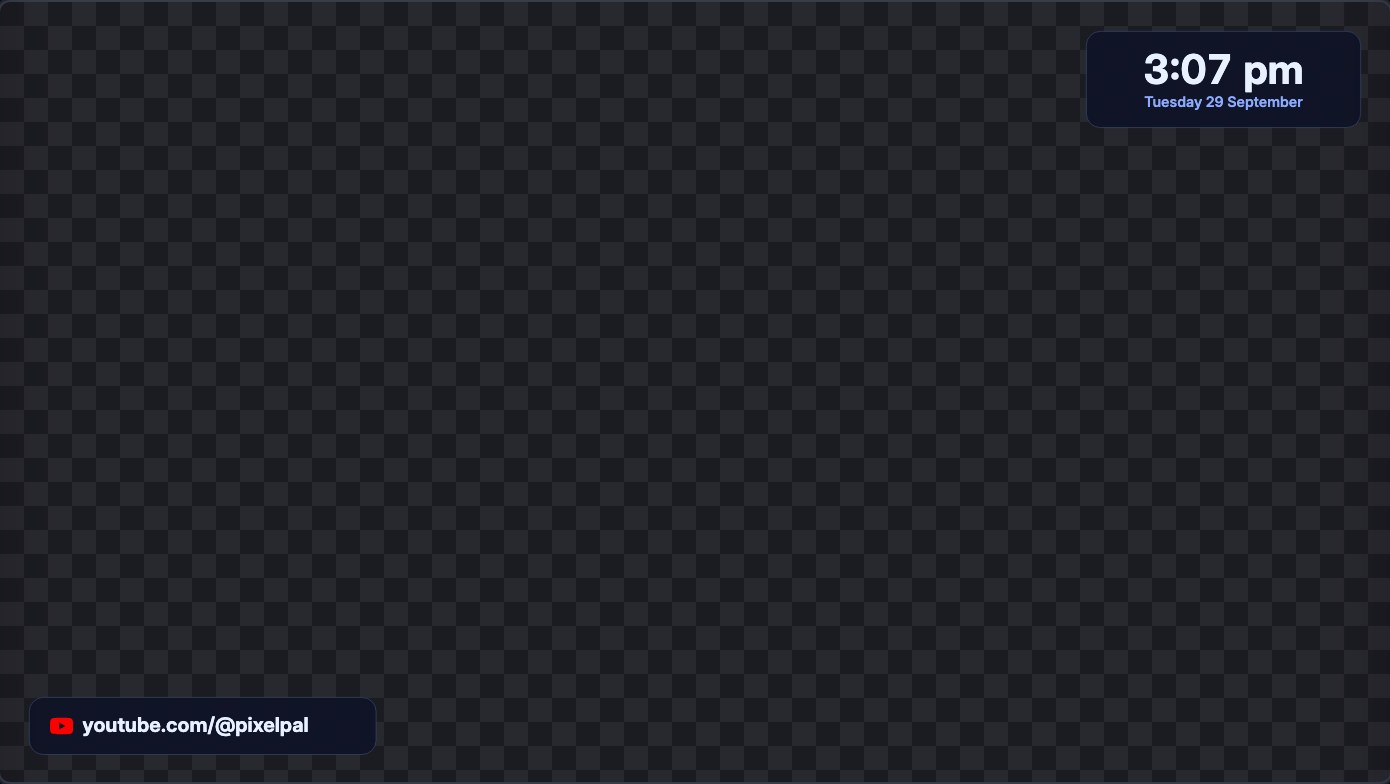
Under Parts (Style one part at a time), a Clock layer has Panel, Time and Date, and a Social rotator has Panel, Icon and Handle. In custom CSS they are .w-clock, .w-clock-time and .w-clock-date, and .w-socials, .w-socials-icon and .w-socials-handle; each social is a .w-socials-entry with its platform in data-platform. Both panels wear your theme's Panel frame.
Show your live viewer or follower count. Under Chat & info, beside the plain Label, are two ready-made ones:
- Drag Viewer count or Follower count onto the canvas, or open it and press Add.
- Change its Heading in the right panel if you want other words than Viewers or Followers. The number is grouped, so 12345 reads 12,345.
- Publish (step 5).
The viewer count refreshes about once a minute, when Bloopbot next checks your stream, and shows 0 while you are offline. The follower count goes up the moment someone follows and is checked against Twitch every minute. Any Label can show the same numbers with $(data.stream.viewers) or $(data.channel.followers) in its Text.
3e. Show your latest events
An Event list shows the latest things that happened on your channel, newest first, one row each: an icon, who it was and what they did.
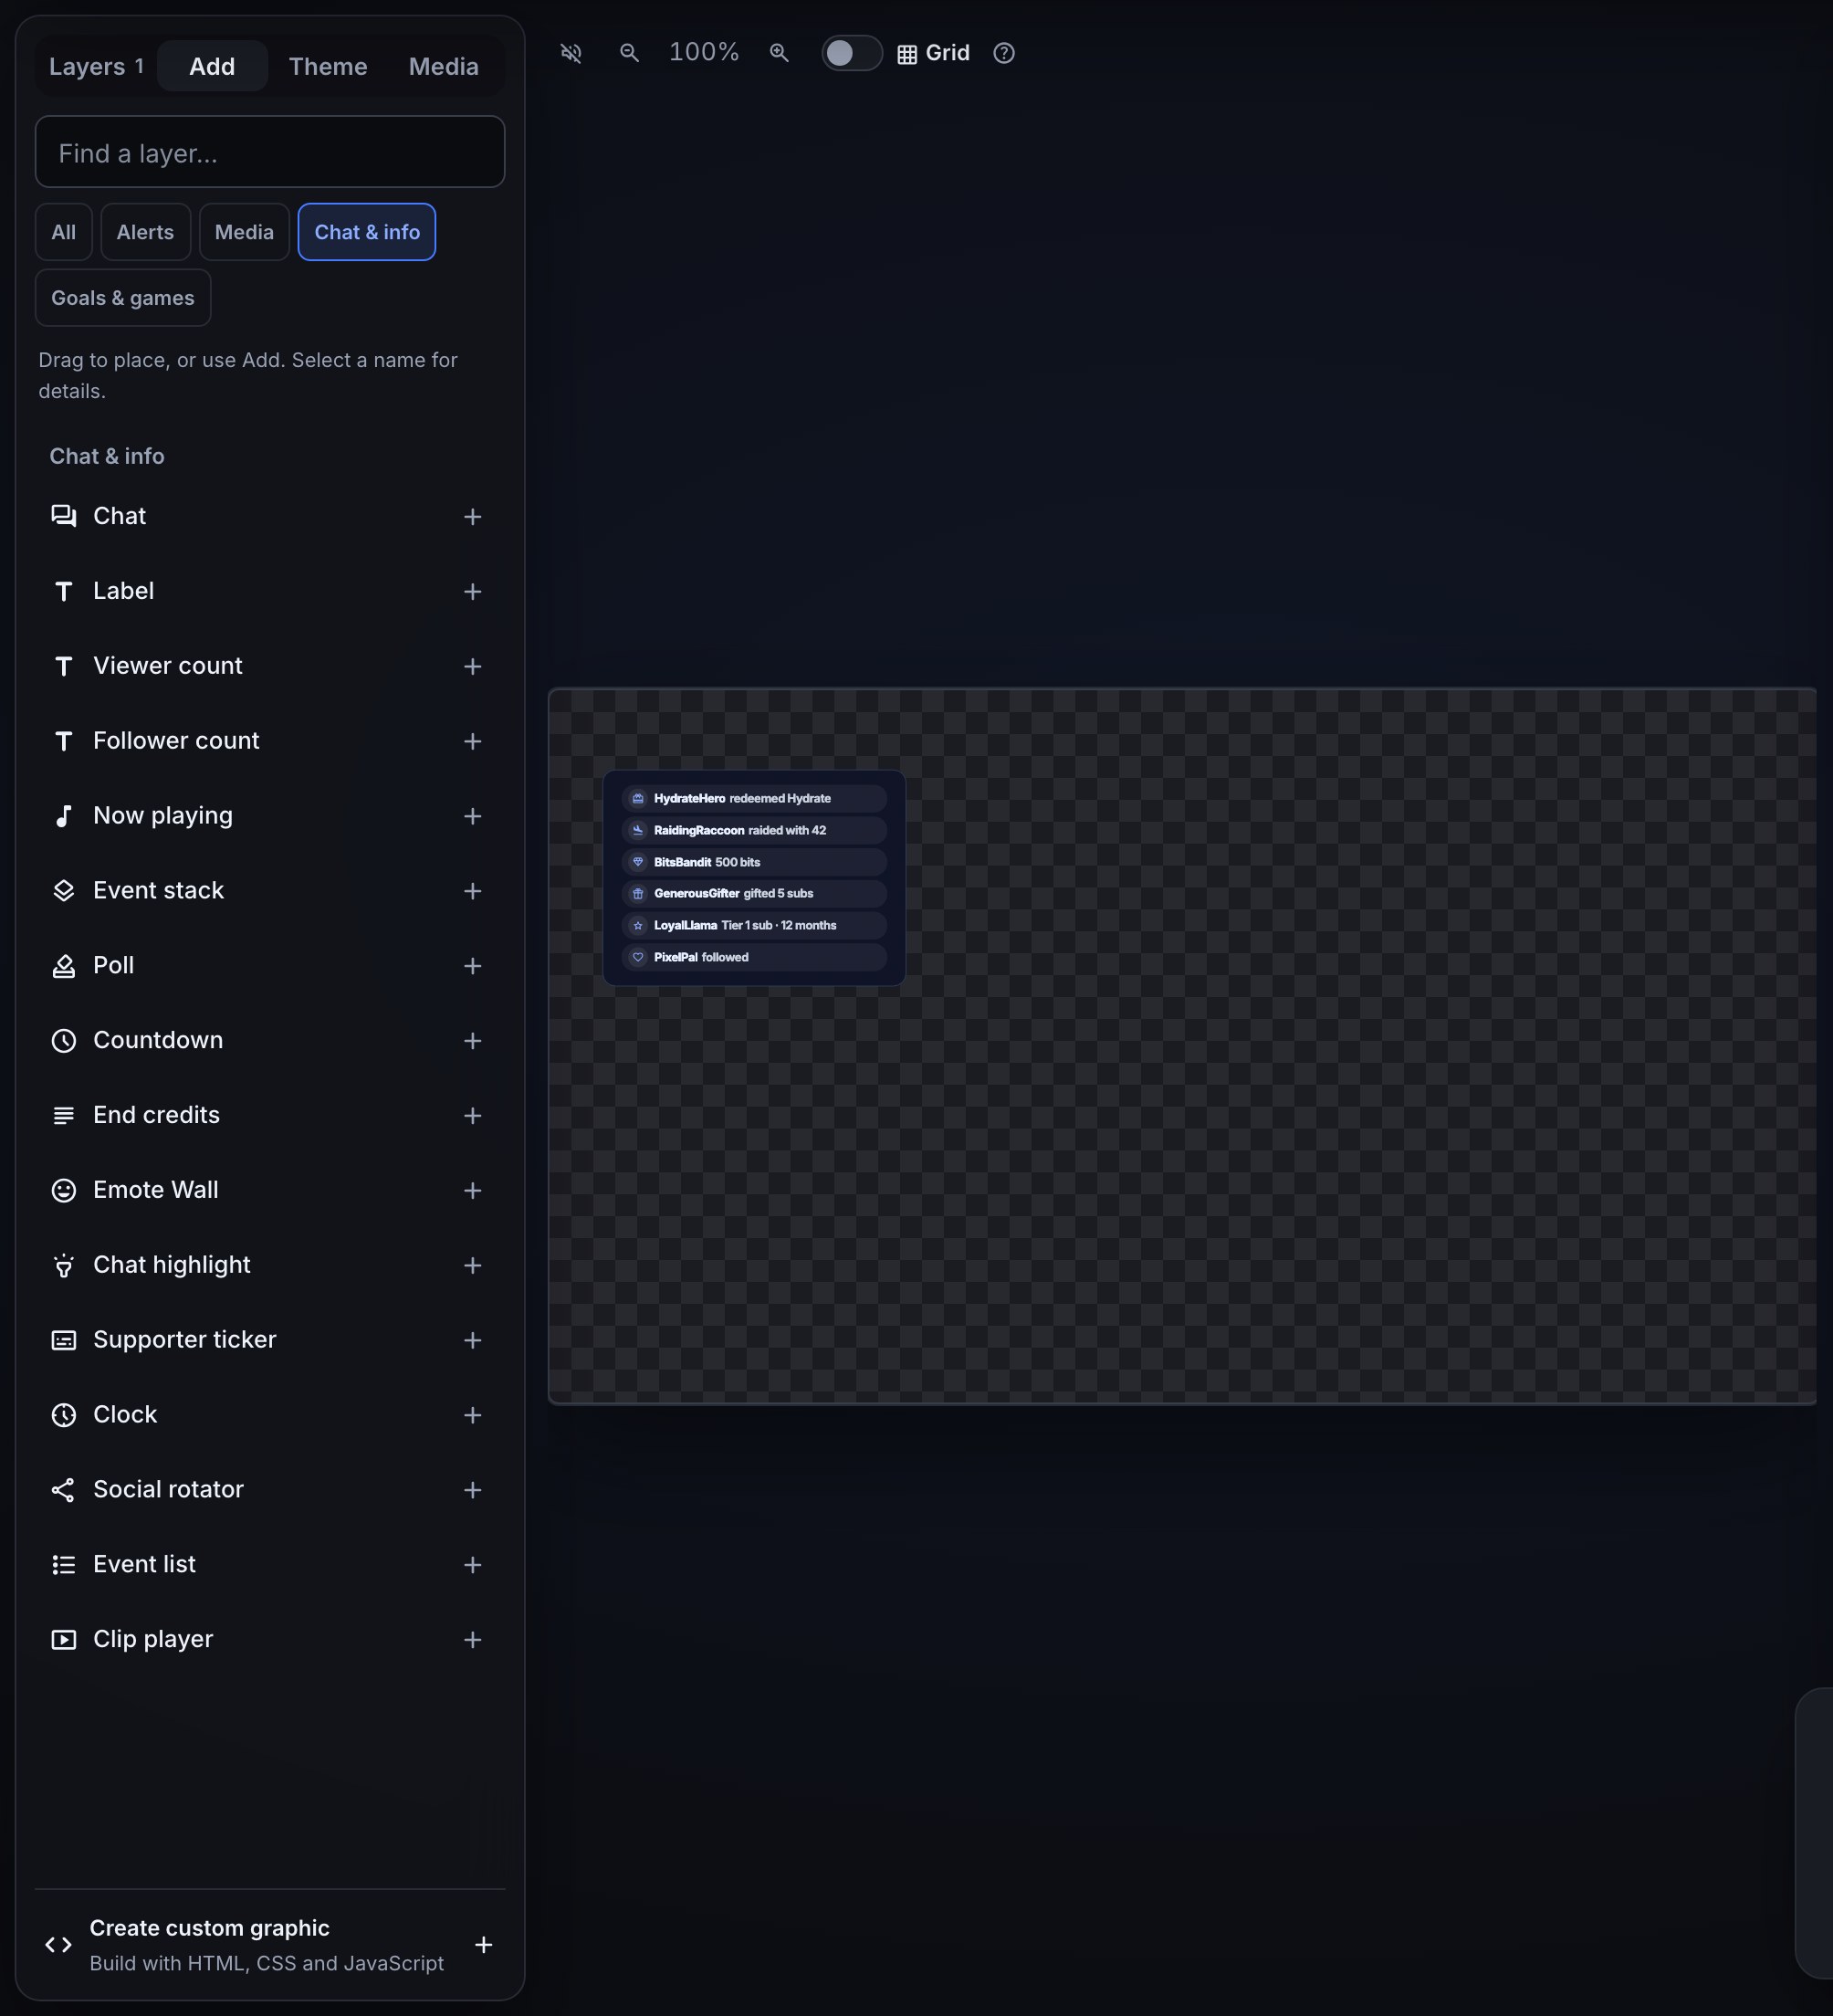
- Choose Add and drag the Event list tile from Chat & info onto the canvas, or open it and press Add. Add puts it in the middle of the canvas and a drop puts it where you let go; drag it where you want it.
- In the layer's settings, under Show, untick any type you do not want: Follows, Subs, Gifts, Cheers, Raids or Redemptions. All six are on to start with.
- Set Rows, how many events show at once: 1 to 20, 6 to start with.
- Pick where the newest event goes under Newest: At the top or At the bottom.
- Publish (step 5).
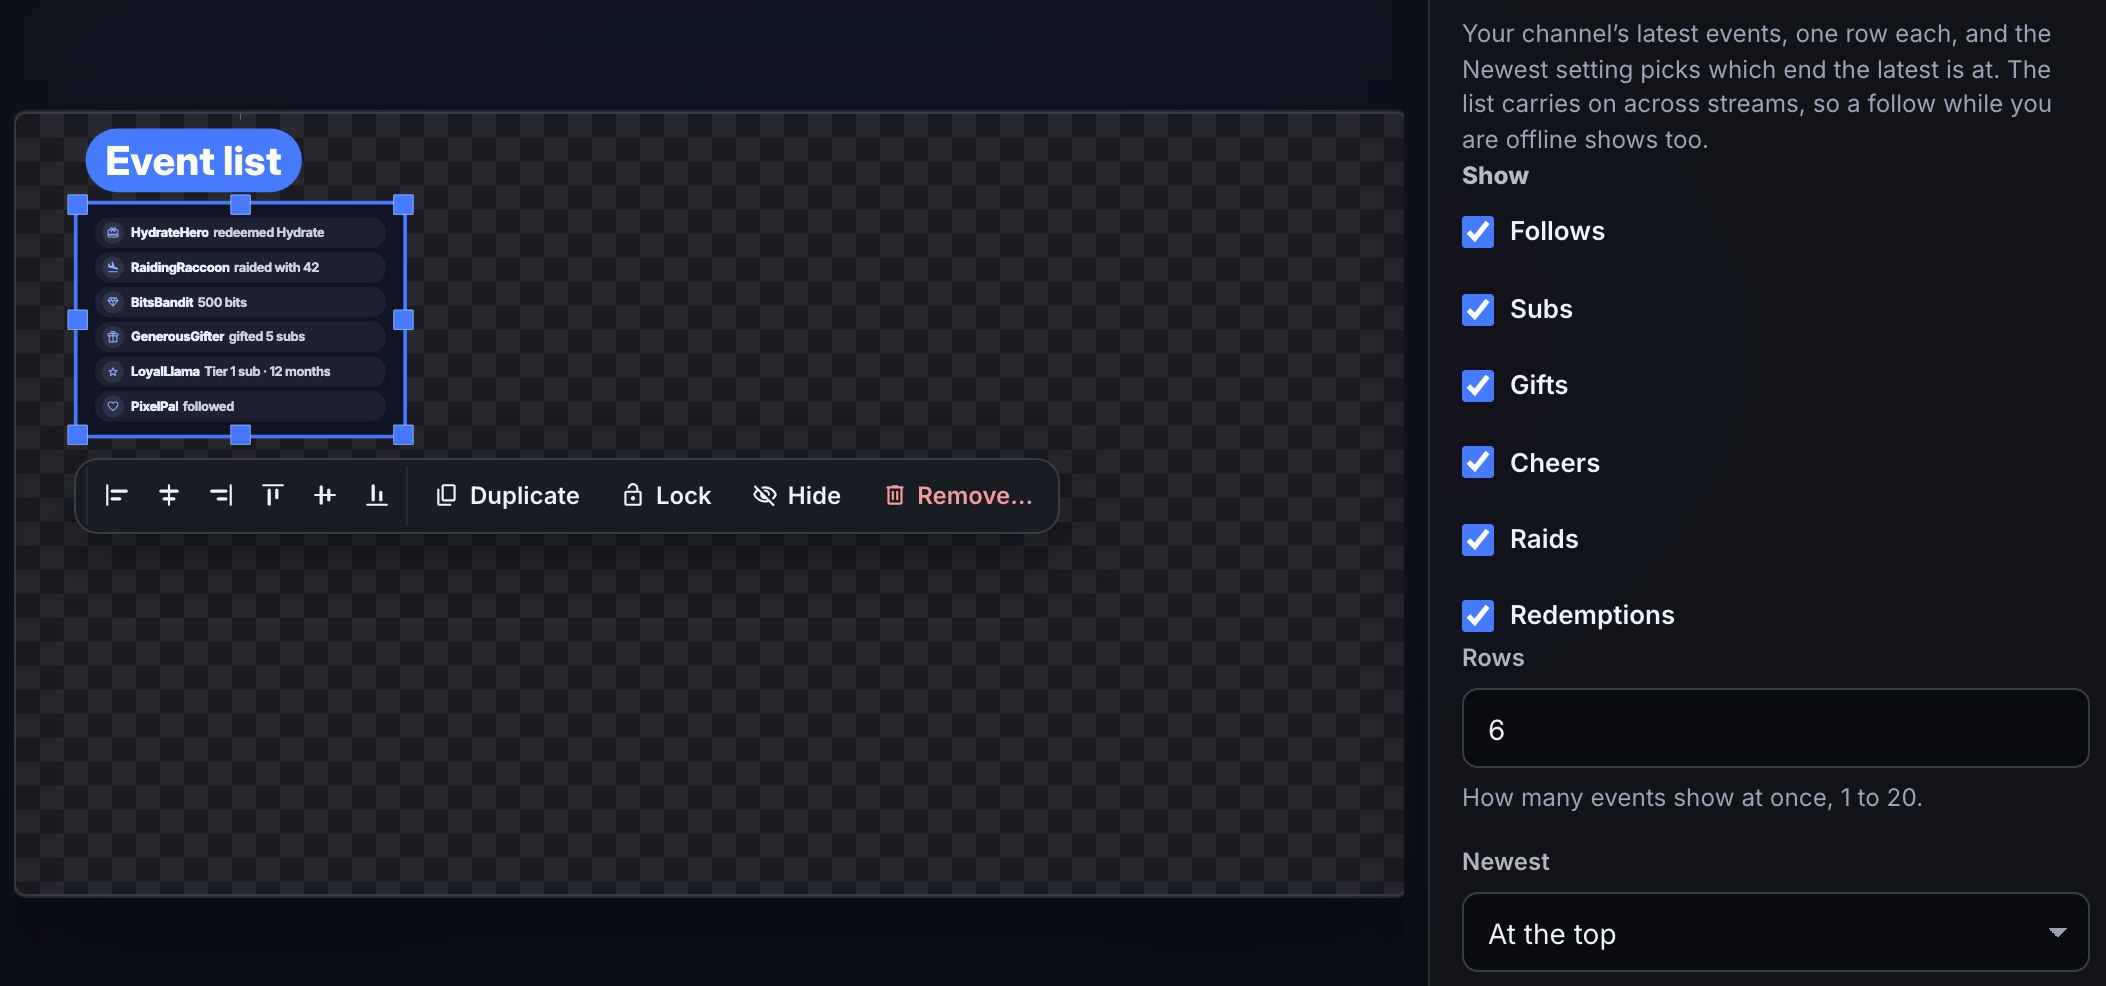
Each row says who and what:
| Event | The row reads |
|---|---|
| Follow | PixelPal followed |
| Sub | QuietMouse Tier 1 sub |
| Resub | LoyalLlama Tier 2 sub · 12 months |
| Gift subs | GenerousGifter gifted 5 subs (gifted a sub for one; gifted 5 Tier 2 subs above Tier 1) |
| Cheer | BitsBandit 500 bits |
| Raid | RaidingRaccoon raided with 42 |
| Redemption | HydrateHero redeemed Hydrate |
The list is your channel's, not one stream's: it carries on from one stream to the next, and a follow that comes in while you are offline shows too. It goes back as far as the last 90 days. The messages viewers send with a cheer or a resub are not shown, only who and what. An anonymous gift reads Anonymous.
A new row slides in at the newest end and the rows already there stay put; the oldest row goes when the list is full. How a row comes in follows your theme's Motion → Event list rows → Coming in (Make chat lines, rows and media move), and it simply appears when the computer showing the overlay asks for reduced motion.
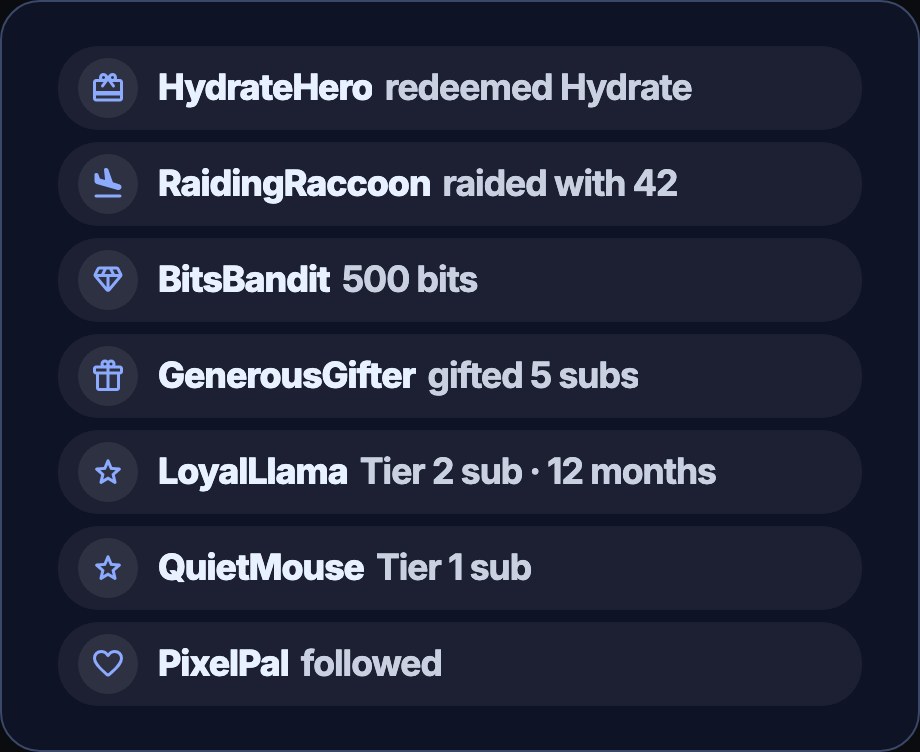
The editor's canvas always shows one made-up row of each type, so you can place and style the layer before anything happens; your real events show in OBS. To watch a row arrive, open Simulate in the top bar and press Test event list: it shows the made-up rows and then one more arriving on top. Tick Also play on the live overlay in OBS to show it on stream, where your real list comes back after a few seconds. A test never adds to your real list and nothing reaches Twitch.
Under Parts (Style one part at a time) an Event list has Panel, Row, Icon, Name and Detail. In custom CSS they are .w-eventlist, .w-eventlist-row, .w-eventlist-icon, .w-eventlist-name and .w-eventlist-detail; each row has its type in data-kind — follow, sub, gift, cheer, raid or redemption. The panel wears your theme's Panel frame, and each row its frame and background: the Event row frame on the layer’s Layer appearance · Local section, or Chat line and event row frame in the theme.
4. Give one layer its own look
Every layer draws with the overlay’s theme. Under Layers, Theme · My theme names the assigned theme and says Follows Active or Pinned to this overlay. Open it to edit the shared theme, then use Back to followed by the selected layer’s name to return. Clicking empty canvas, or Overlay settings below the theme entry, opens this overlay’s local settings instead. Style every overlay with a theme covers theme management.
- Select the layer and open Layer appearance · Local in the right panel. It names the theme it follows, for example Follows My theme, and shows that theme’s values. Open Typography, Colours & panel, or Background & spacing (spacing, border, frames and backgrounds) for the fields you need.
- Change a field — the accent colour, a font, the panel or the spacing. That field now belongs to this layer only: Reset to theme appears under it, a dot marks its group, and the other layers keep the theme.
- Change as many fields as you like. The ones you leave alone keep following the theme, so a later change to the theme still reaches them. The note inside Layer appearance · Local counts the fields this layer has changed.
- Press Reset to theme under a field to hand that field back, or the reset icon (Reset all to theme) in the note inside Layer appearance · Local to hand back every field at once. Nothing else changes.
- To style one piece of the layer — just the names in a chat box, just an alert’s title — open Parts · Layer. Opening a part shows its name and outlines it on the canvas; Back to parts returns to the list. Fields identify Local override, a named theme source or Widget default; Style one part at a time covers fonts, gradients, text effects and highlighted values.
- To make the layer move — chat lines that bounce in, an idle float, a wave on a name — open Motion · Layer. For an ordinary alert, open Motion · Layer for idle and letters; its entrance, exit and word timing are in Layout & timing · Shared design in the same workspace. Make chat lines, rows and media move and, for alerts, Make it move cover each choice.
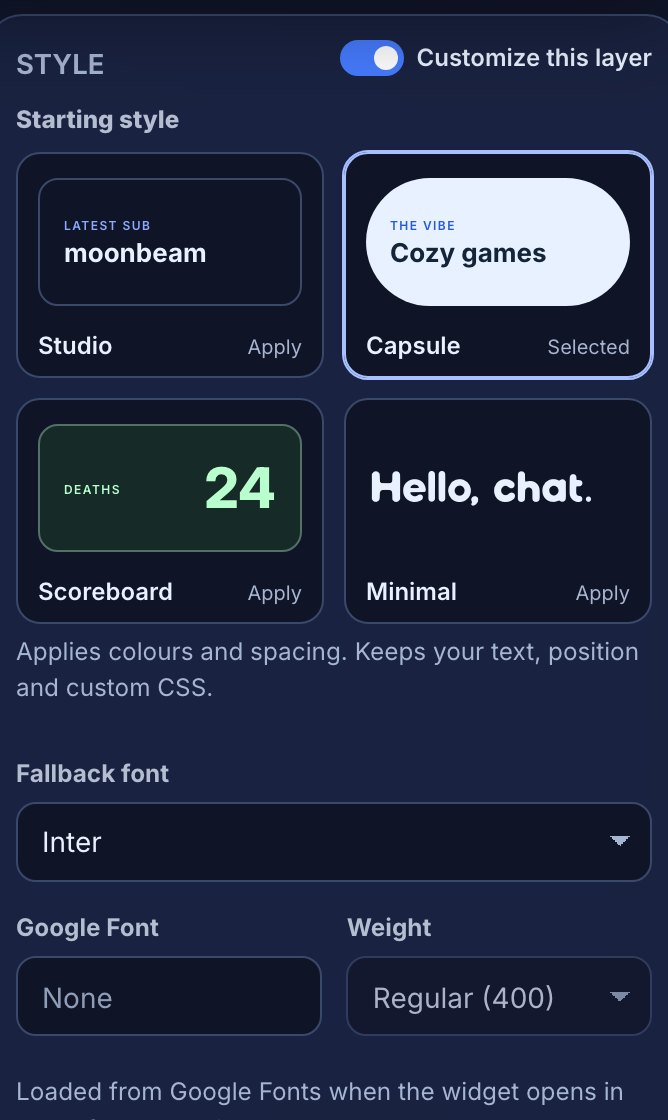
Fade one layer
Layer opacity makes a whole layer see-through, its panel and its content together. Use it to let a watermark sit quietly over your game, or to push a banner back behind a chat box.
- Select the layer and open Layer appearance · Local in the right panel.
- Drag Layer opacity, the first control there. Every layer starts at 100%, fully solid. The canvas fades as you drag, and the percentage shows beside the slider and, once it is below 100%, at the foot of the settings panel with the layer’s other numbers.
- Publish when it looks right. OBS shows the same fade.
A whole drag is one step for Undo. Drag back to 100% to make the layer solid again.
0% is invisible but not gone: the layer keeps its place, stays in the Layers list and keeps running, so a counter keeps counting and a flow can still show or hide it. The eye in the Layers list is different: a layer you hide there is not drawn at all. A layer a flow’s Show a layer step brings in fades to the opacity you chose, not to solid.
The Clip player and the Media share player have no slider. Twitch and YouTube will not play a video that is faded or covered, so those layers always draw solid, and so does a custom graphic that plays one of them. An Image layer’s own Opacity fades just its picture; Layer opacity is separate and fades the whole layer, so the two multiply. On a Vertical layout a layer follows its Horizontal position and opacity until you place or fade it there; from then on it keeps its own Vertical position and opacity, and Reset to auto gives it both back from Horizontal.
Shape a layer
Any layer can be cut to a shape: a hexagon face cam, a speech-bubble chat box, or an angled panel with pointed ends for an Up next bar. An outline and a soft glow can follow the same edge.
Shape has four choices:
- None is the plain box. Every layer starts here.
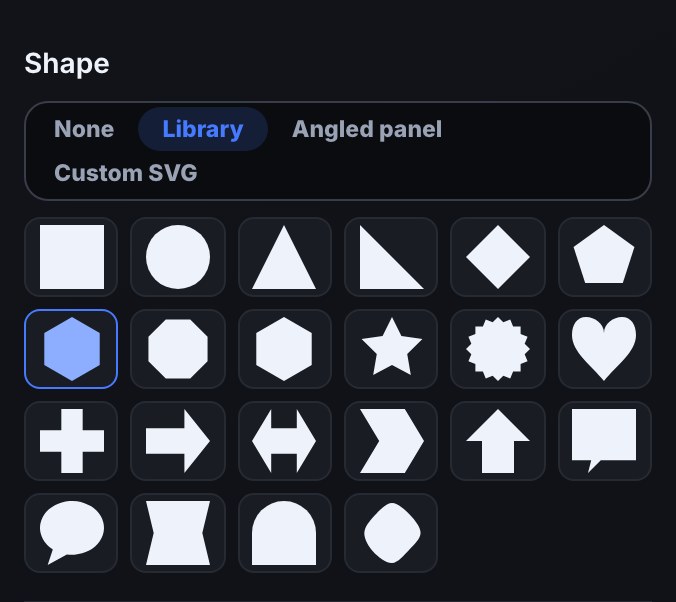
- Library shows shape tiles: hexagon, chevron, star, speech bubble and the rest. Pick one and it stretches to the layer’s box.
- Angled panel sets each side to Straight, Point out or Point in, with its depth, and cuts any corner by its own field, such as Top-left cut. Everything is in pixels, so the angles stay the same however big the layer is.
- Custom SVG cuts the layer to an SVG from your media library.
- Select the layer and open Layer appearance · Local in the right panel. Shape and Outline are under Layer opacity.
- Under Shape, press Library, Angled panel or Custom SVG. For Library, pick a tile. For Custom SVG, choose a file under Shape file, or press Upload to add a new one.
- For an Angled panel, the canvas shows diamond handles. Drag a corner’s handle inwards to cut that corner. Drag a side’s middle handle outwards for a point, or inwards for a notch. Handles move a whole pixel at a time and stop before the panel would cross itself. You can also press Tab to reach a handle, then use the arrow keys to change it, with Shift for 10 px.
- Under Outline, turn on Draw an outline and set its Width. Its Colour starts on Theme, which follows your theme’s layer outline colour; press Custom to pick one for this layer. Turn on Glow for a soft light round the edge, and set its Blur and Strength.
- Publish. OBS draws the same shape, outline and glow.
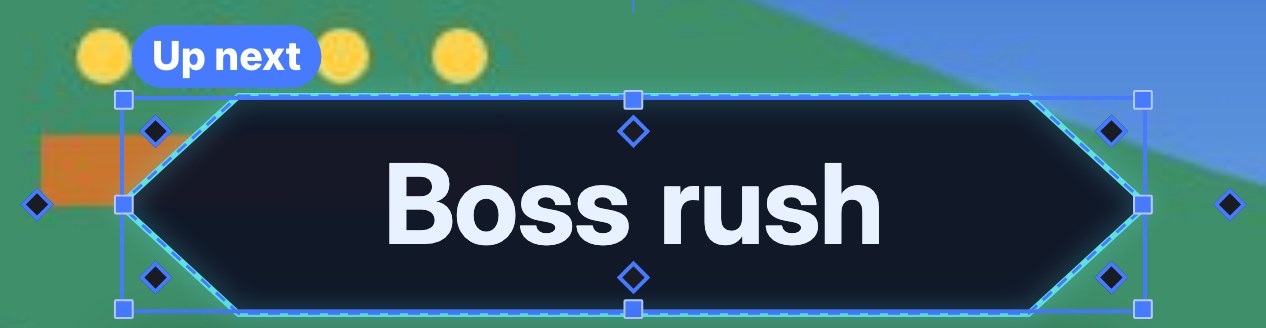
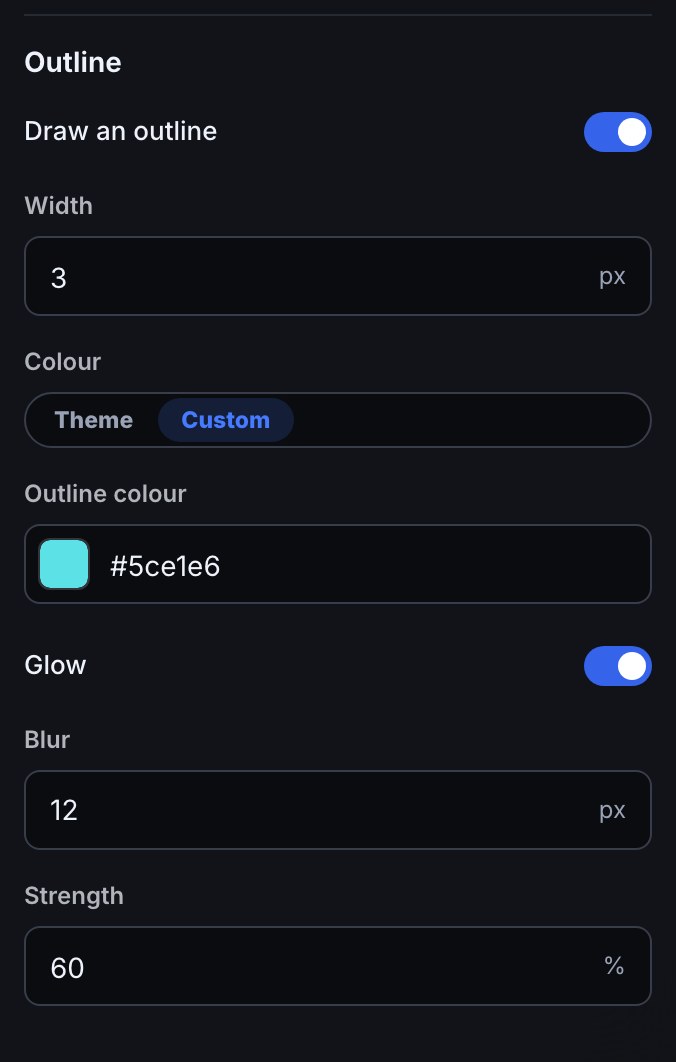
Example: a Label layer named Up next, 520 px wide, that says Boss rush. Set it to Angled panel with Left and Right on Point out at 60 px, then turn on Draw an outline at 3 px, press Custom and pick a teal, and turn on Glow. It reads as a bar with arrow-head ends, lit round its edge.
A shape changes only the layer’s edge, and the content inside stays where it was. Give a panel with deep points some padding (under Background & spacing) so its words stay clear of the angles.
A Custom SVG must be made of flat shapes only: paths, polygons, rectangles, circles and ellipses, up to 100 KB. A file with text, pictures, scripts, links to other files or effects is refused with Flatten the shape to paths and upload it again. To fix it, open the file in your drawing app, convert text and strokes to outlines, remove any pictures, and save it as a plain SVG.
The Clip player and the Media share player have no Shape or Outline, and neither does a custom graphic that plays one of them. Twitch and YouTube don’t allow their players to be cut or covered, so those layers say so instead.
Put a frame around one layer’s panel, lines or cards
A theme can wear a picture frame round its panels, chat lines and alert cards (Put a frame around panels, chat lines and cards). One layer can wear a different frame, or none, without touching the theme.
- Select the layer and open Layer appearance · Local. Open Background & spacing. Under Border colour you find Panel frame for the layer’s panel, and a frame for its lines or rows, named for the layer — Chat line frame on a chat box, Event row frame on an event stack or an event list. An alert layer’s Alert card frame is under its backgrounds. A layer shows only the frames its type draws: a Poll, End credits, Image or Shape layer has a Panel frame only, round its card, its panel, its picture or its box, and a Minigames layer draws none, so it shows no frame control. On a chat box the Chat line frame goes round each line in every layout: Bubbles, Lines and Compact.
- A layer that follows a theme with a frame shows that frame already chosen. Change a setting — the Frame image, Corner size, Frame width, Frame outset, Sides or Draw the middle of the picture — or press Image on a layer whose theme has none. That frame now belongs to this layer: a dot and Reset to theme appear beside it, and the other layers keep the theme’s.
- To take the theme’s frame off this layer alone, press None. The layer keeps a None of its own, so it stays plain even when the theme changes.
- Press Reset to theme under a frame to hand it back, or the reset icon (Reset all to theme) in the note inside Layer appearance · Local for every field. The canvas shows each change as you make it. Press Publish.
A layer’s frame replaces the theme’s frame as a whole, so choose every setting you want on it. While a frame is on a box, its Frame width replaces any Border width of that box, including a Border set on its part. To frame just one piece of the layer, open Parts · Layer: a part that draws a box, such as a chat line or a goal bar’s track, has a Frame under Box, and a part’s own frame keeps its own width. To take the theme’s frame off one box, press None on the part’s Frame, which says Uses the theme’s frame until you choose: the frame goes completely, leaving the box’s plain border and no thick edge behind, and Reset to theme brings it back.
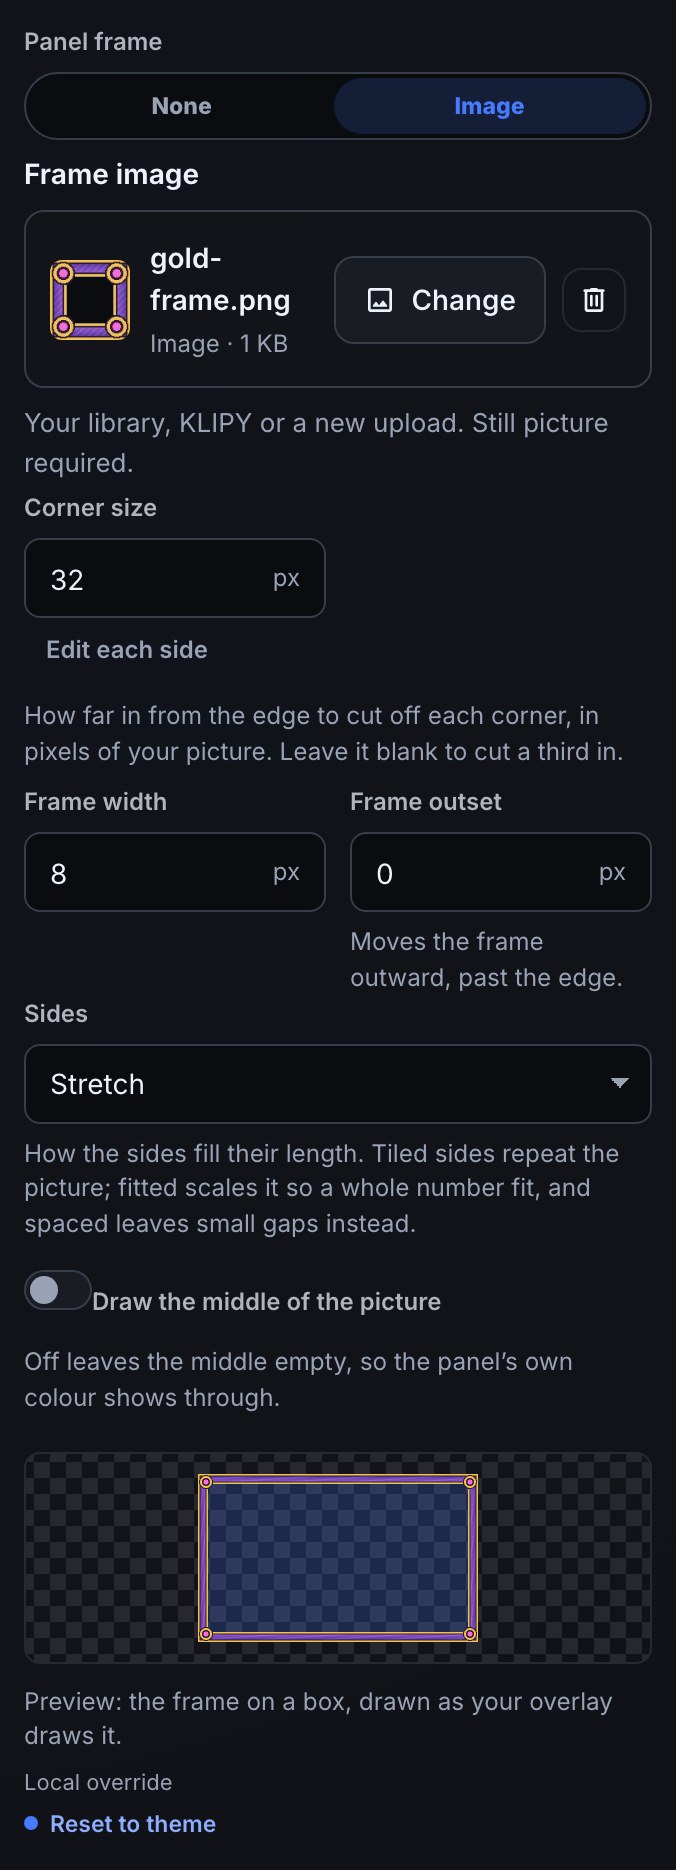
A frame goes round a layer’s panel. It is not the overlay’s background: Give the overlay a background fills the whole canvas behind every layer.
Give the overlay a background
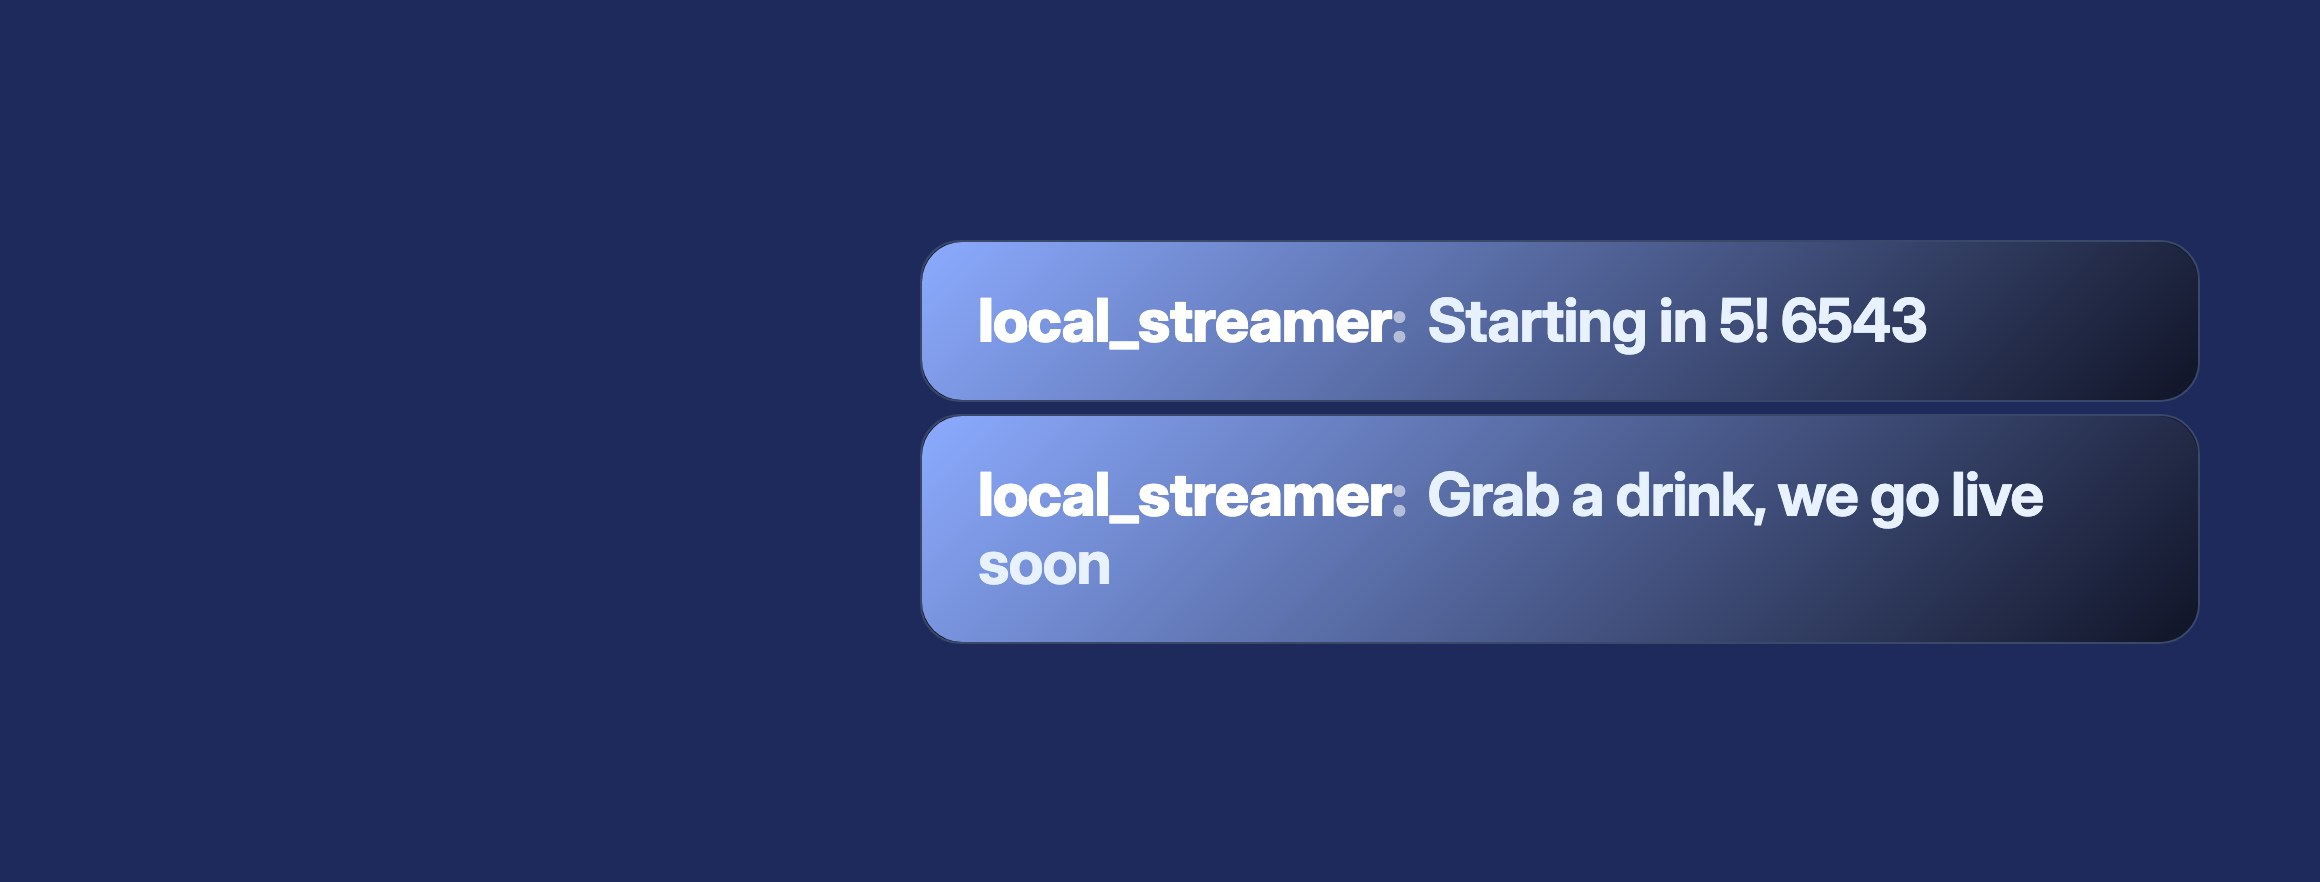
An overlay can fill the whole 1920 × 1080 canvas behind its layers: a colour, a gradient, a picture, or a looping video. It is what turns an overlay into a scene screen — starting soon, be right back or ending — and it belongs to this overlay alone, so your gameplay overlay stays clear.
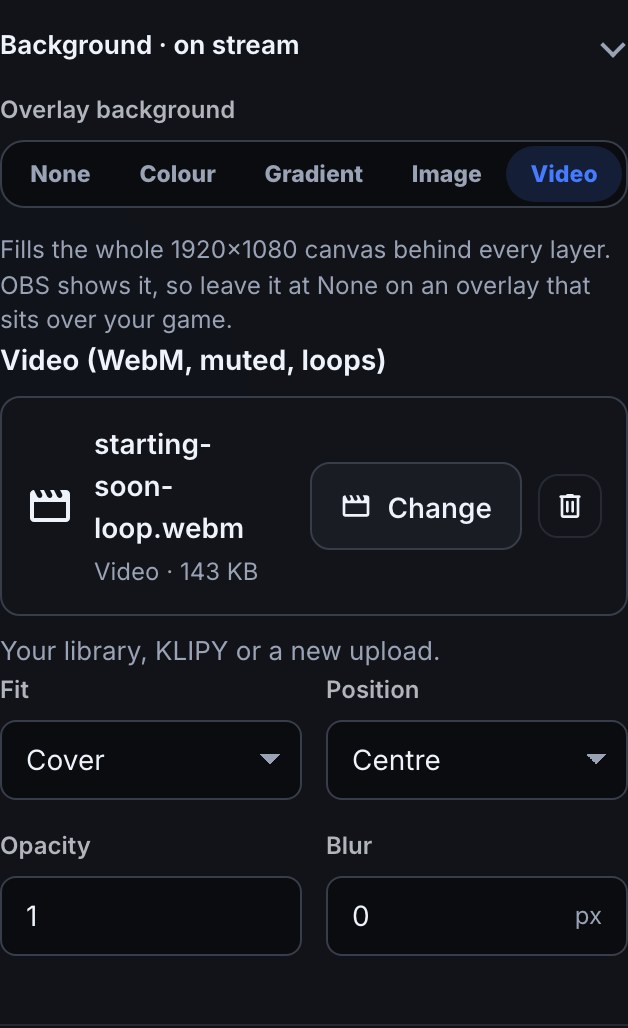
- Click empty canvas or press Overlay settings below the theme entry. Open Background · on stream in Overlay settings · Local.
- Pick Colour, Gradient, Image or Video. A new image or video starts on your library’s first file of that kind.
- At the Image or Video field, press Choose picture to preview another file, or Upload to add one. A WebM video can be up to 25 MB; a PNG, JPEG, GIF or WebP can be up to 5 MB. Set its Fit, Position, Opacity and Blur.
- Press Publish. OBS shows the background behind every layer of this overlay.
A background video always plays muted and loops for as long as the scene is on screen; it never makes a sound, so music and alert sounds stay with your alerts and the Media layer. One layer can also have a video behind its own panel: select it, then open Layer appearance · Local → Background & spacing and set its Panel background to Video.
One overlay plays at most 2 background videos, its own and its layers’ panels together. With two playing, Video is greyed out on the rest, with a note saying why; change one of the two to an image, a gradient or a colour to free a place.
Preview over your current stream
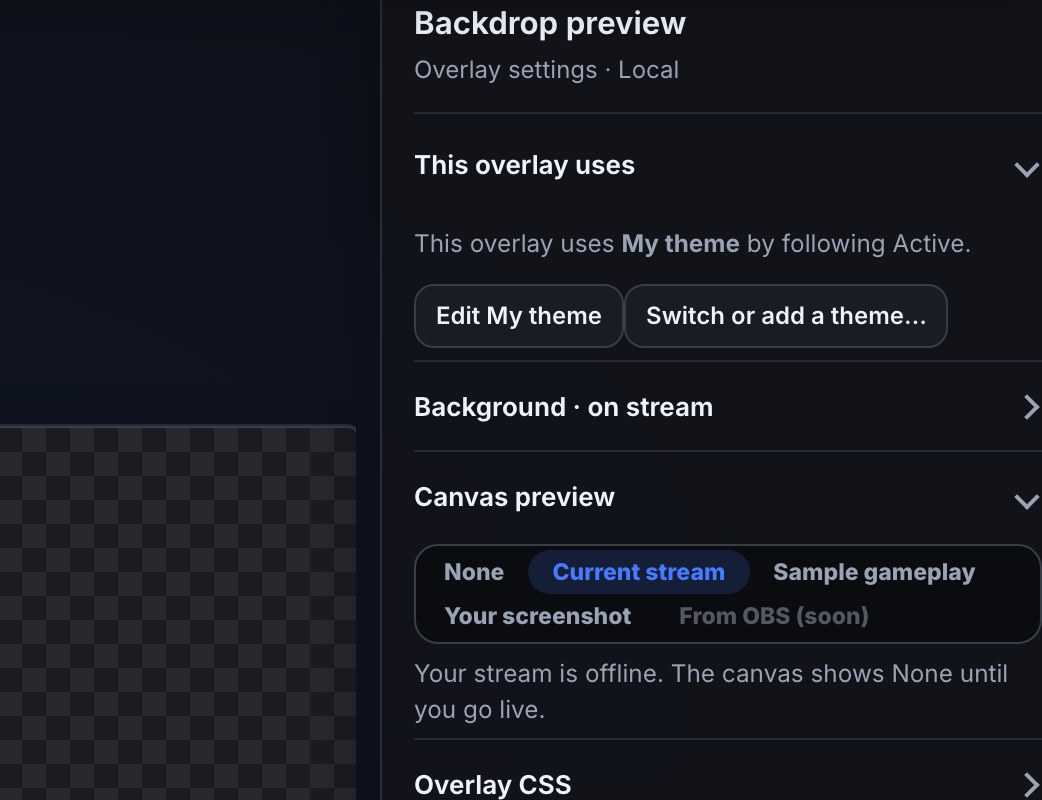
The Backdrop · only you see this control lets you judge an overlay against what viewers currently see. It starts with your current stream, muted, while you are live, and with None while you are offline. It never reaches OBS.
- Open Overlay settings and expand Canvas preview in the panel on the right.
- Under Backdrop · only you see this, choose Current stream to follow your live broadcast. You can also choose None, Sample gameplay or Your screenshot. A choice you make stays in this browser.
- Arrange a layer against the picture behind the canvas. For example, place a goal bar where it does not cover your webcam, then Publish when the overlay itself is ready.
The stream plays muted behind the editor canvas only. If your channel is offline, Current stream shows None until you go live. If it stays blank while you are live, check that your stream has started on Twitch and refresh the editor; you can use Sample gameplay or Your screenshot meanwhile. An overlay’s own Background · on stream is separate and still appears in OBS when published.
Style parts with custom CSS
The overlay has one Overlay CSS editor, not one per layer. Open Overlay settings, then Overlay CSS. Whatever you write there loads after every layer's own look and after your theme's own Theme CSS (Style every overlay with a theme), so it can reach further than the colour and spacing controls above it — right down to one part of one layer's content, like just the fill of a goal bar or just the names in your chat box. The canvas updates as you type, it holds up to 12,000 characters, and clearing the box returns every layer to its own controls.
A rule applies across the whole overlay: two goal bars on the same overlay both pick up a rule written for .w-goal-fill. Each kind of layer draws its own named parts, and those names stay put across a redesign, so a stylesheet you write today keeps working after you change your theme. A quick example for each:
- Label —
.w-text { font-size: 60px; }grows the text past what the size slider offers. - Goal bar —
.w-goal-fill { background: linear-gradient(90deg, gold, orange); }gives the filled part its own gradient. - Event stack (polls, predictions, raids, hype trains) —
.w-stack-card { border-radius: 24px; }rounds every card's corners. - Poll —
.w-poll-fill { background: linear-gradient(90deg, gold, orange); }gives the option bars their own gradient. - Wheel —
.w-wheel-seg[data-hit] { stroke: white; stroke-width: 2; }outlines the segment the wheel landed on;.w-wheel-labelis each segment's text. - Alert —
.w-alert-title { text-transform: uppercase; }capitalises every alert's title. - Media —
.w-media-item { border-radius: 12px; }rounds the corners of whatever plays. - Chat box —
.w-chat-name { color: #ff6ad5; }gives every viewer's name the same colour instead of their own — Bloopbot draws each viewer's own colour through a variable, and a plain rule like this one for the same part still overrides it. - Now playing —
.w-nowplaying .w-nowplaying-title { font-style: italic; }italicises the current track. Write it with.w-nowplayingin front: the built-in rule for the title names both, and a shorter.w-nowplaying-titleon its own loses to it. - Giveaway —
.w-giveaway-slot[data-reveal="settled"] .w-giveaway-winner-name { font-size: 1.4em; }makes a revealed winner's name stand out, without also enlarging the slots still waiting their turn. - Image —
.w-image { filter: grayscale(1); }desaturates the picture. - Shape —
.w-shape { box-shadow: 0 12px 30px rgba(0, 0, 0, 0.5); }drops a shadow behind a Box, a Circle or a Divider. - End credits —
.w-credits-section[data-section="raids"] .w-credits-name { color: gold; }colours just the raiders' names. - Custom graphic — a rule reaches inside a custom graphic when it names one of the graphic's own classes that start with
w-(Match your overlay's theme).
The same named parts are what Parts styles without CSS (Style one part at a time); a part style is drawn before your stylesheet, so a rule here still wins over it.
Bloopbot always loads your stylesheet last, so your rule wins a tie against a built-in rule that names the same parts — that is why the colour and gradient examples above work with nothing more than the part's own name. But the tie only goes to you when your rule is at least as specific as the one it replaces, which is why the now playing and giveaway examples above name an extra part around the one they change. Reach for var(--w-accent), var(--w-text) and var(--w-panel-fill) inside your own rules to pick up your theme's colours instead of hard-coding one, so the part still matches if you later switch themes. A rule aimed at a part a layer doesn't have simply does nothing.
5. Publish your changes
The canvas is your Editor draft; the Published output is what your Browser Source can show. Editing the draft does not update that output on its own. Each change saves to your channel’s draft about a second after you make it, and OBS keeps showing what you last published until you press Publish. The draft holds every overlay on your channel, your alert designs, themes and wheels. They wait there together, and when you press Publish you choose which of them go live. The one thing that saves straight away is the overlay’s name.
The chip in the top bar says where you are: Saving… while a change is on its way, 3 changes · draft saved once it is in the draft, and Published when this overlay has no edits waiting. Published is its publication status; check OBS to see whether the source is showing in your current scene.
Waiting to publish includes this overlay’s edits and shared edits, such as alert designs and themes; the draft chip counts those shared changes too. Publish can cover the whole channel draft, including edits to other overlays and shared themes, designs, wheels and flows, and Discard changes… always throws away all of it.
- Make your changes. You can close the tab once the chip says draft saved — they are still there when you come back.
- Click the chip to open Waiting to publish: changes by name, such as “Gameplay: moved Raid alert”, and shared changes waiting with them.
- Press Publish, in the top bar or in that list. Publish your overlay always opens first, even for one changed part, so you can review its named changes and affected overlays before choosing what goes live (below). Once it is live, the editor says Published — ready for your Browser Source. Open Browser Sources affected by your edits refresh; shared theme or design edits can affect several overlays.
- Changed your mind instead? Discard changes… in the same list asks first, then throws away every change since the last publish, on every overlay.
Choose what goes live. Publish your overlay says "Choose what goes live now. Anything you leave unticked stays in your draft." It has one tick box for each part that changed: every changed overlay by its name, plus Alerts, Themes and Wheels when those changed. Each row lists its changes, and every row starts ticked. Untick a row to keep its changes in your draft; they are not lost, and not on stream.
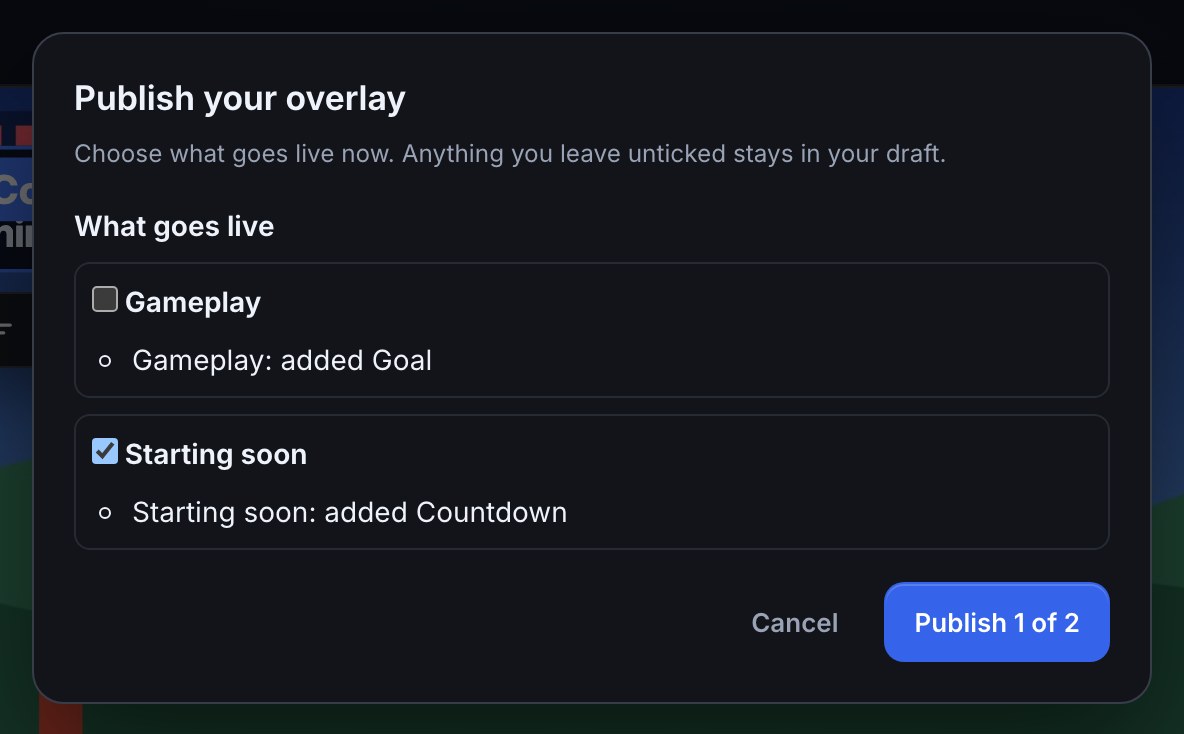
- A locked row. If a part you ticked needs another part, that part is ticked and locked, marked "Needed by" the overlay that uses it. For example an overlay that plays an alert design takes the changed alert designs with it, and a publish can also bring along another overlay: when you renamed an alert design that several overlays show, they go live together.
- New flows. Each new flow the publish would create has its own choice: Create and switch on, Create switched off or Don’t create. A flow that plays an alert design you are not publishing says "Waits for Alerts" and offers Later or Don’t create. Later keeps the flow in your draft until that alert goes live.
- The button. It counts what you picked: Publish 1 of 2, or just Publish when everything is ticked. Untick every row and only the new flows you chose are set up; the overlay, alert, theme and wheel changes all stay in your draft.
- Afterwards. The status line says how many changes are still in your draft, and the chip keeps counting them. Press Publish again whenever you want the rest live.
History, in the top bar, lists every publish as a version: newest first, the one on stream marked Live, each with the changes it made. The eye icon (Preview) on a version shows it on the canvas without changing anything; Back to draft returns to your edits. Restore to draft puts that whole version back in your draft, and Restore only followed by the overlay’s name brings back just the overlay you are editing. Restoring never changes your stream by itself — look it over, then publish. If one of your alert flows plays a design the restored version does not have, the editor names that flow so you can point it at another design.
Editing in two tabs, or on two computers? If the other one saved the draft first, a banner across the canvas says Changed in another tab. Load theirs replaces what this tab has with the saved draft; Keep mine saves this tab’s changes over it. Until you choose, nothing saves from this tab and Publish waits.
A worked example
A stream overlay in three pieces, on one Browser Source. Open your widget’s editor, then:
- Choose Add and drag the Goal bar tile to the bottom of the canvas.
- Drag a Label tile to the top-left for your death counter.
- Drag a Chat tile down the right-hand side.
- Select the goal bar and, under Layer appearance · Local → Colours & panel, change its Accent and Panel colours, so it stands out while the counter and the chat box keep the overlay’s theme.
- Press Publish, review the named changes, confirm Publish and check the scene in OBS.
The canvas is what the Browser Source shows: three kinds of content in one source, one of them with colours of its own.
What you should see
- Every layer drawing its own kind’s content on the canvas — a chat box showing chat, a goal bar showing progress, a counter showing its number — never a plain box.
- The layer you select carrying its name, its eight resize handles and its rotate handle, over its own content — and every other layer drawing plainly, with no box around it.
- Several layers selected together each carrying a lighter outline than the one you selected last, and an Align/Distribute/Group toolbar under them.
- A locked layer marked in the Layers list, ignoring a drag or a nudge until you unlock it.
- Each layer where its frame says on the 1920 × 1080 canvas, with the whole surface shown scaled to fit the editor’s canvas card — and, once you rotate one, tilted exactly as much in OBS.
- A published change reaching an open OBS Browser Source on its own within a few seconds, with nothing to do to the source, and the chip in the top bar reading Published.
- An edit you have not published yet showing on the canvas, but not in OBS, with the chip counting it — for example 2 changes · draft saved.
- Text you type on one layer appearing in the canvas while the other layers keep their place. A sample that starts again as you edit stays quiet while Mute preview is on.
- A hidden layer drawing nothing, and coming back when you show it again.
- A layer you faded showing through to what is behind it on the canvas and in OBS once published, and its percentage at the foot of the settings panel.
- A layer a flow’s Show a layer or Hide a layer step changed fading in or out in OBS at once, and staying that way after OBS refreshes.
- An overlay with a background video looping it, silently, behind every layer, in the editor and in OBS.
- A field you changed on one layer marked with a dot and Reset to theme, and that layer’s other fields following the overlay’s theme.
- A layer’s own frame drawn round its panel, chat lines or alert cards on the canvas and in OBS once published, while the other layers keep the theme’s.
- A test for every type you have placed under Simulate → Test events in the top bar, drawing on the canvas until you tick Also play on the live overlay in OBS.
- An alert layer drawing nothing until an alert plays on it — press Test in editor in its workspace (or Test on its toolbar) to see the draft on the canvas, or Test published output… to send the published design to the real queue. Check its playback in your streaming app.
If something looks wrong
- A layer draws nothing: its row may be marked hidden, a flow’s Hide a layer step may have hidden it, or its content may only arrive with an event — an alert layer or the Media layer sits empty until something plays on it.
- A layer stays hidden although its eye is on in Studio, or stays on screen although it is hidden there: a flow’s Hide a layer or Show a layer step changed it, and publishing does not undo that. Run a flow with the opposite step (Show or hide layers from a flow).
- A layer sits somewhere other than where Studio shows it, at another size: a flow's Change layer state step put it in one of its states. Pick that state in Studio's state picker to see it, or run a step that changes it back to Default (Glide a layer between sizes with states).
- A banner says Your old Alert box was retired: the Alert box is gone and its settings were not carried over. Add an alert layer for each alert type you want from the Add tab, then Publish; the old box is removed from OBS with that Publish.
- There is no Layer opacity slider. It is the first control under Layer appearance · Local, so select a layer first. The Clip player and the Media share player never offer it, because Twitch and YouTube will not play a faded video.
- The align-content buttons are missing. They only show for a layer with its own height: drag its top or bottom handle first. Layers that fill their whole box (Image, Shape, Chat and the others listed in Resize from any edge) don't have them.
- The canvas is ahead of OBS: a change reaches OBS when you press Publish, not as you drag. The chip in the top bar says how many changes are waiting.
- The chip reads Not saved — fix the highlighted fields: a change was refused. The message sits beside the field, and that change is kept only in this tab until you fix it — it is not in your draft yet.
- Opening another overlay asks Your last change to … isn’t saved: that change has not reached your draft. Press Cancel to stay and fix it, or Switch anyway, knowing it may be lost. A refused change on an overlay you switched away from is listed under the canvas, starting with that overlay’s name.
- The chip reads Couldn’t save — retrying: the editor lost its connection. It keeps trying on its own; keep the tab open until the chip says draft saved again.
- A banner says Changed in another tab: choose Load theirs or Keep mine (step 5). Nothing saves from this tab until you do.
- A new or changed alert design does not play when you test it in OBS: tests on the live overlay use the published designs. Publish first, then test.
- Add in a layer’s details is greyed out and the tab says This overlay holds as many layers as it can: the overlay has its 24 layers. Remove one, or put the new piece on another overlay.
- On a phone, layers cannot be dragged: open a tile in Add and press Add to place it in the middle, and arrange the overlay on a larger screen.
- One layer ignores a change to the theme: it has its own value for that field. Select it and press Reset to theme under the field in Layer appearance · Local.
- A layer has no frame though the theme does: it has switched the theme’s frame off with None. Select it and press Reset to theme under the frame. If the frame’s control is missing from its Layer appearance · Local section, the layer’s type does not draw that frame.
- An End credits layer shows Thanks for watching!: nobody has followed, subscribed, gifted, cheered or raided this stream yet, or only in sections you turned off. It fills in as soon as someone does.
- End credits show the last stream's names after you go live: the list starts over when Twitch reports the new stream; give it a moment.
- The clock shows the wrong time: it shows the time of the computer running OBS. Set that computer's clock and time zone; the overlay follows it on its next tick.
- The chip reads Not saved — fix the highlighted fields and a social's row says Type a handle of 1-60 characters.: Add makes a row with an empty handle, and saving refuses it until it holds one. Type the handle, or press the bin to remove the row.
- A social's icon is missing, or its row says Choose one of the listed platforms: an overlay made elsewhere, such as by an AI assistant or from an older copy, names a platform the list does not offer. Pick another platform, or Website for any other link.
- An Event list shows nothing in OBS: nothing has happened yet of a type it shows, or every type is switched off under Show. It fills in with the next follow, sub, gift, cheer, raid or redemption.
- An older sub in the Event list reads subscribed with no tier: subs saved before the Event list arrived were kept without their tier. New subs show it.
- The Event list on the canvas shows made-up names: the canvas always draws sample rows so you can style the layer. Your real events show in OBS.
- A chat layer spills past its box: give it a fixed height by dragging its bottom edge. A chat box with a height keeps the newest lines and drops the oldest at its edge.
- The made-up names from Test credits are still showing: they go when the demo's roll ends — at most a minute and a half. If they stay, refresh the Browser Source in OBS.
- Video is greyed out under a background: this overlay already plays 2 background videos. Change one of them to an image, a gradient or a colour.
- The background video stands still on the canvas: your computer is set to reduce motion, so the preview shows the video’s first frame. OBS plays it.
- A video will not upload: WebM videos can be up to 25 MB, and pictures and sounds up to 5 MB. Files you drop together upload one after another. A file started from another tab or window while one is still uploading is refused with Another file is still uploading — try it again once the first has finished.
- A layer will not go where you want it: drag it on the canvas, or nudge it with the arrow keys. Any of its eight square handles resizes it, and the round handle above its name rotates it.
- A layer will not move, resize or be removed: it is locked (a small lock shows in its Layers row). Unlock it from its toolbar, the lock beside its row, or Cmd/Ctrl+Shift+L.
- Clicking one layer selects several: it is in a group. Double-click it, or click its row in the Layers list, to work on it alone — its Layer appearance · Local section is that layer’s, not the group’s — or Ungroup the group. Click the group heading for the group’s own settings.
- The canvas plays a sound every time you edit: Mute preview above the canvas turns that off. It stays off until you turn it back on, and OBS is unchanged.
- A resize does not snap: the layer is rotated, Shift is held on a corner, or Alt is held. Snapping works on upright layers.
- The whole widget is in the wrong place in OBS: that is the source’s position and size in your scene, not the editor. A 1920 × 1080 source is what the editor’s canvas shows.
Was this guide helpful?
Thanks. Your answer helps us decide which guides to improve.